Creating Your First Project
Learn how to use Thin Backend to build SPAs
Introduction

Thin Backend is a Blazing Fast, Universal Web App Backend for Making Realtime Single Page Apps.
1. Project Setup
This guide will lead you through creating a small todo application.
Start by creating a new project in Thin Backend:
- Open Thin Backend. (Haven't created an account yet? Create one here)
- Click
+ New Project - Enter
Todo Appinto the name field - and finally click
Create Project
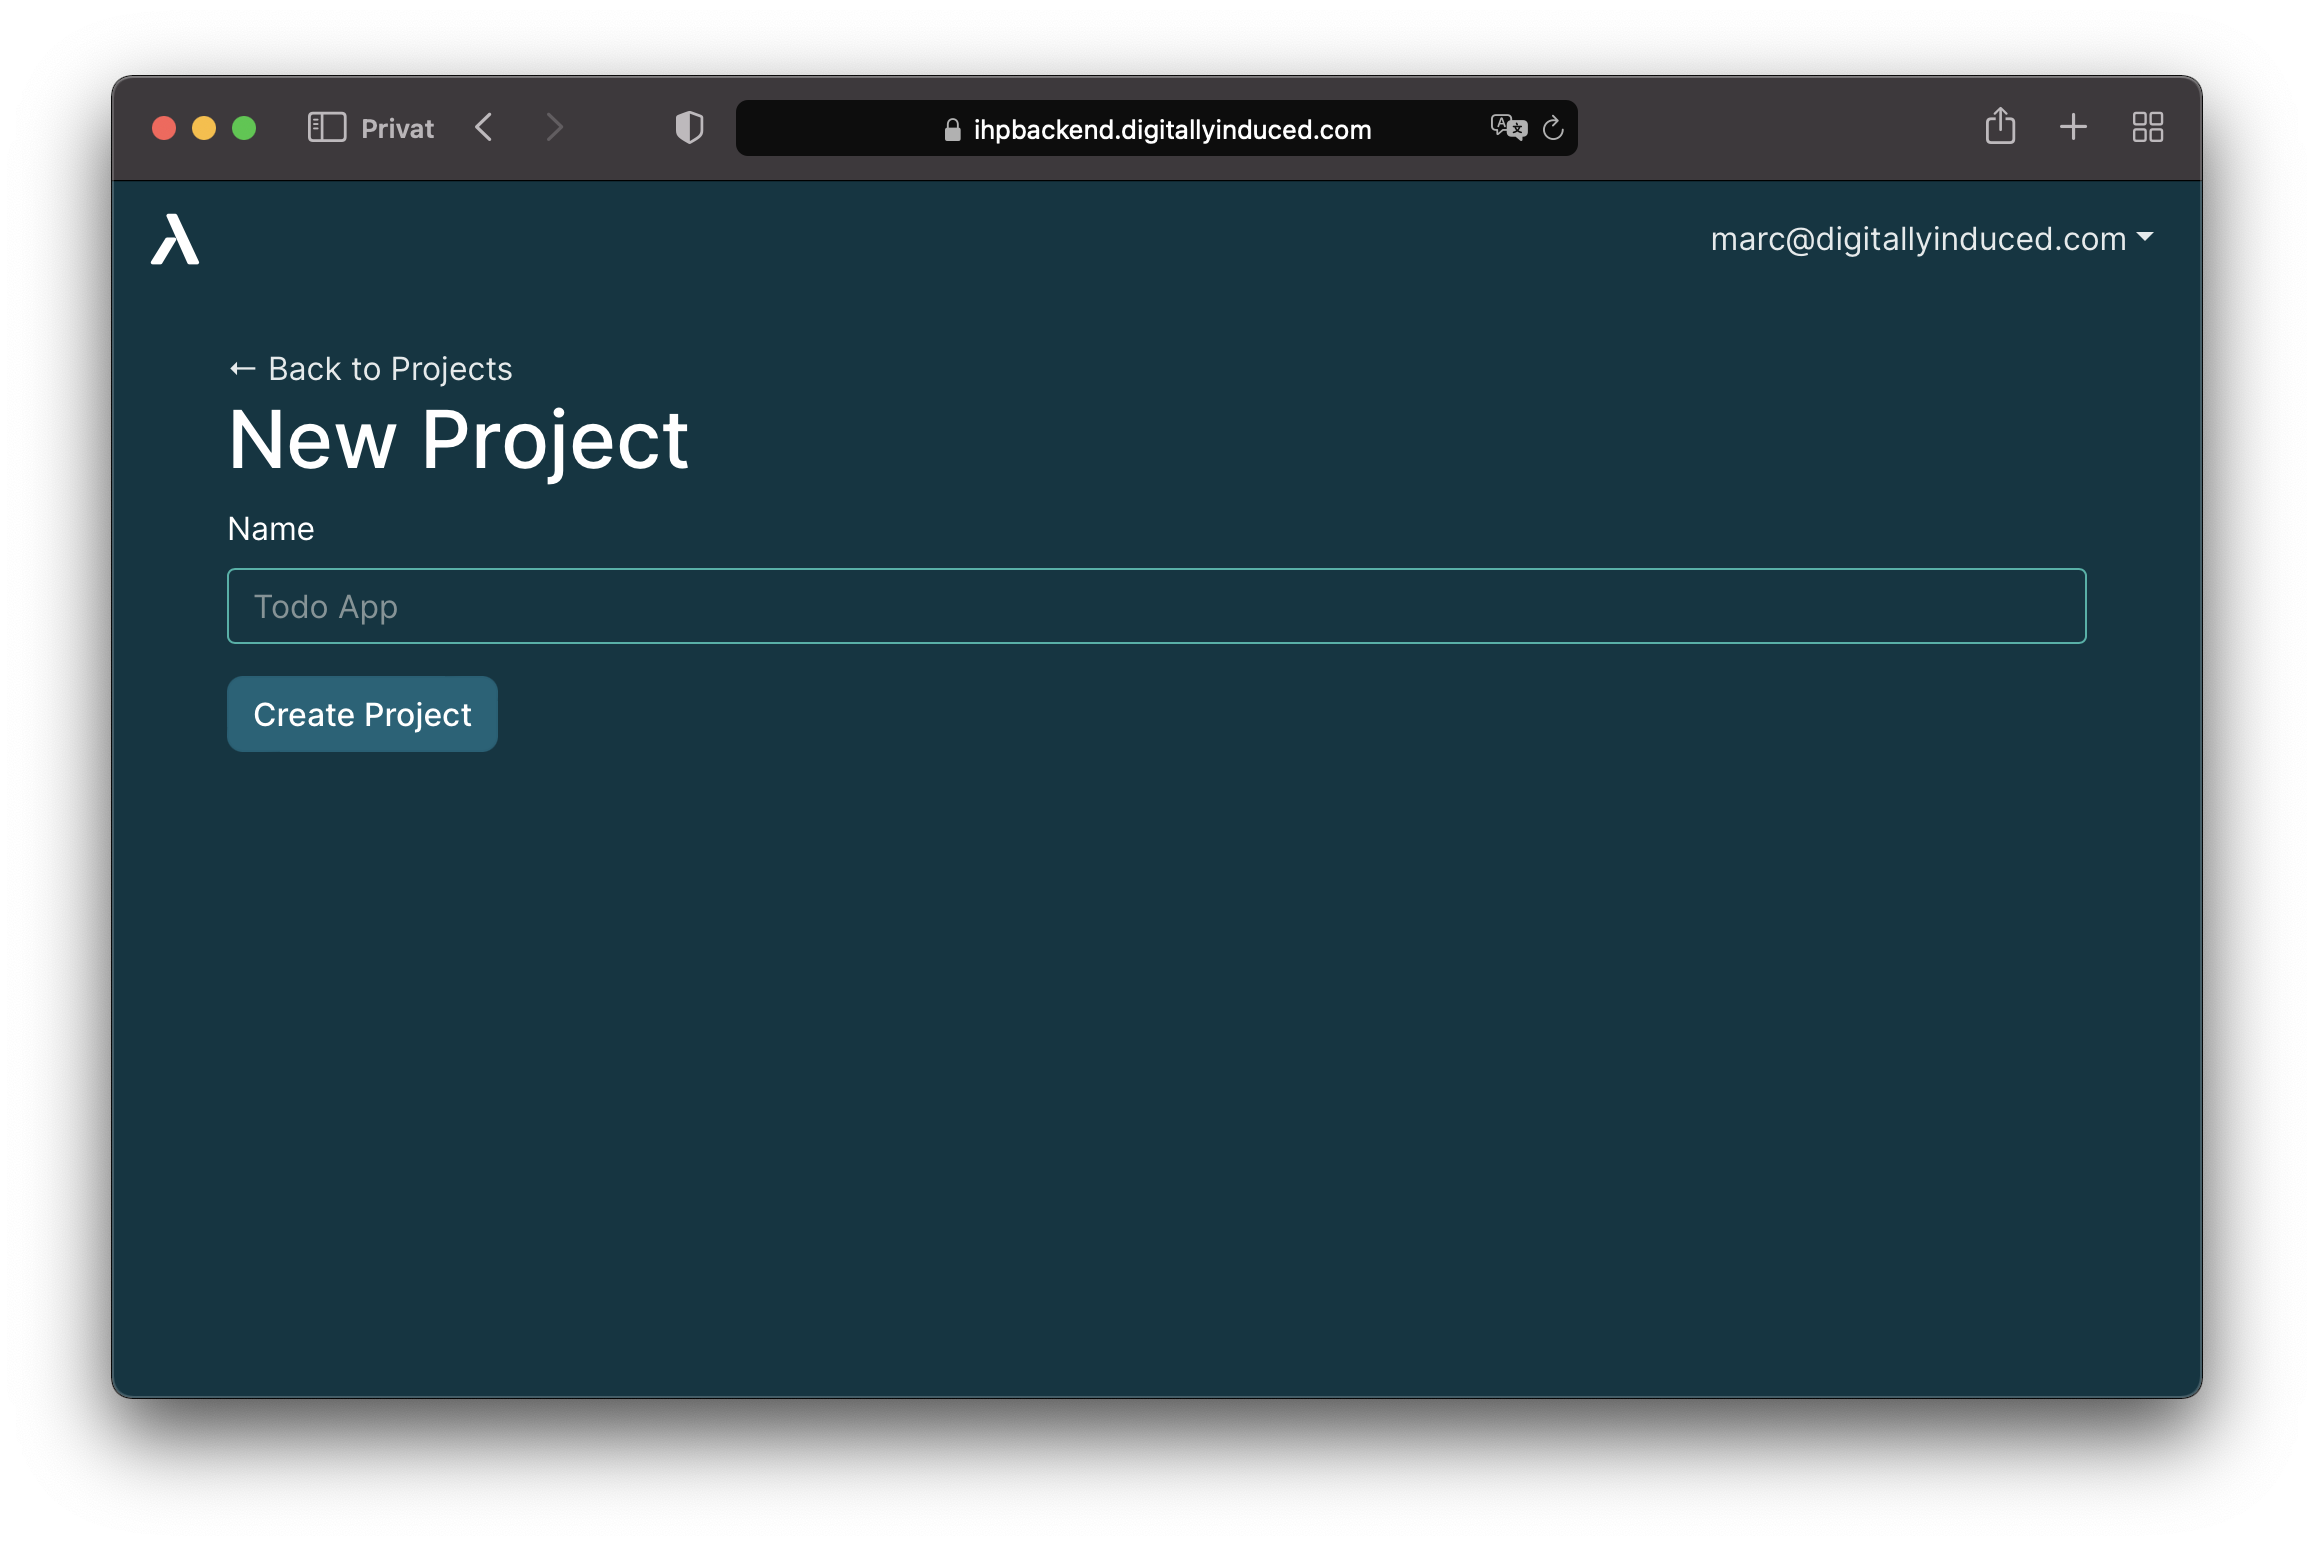
After clicking the Create Project button you will be redirected to the freshly created project:
2. Adding a Frontend
You now already have a working database and API running, ready to be used by a single page app. Next we're setting up a React and TypeScript frontend to connect with our new Thin Backend project.
Click on
Frontendin the left sidebar:
Open a terminal and run the command shown on the page:
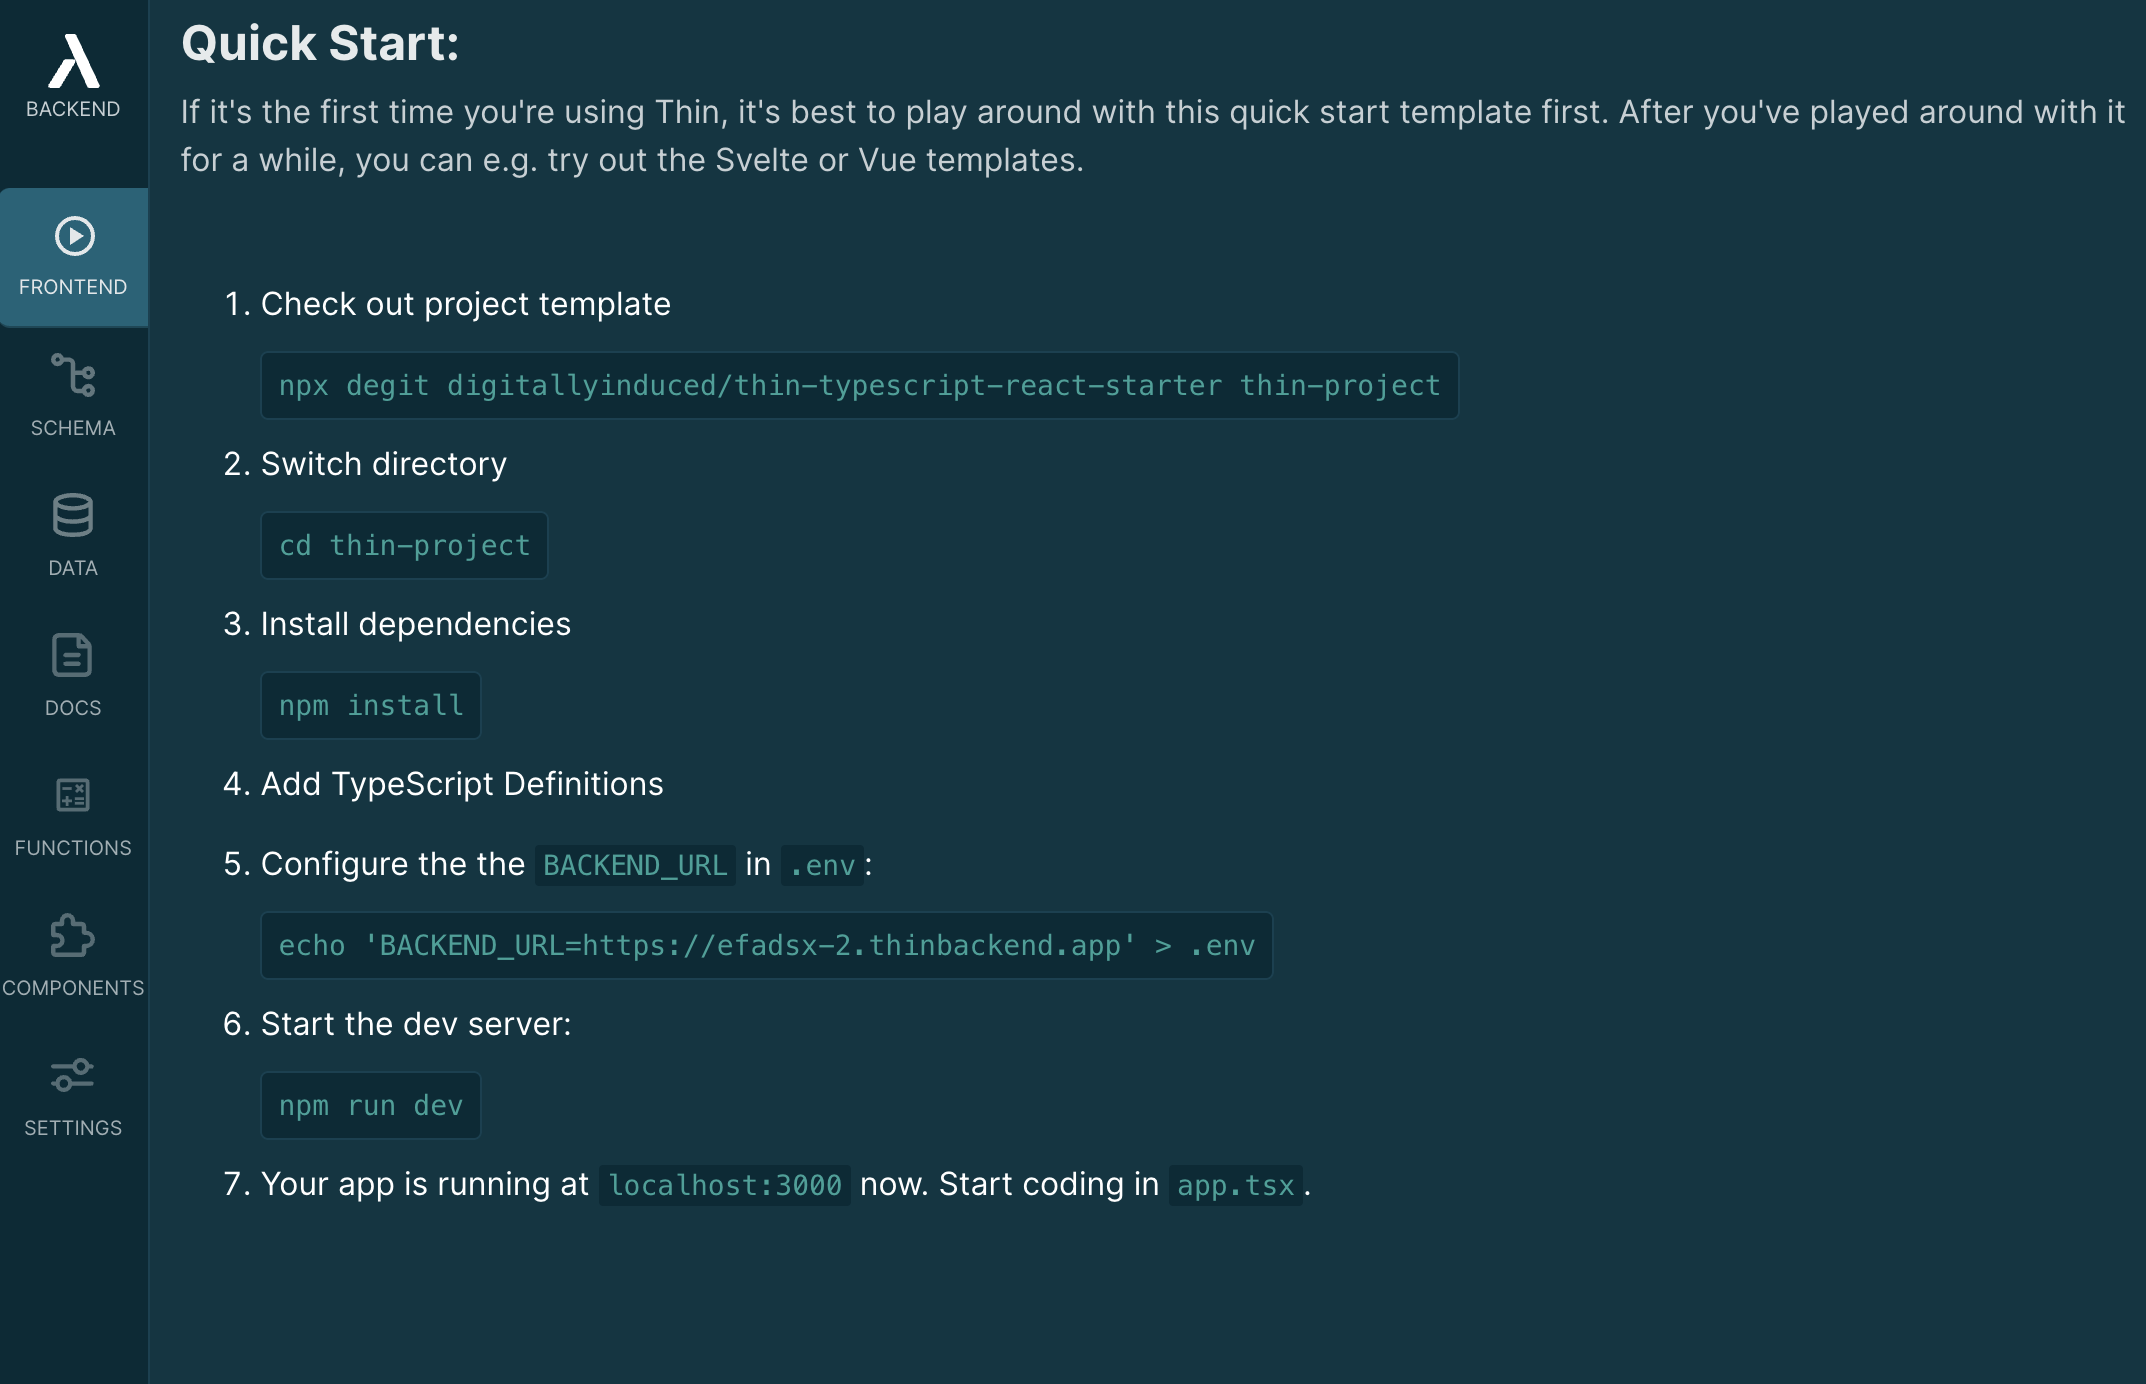
Congrats! The react frontend is now running at
localhost:3000and connected to Thin 🎉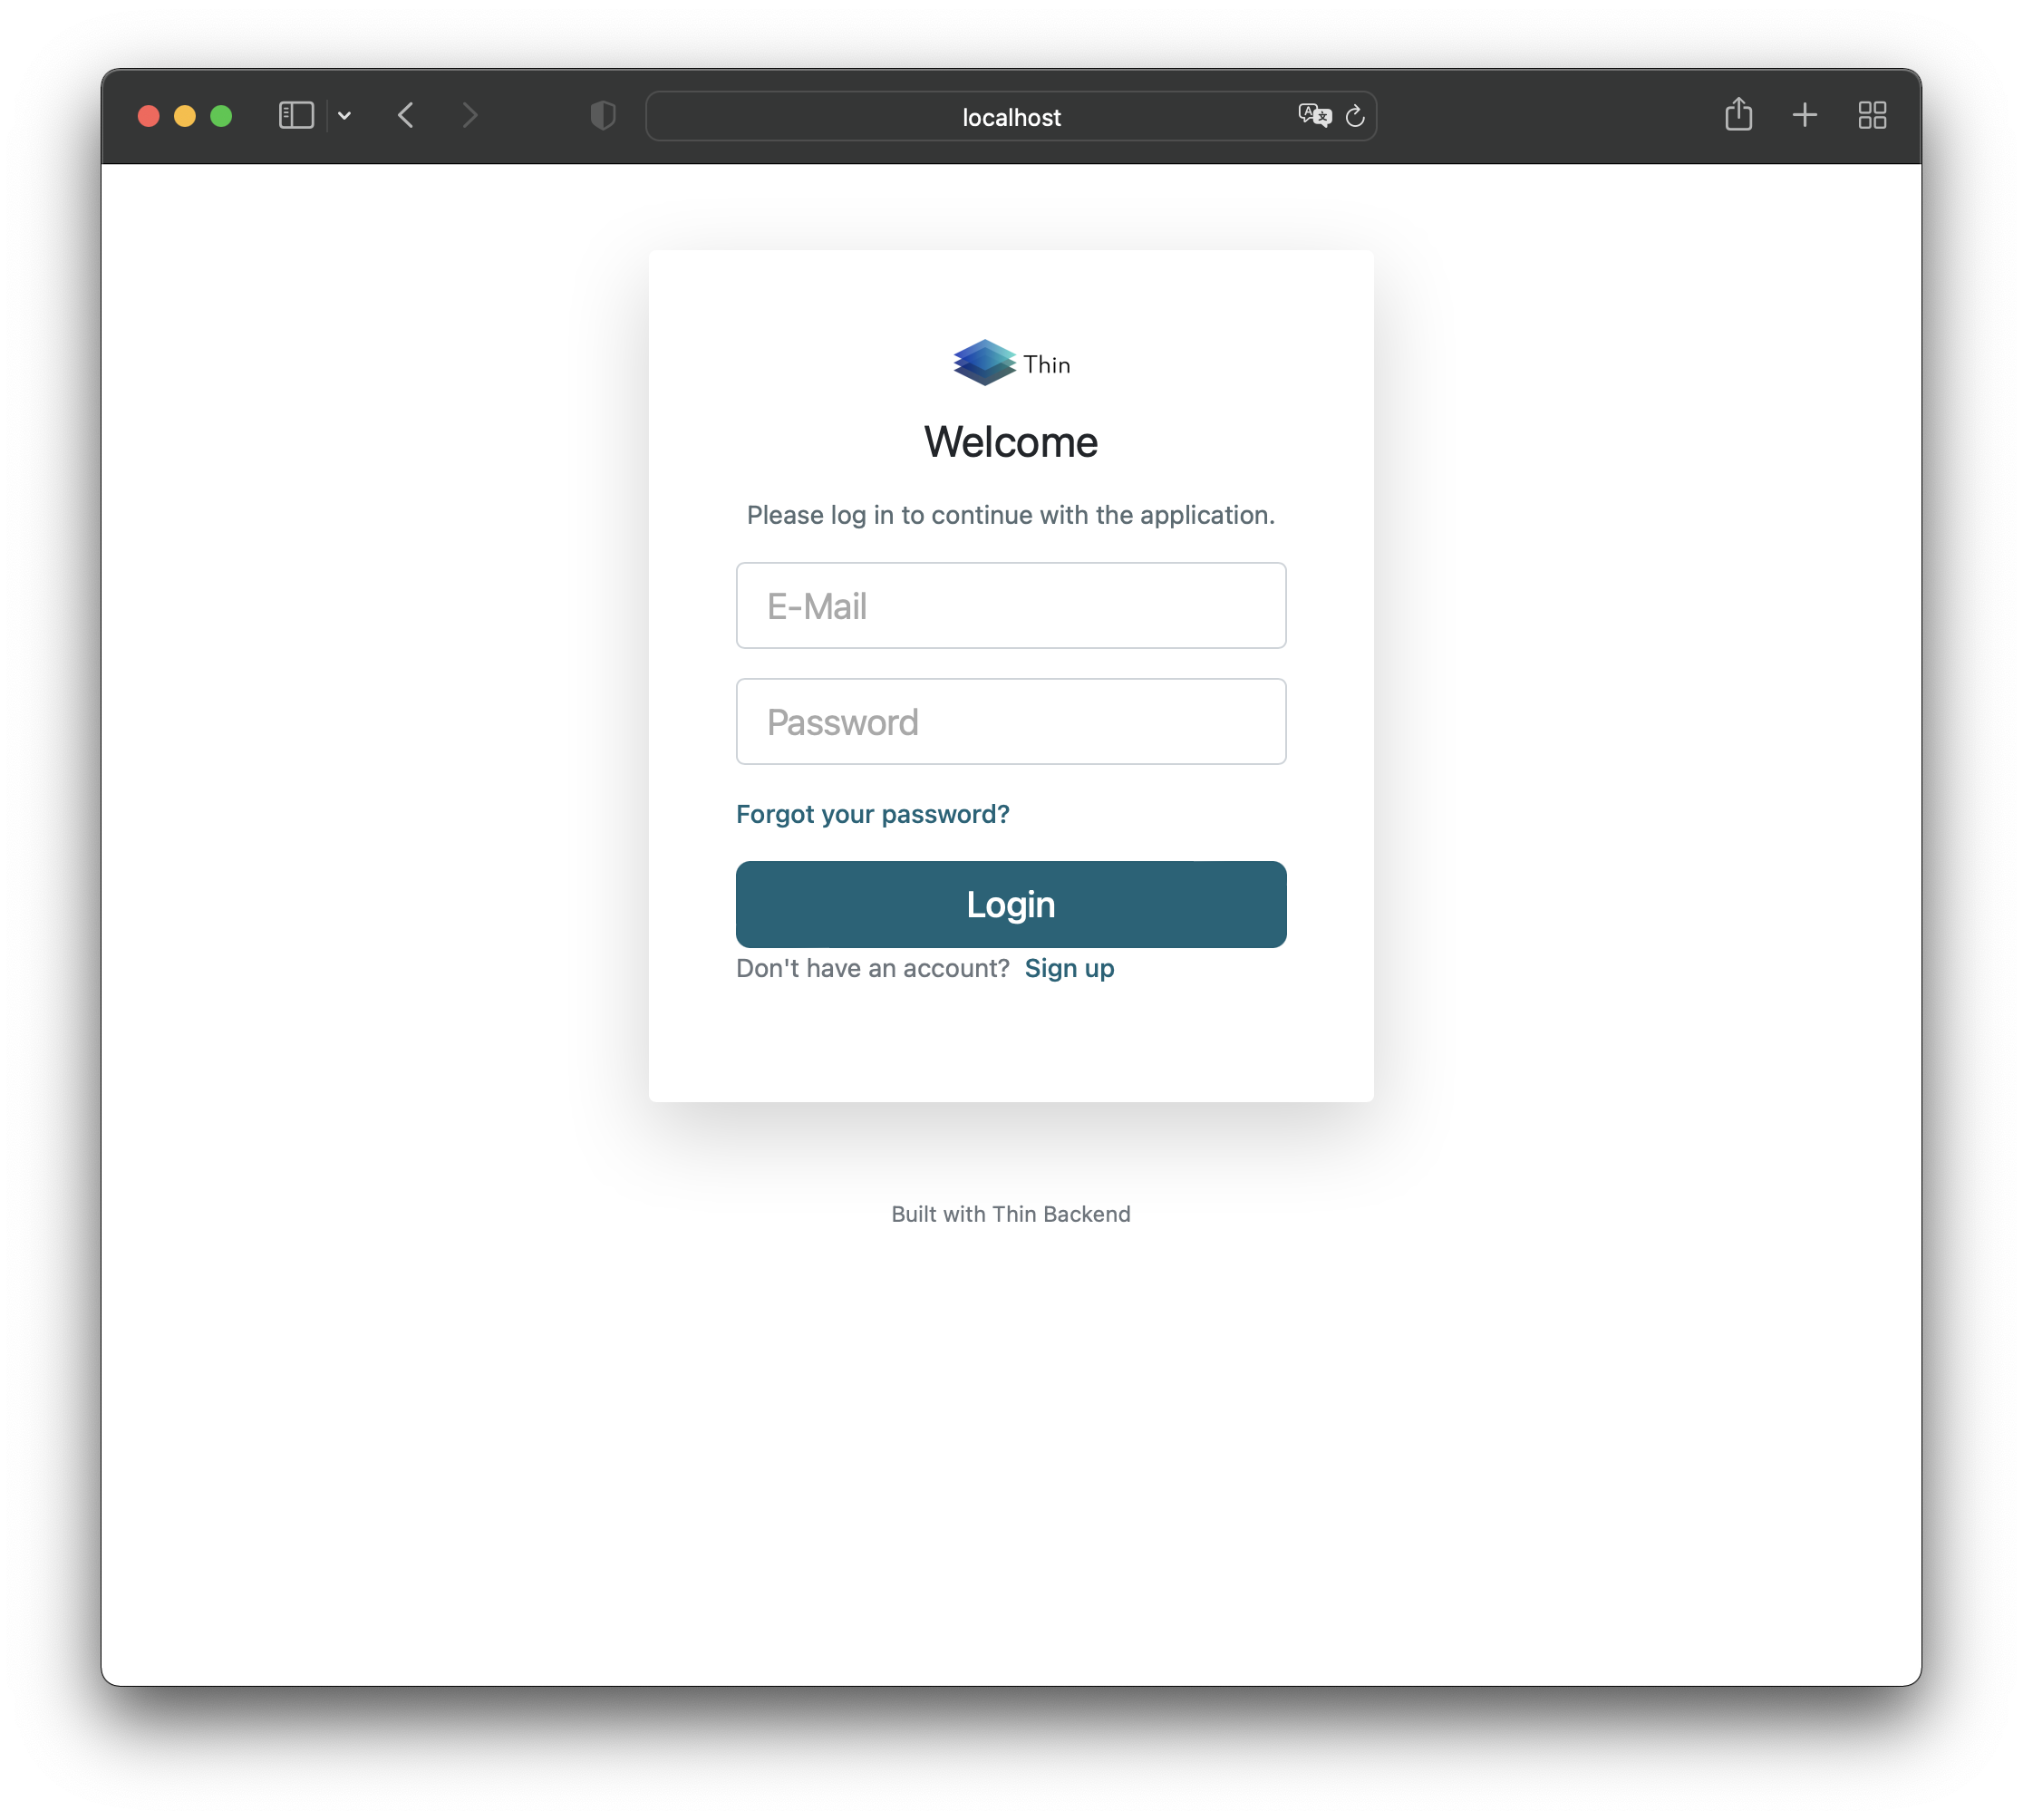
3. Trying out the Frontend
Now that it's running, we can already try out our empty react app:
Open the app at
localhost:3000:As we're not logged into our
Todo App
yet, this will show a login screen.Before we can log in to our app, we first need to create an account.
Click
Sign Upand follow the instructions:
After completing the sign up you will be logged in automatically.
Once the login process is completed, Thin Backend will show us the app:
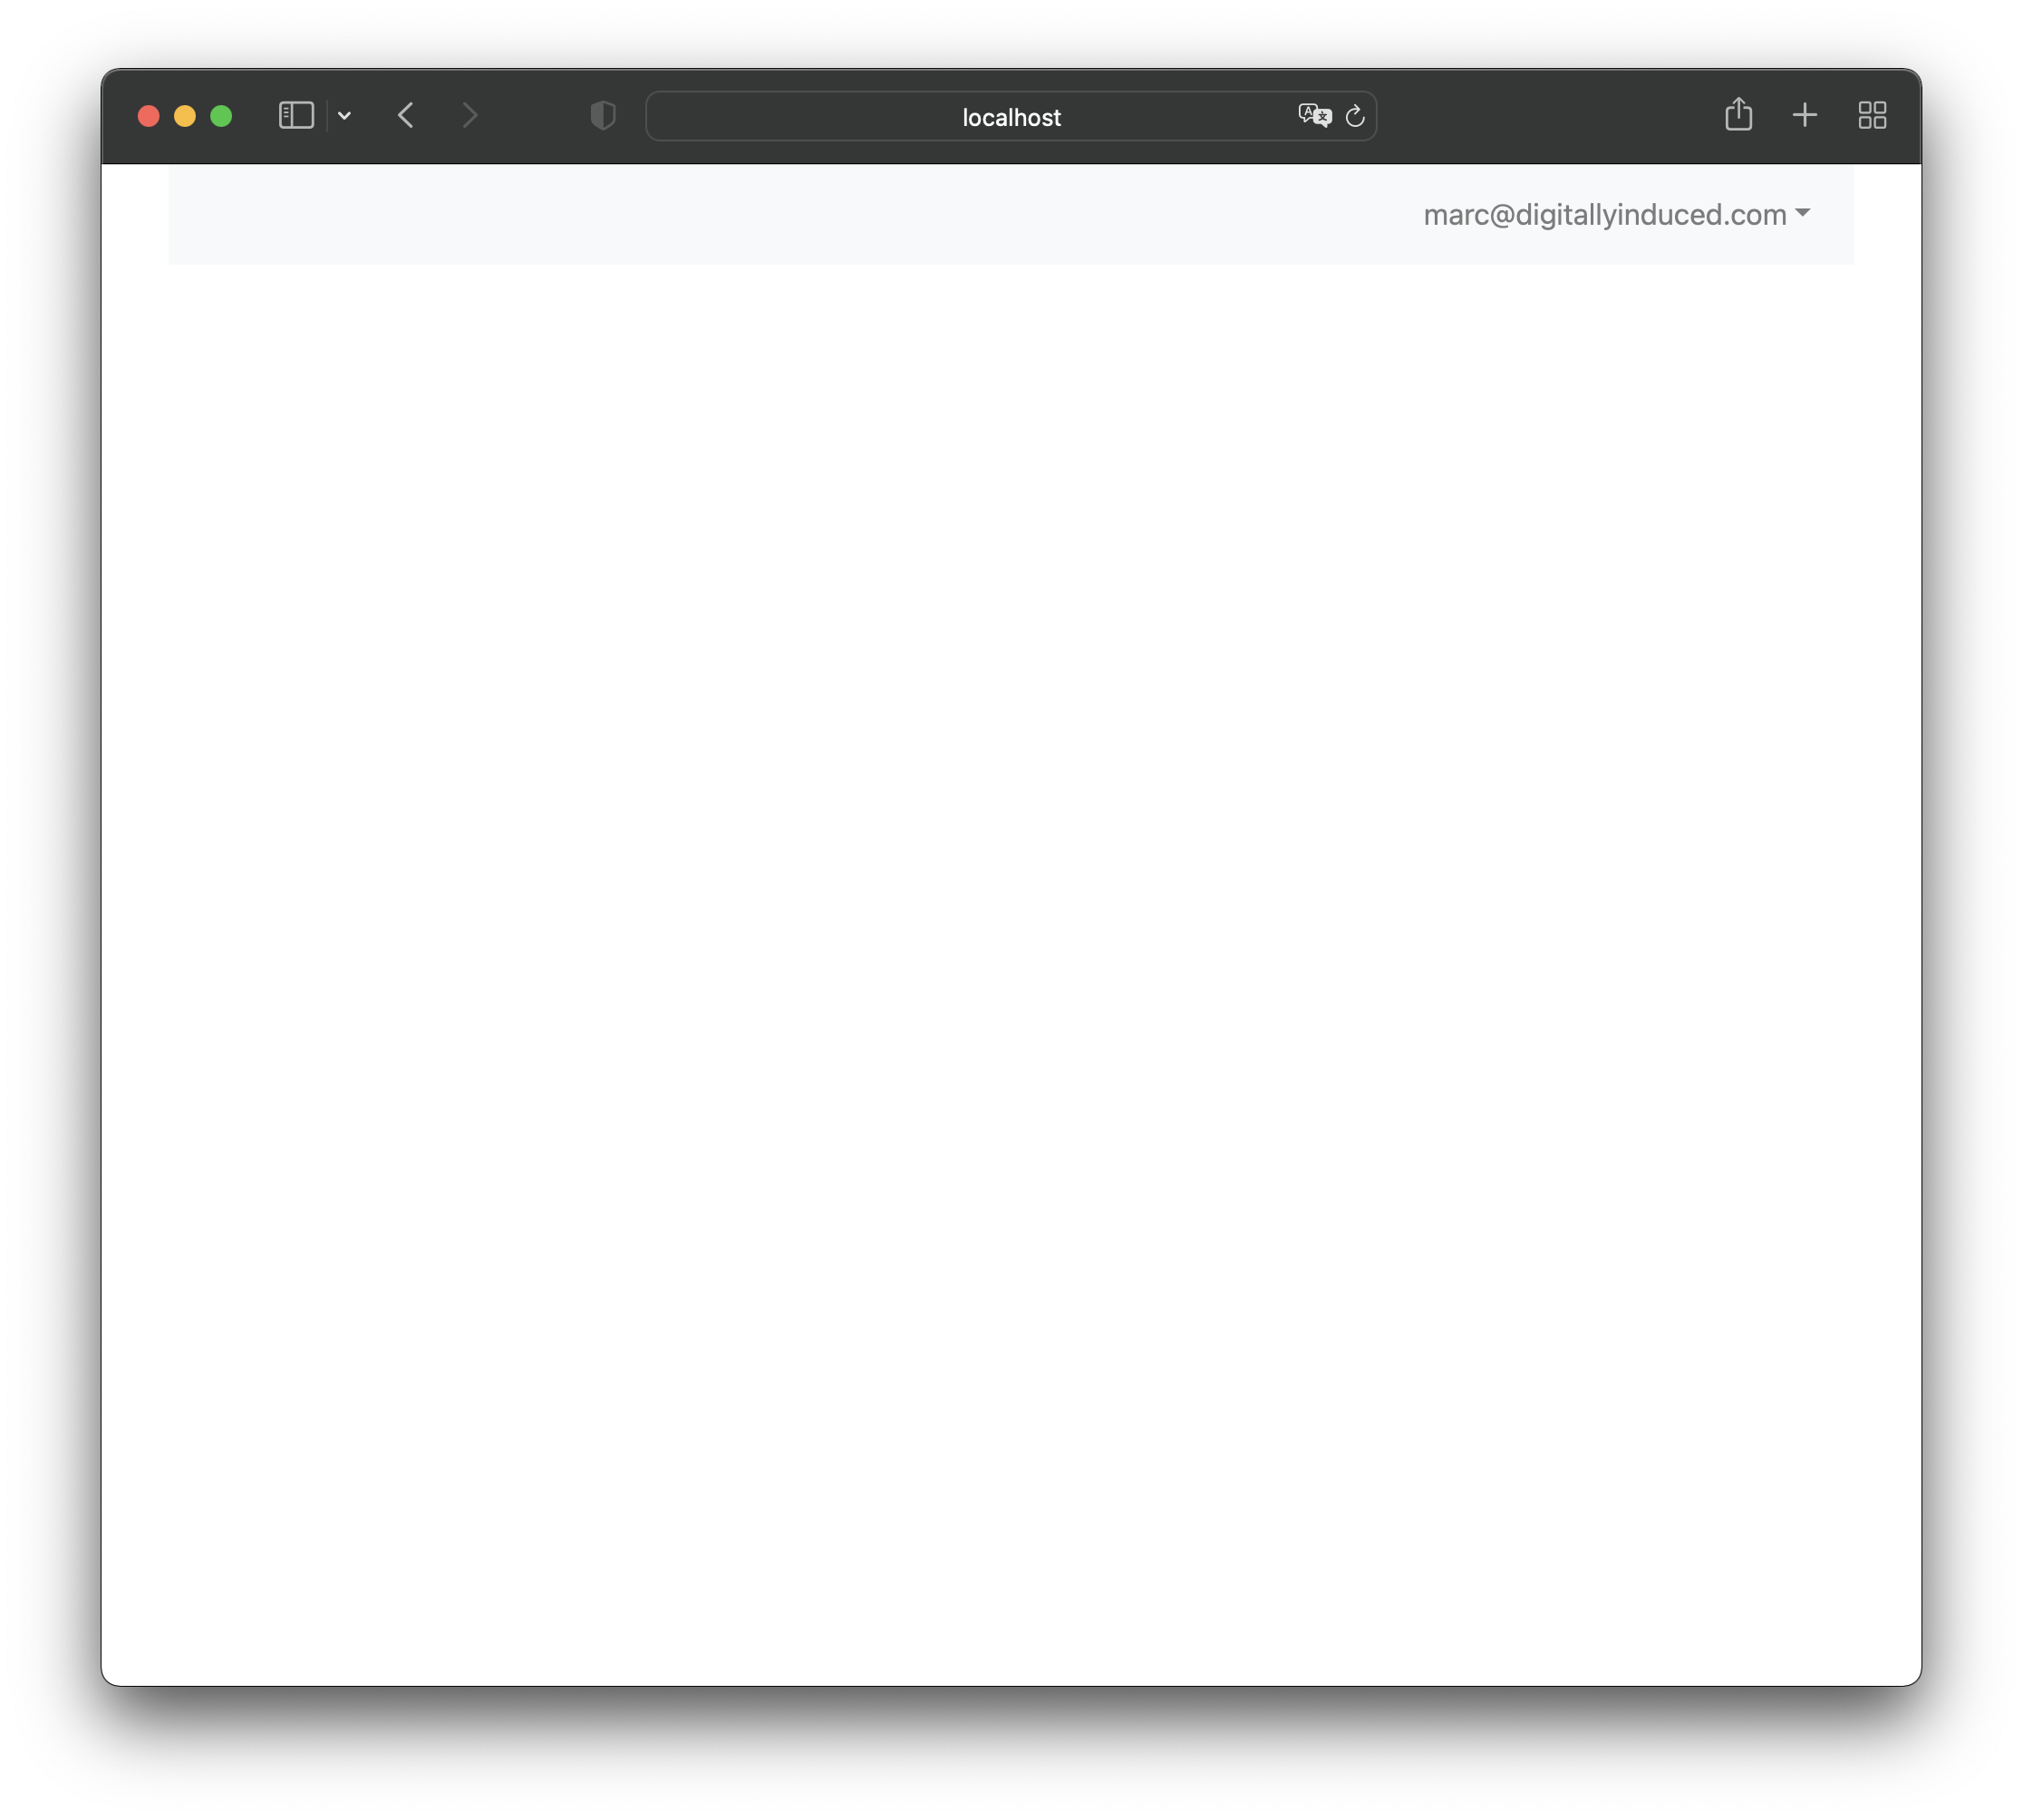
Pretty empty :) But that's expected. We will add some functionality to our app very soon.
On the top right corner you can see the email of the logged in user.
You can use the navigation in the top right corner also for logging out. Click the
▼next to the email and then click onLogout. If you try out the logout functionality, make sure to log in again before continuing with the Guide.
4. Hello World
It's time to make the react app less empty by implementing our todo app.
To test that everything is working fine, let's make the app display a Hello World
:
Open the
app.tsxwith your code editor.Ignore any TypeScript errors for the moment, we'll get to that soon.
Add a
Hello World
message to theApp()component, like this:function App() { return <div className="container"> <AppNavbar/> <div>Hello World</div> </div> }Open the browser at localhost:3000. It should look like this:
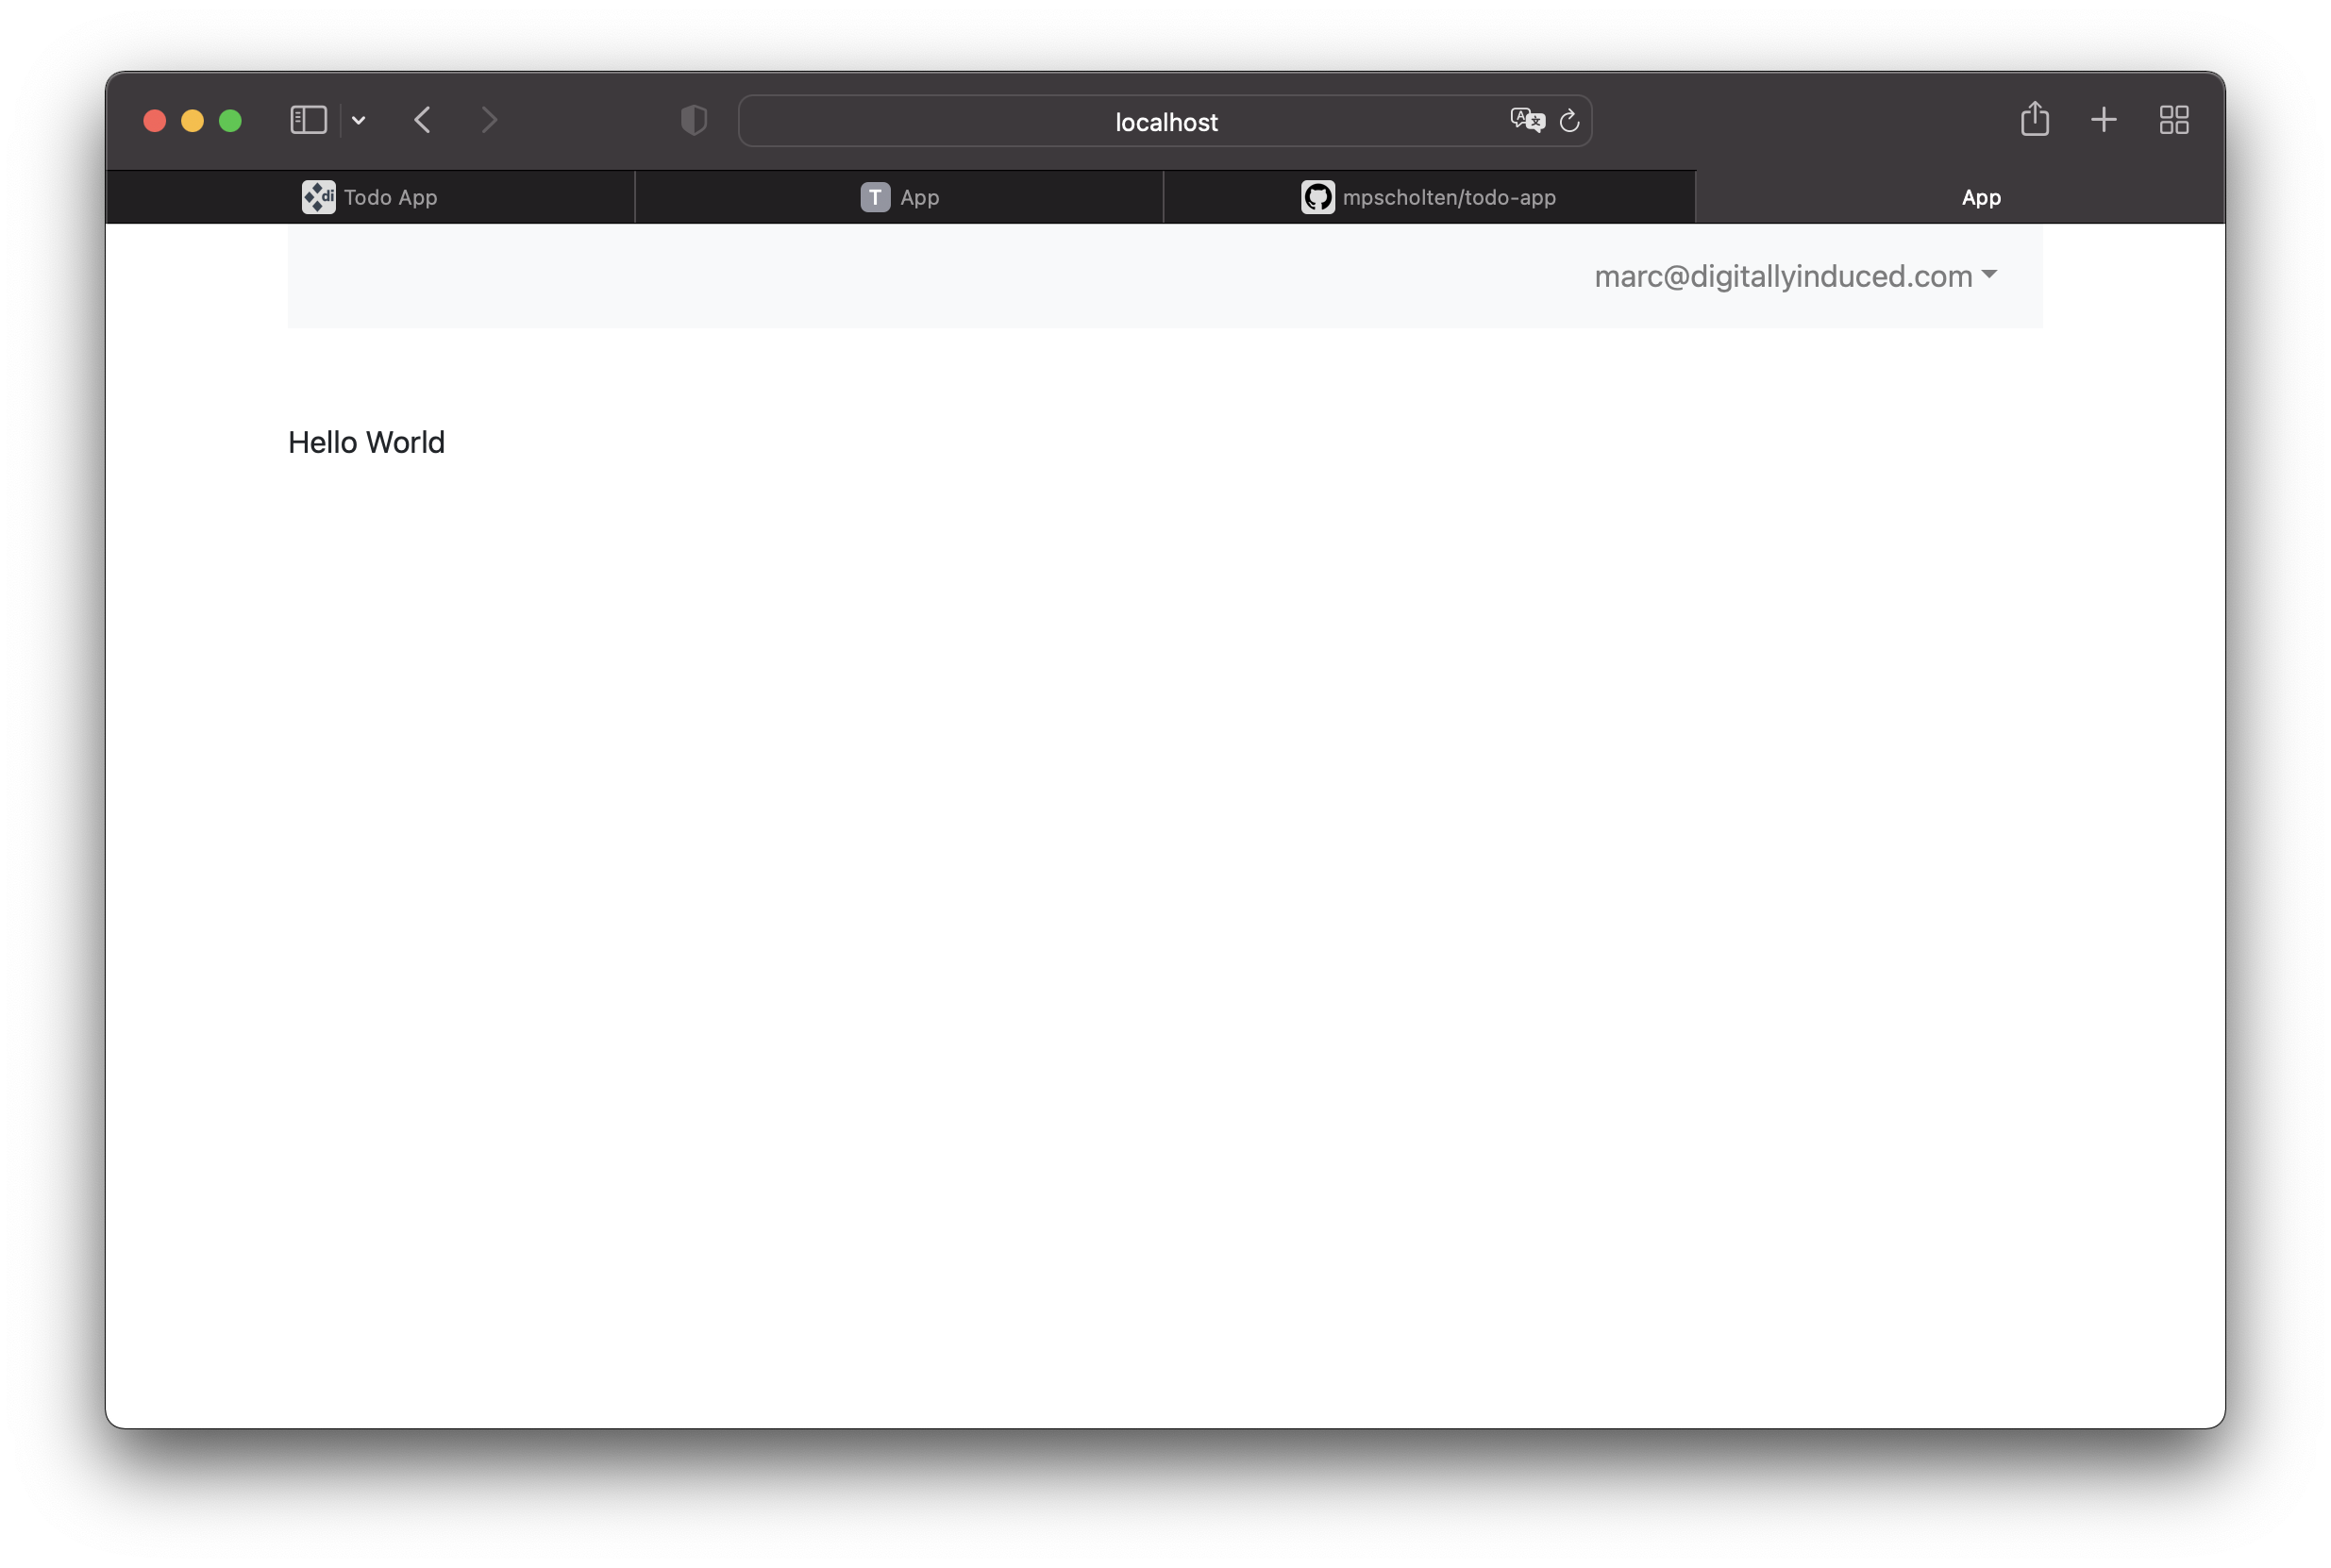
If everything looks alright, we're now ready for developing on our todo app locally.
5. Creating Tables
For our todo app project, let's first build a way to manage tasks.
For working with tasks, we first need to create a tasks table inside our database. A single task has
- a
title, - a
timestampwhen it was created, - a
user_id, - and of course an
idfield for the task itself.
Thin Backend uses UUIDs instead of the typical numerical ids.
This is what your tasks table might look like:
| id :: UUID | title :: Text | created_at :: Timestamp | user_id :: UUId |
|---|---|---|---|
| 8d040c2d-0199-4695-ac13-c301970cff1d | Learn Haskell | 2022-01-03 18:14:51 | 1d89c722-7269-46d3-b71b-ec6742867363 |
| ad938116-a2ac-44ce-9201-cc66b8a4bb51 | Learn IHP | 2022-01-03 18:20:15 | 1d89c722-7269-46d3-b71b-ec6742867363 |
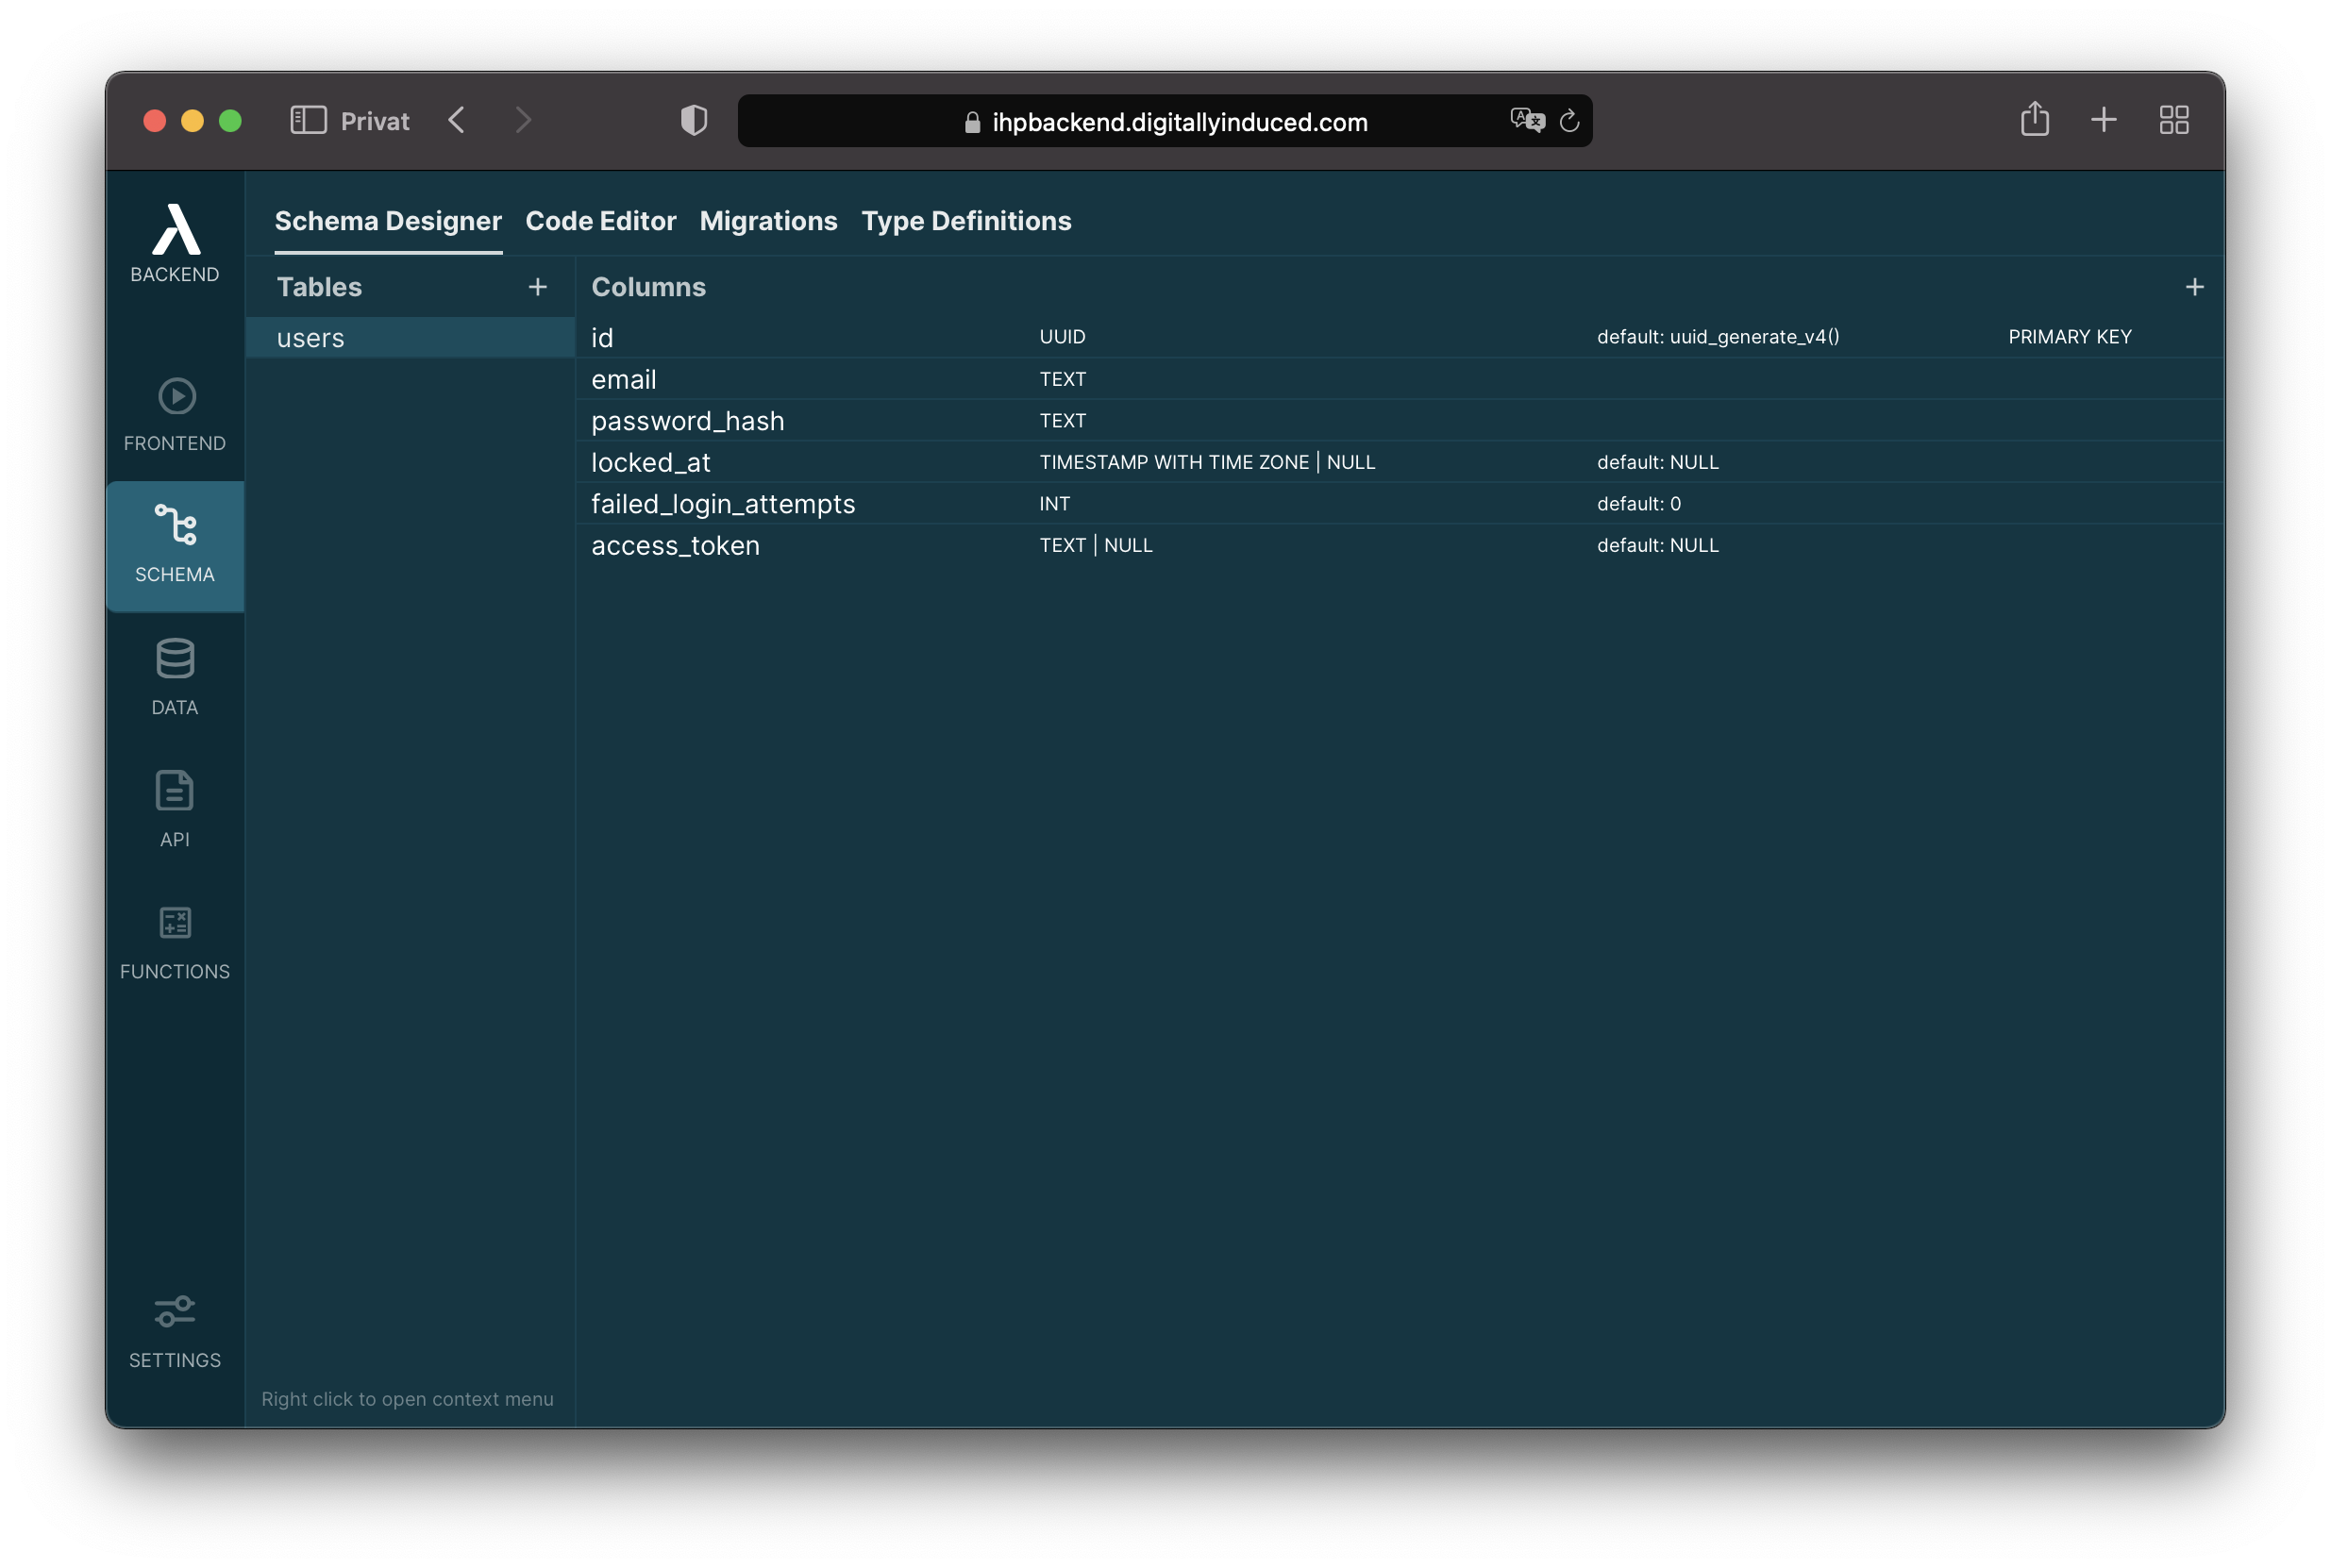
To work with tasks in our application, we now have to define this data schema.
Open the Schema Designer by clicking the SCHEMA button in Thin Backend:
![]()
Right click into the
Tablespane and clickAdd Table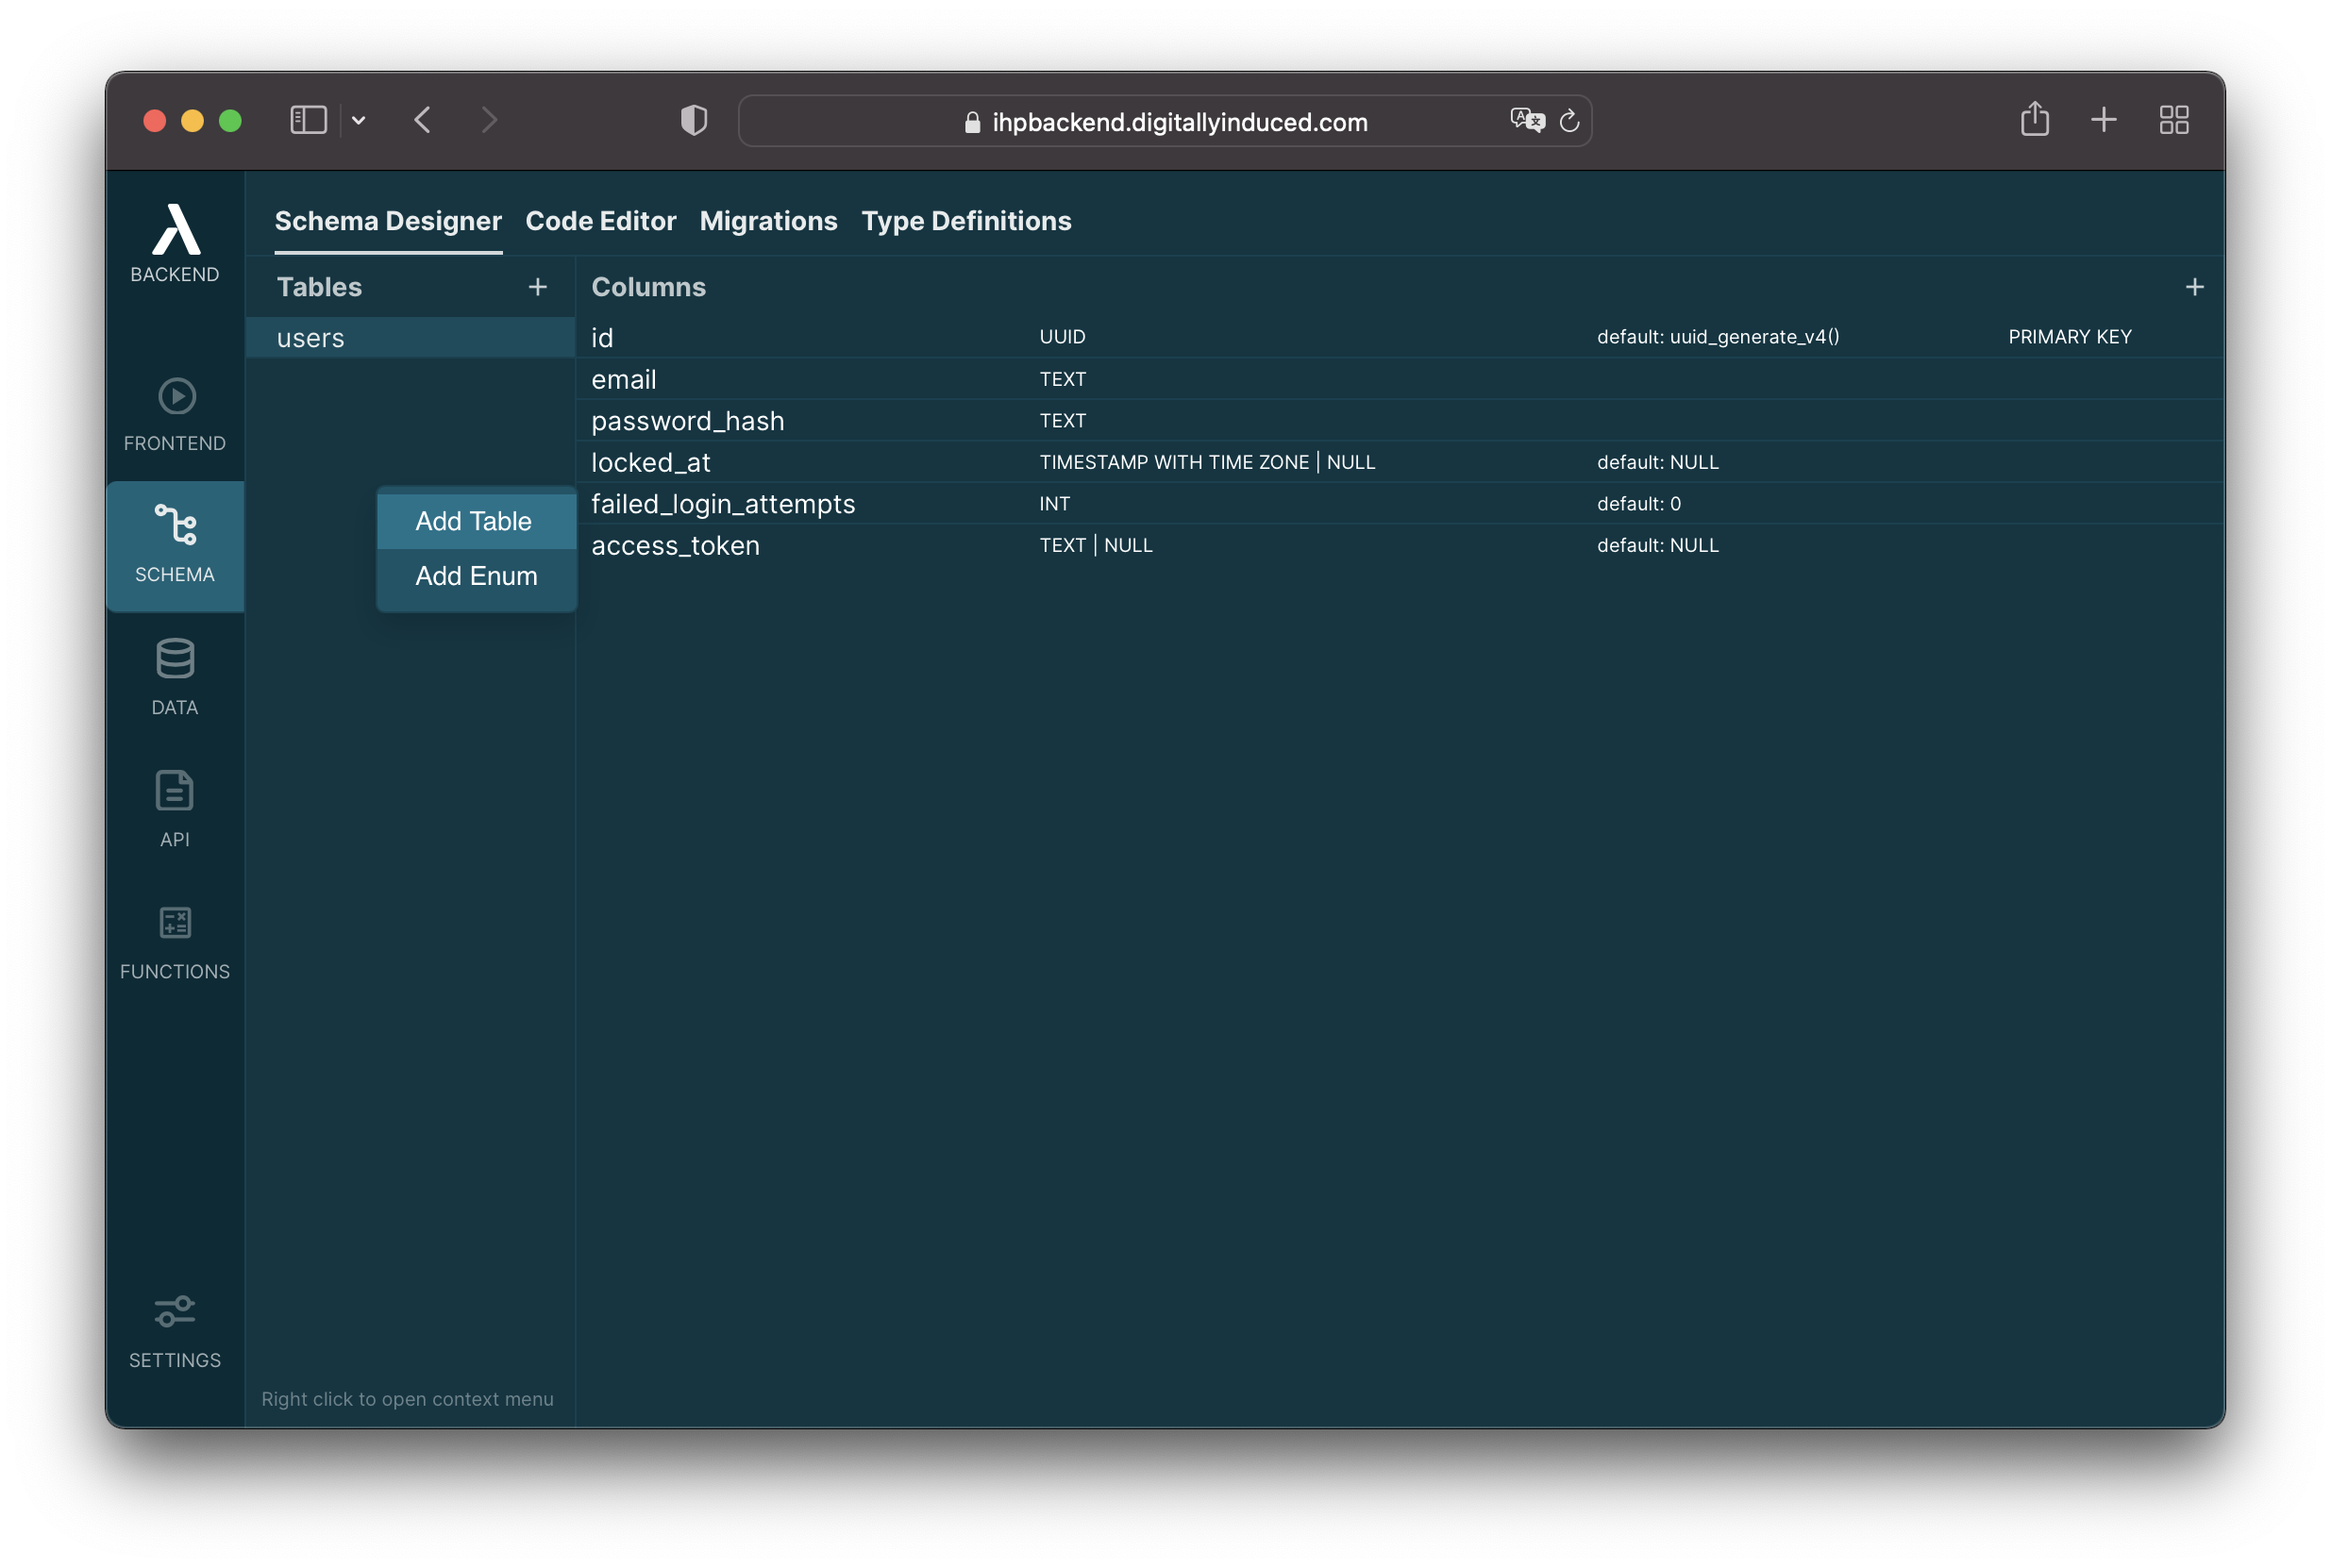
- Enter the table name
tasksand click onCreate Table: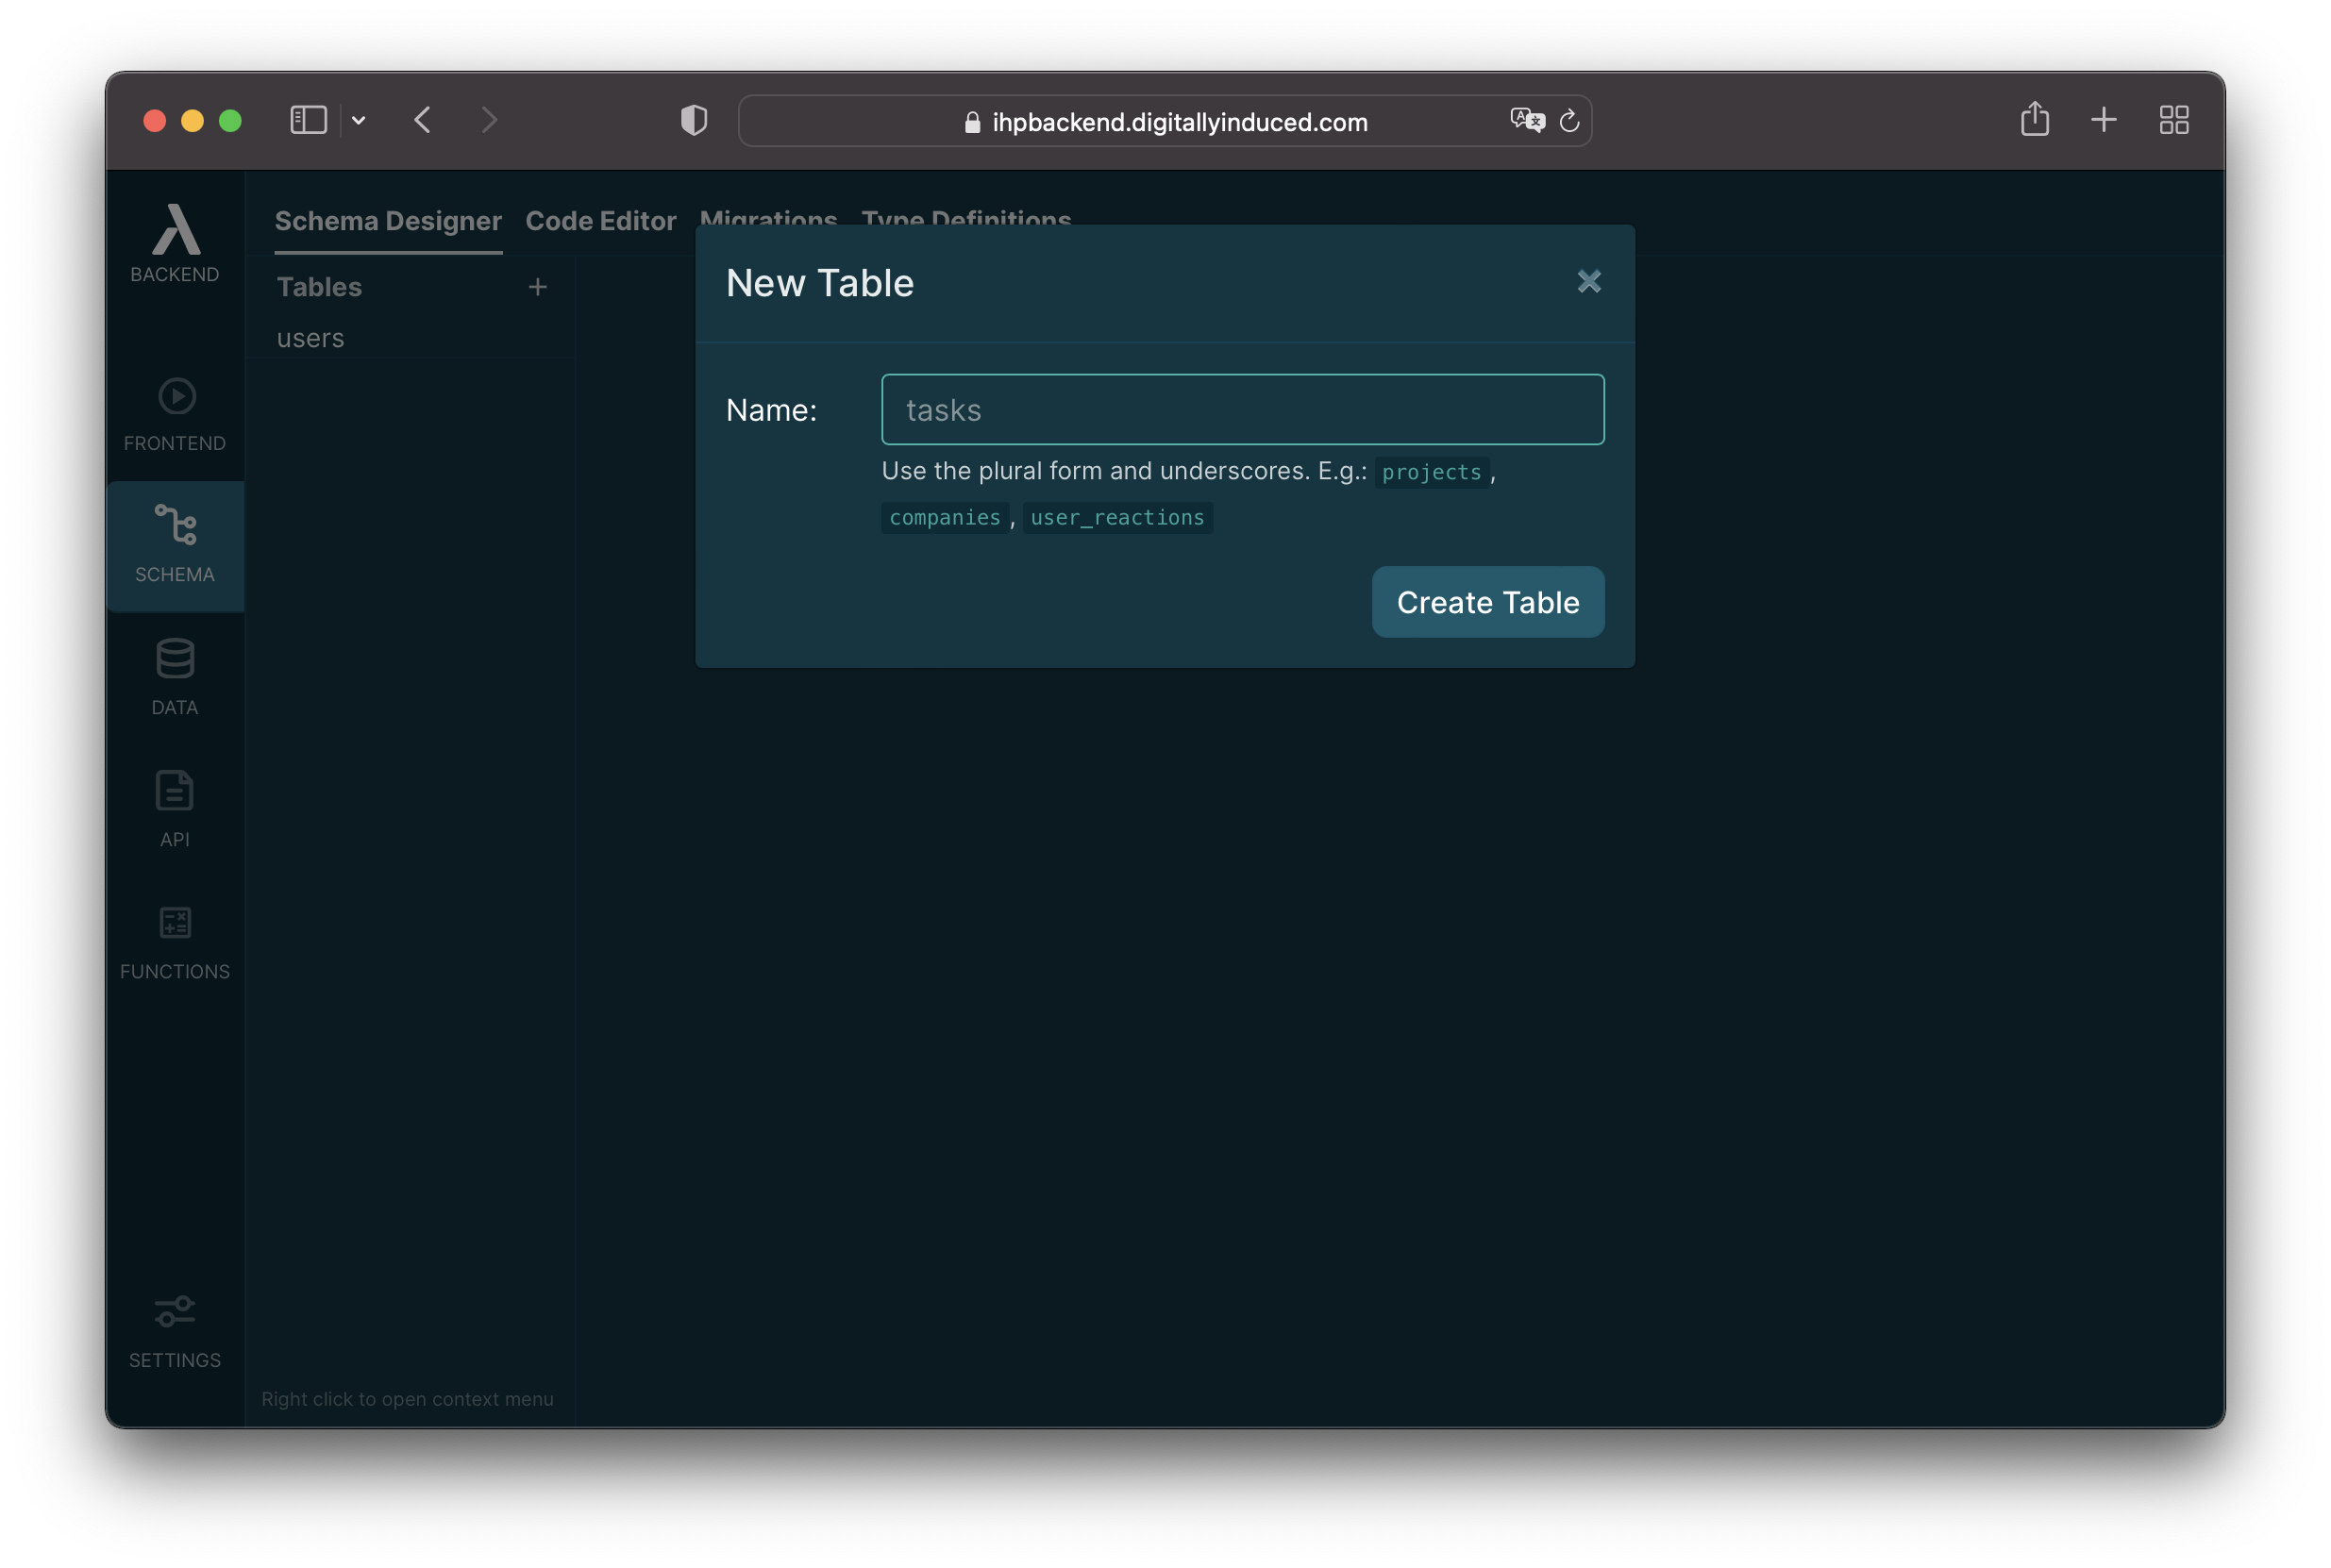
In the right pane, you can see the columns of the newly created table. The id column has been automatically created for us.
Right-click into the
Columnspane and selectAdd Column:
Use this modal to create the
title: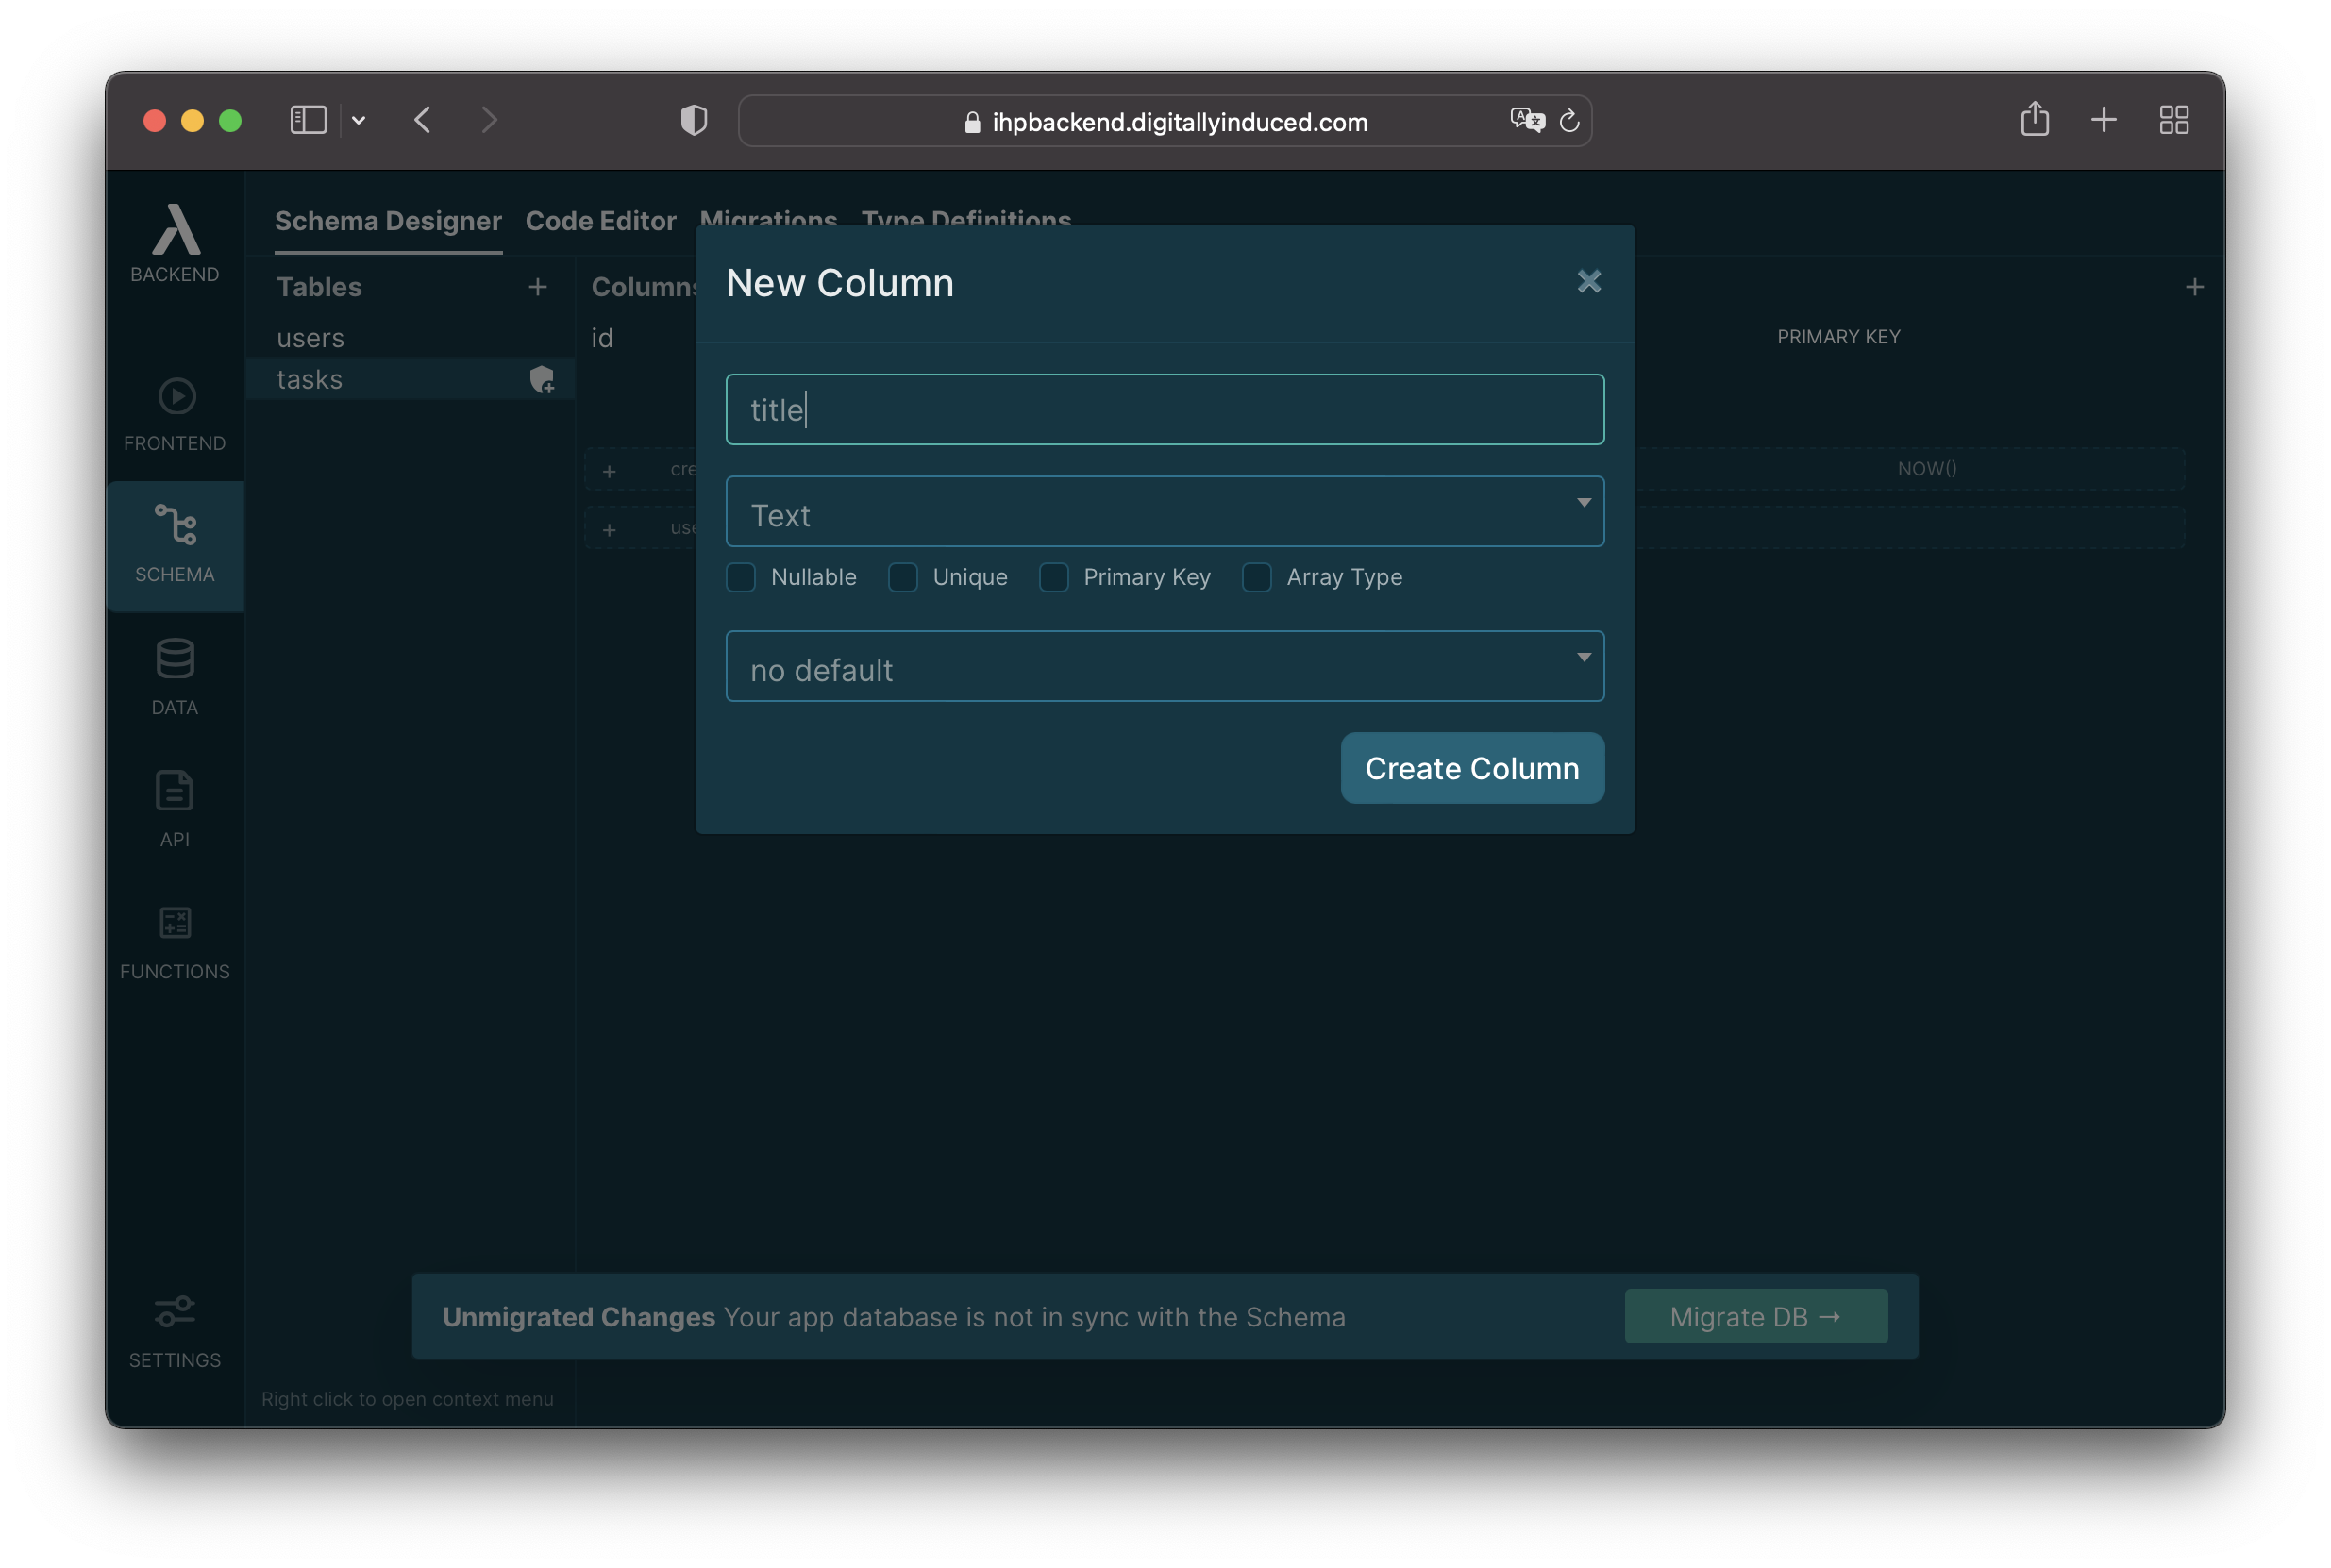
Now let's add the
created_attimestamp column. You can see that Thin Backend automatically suggest thiscreated_atcolumn below the table definition: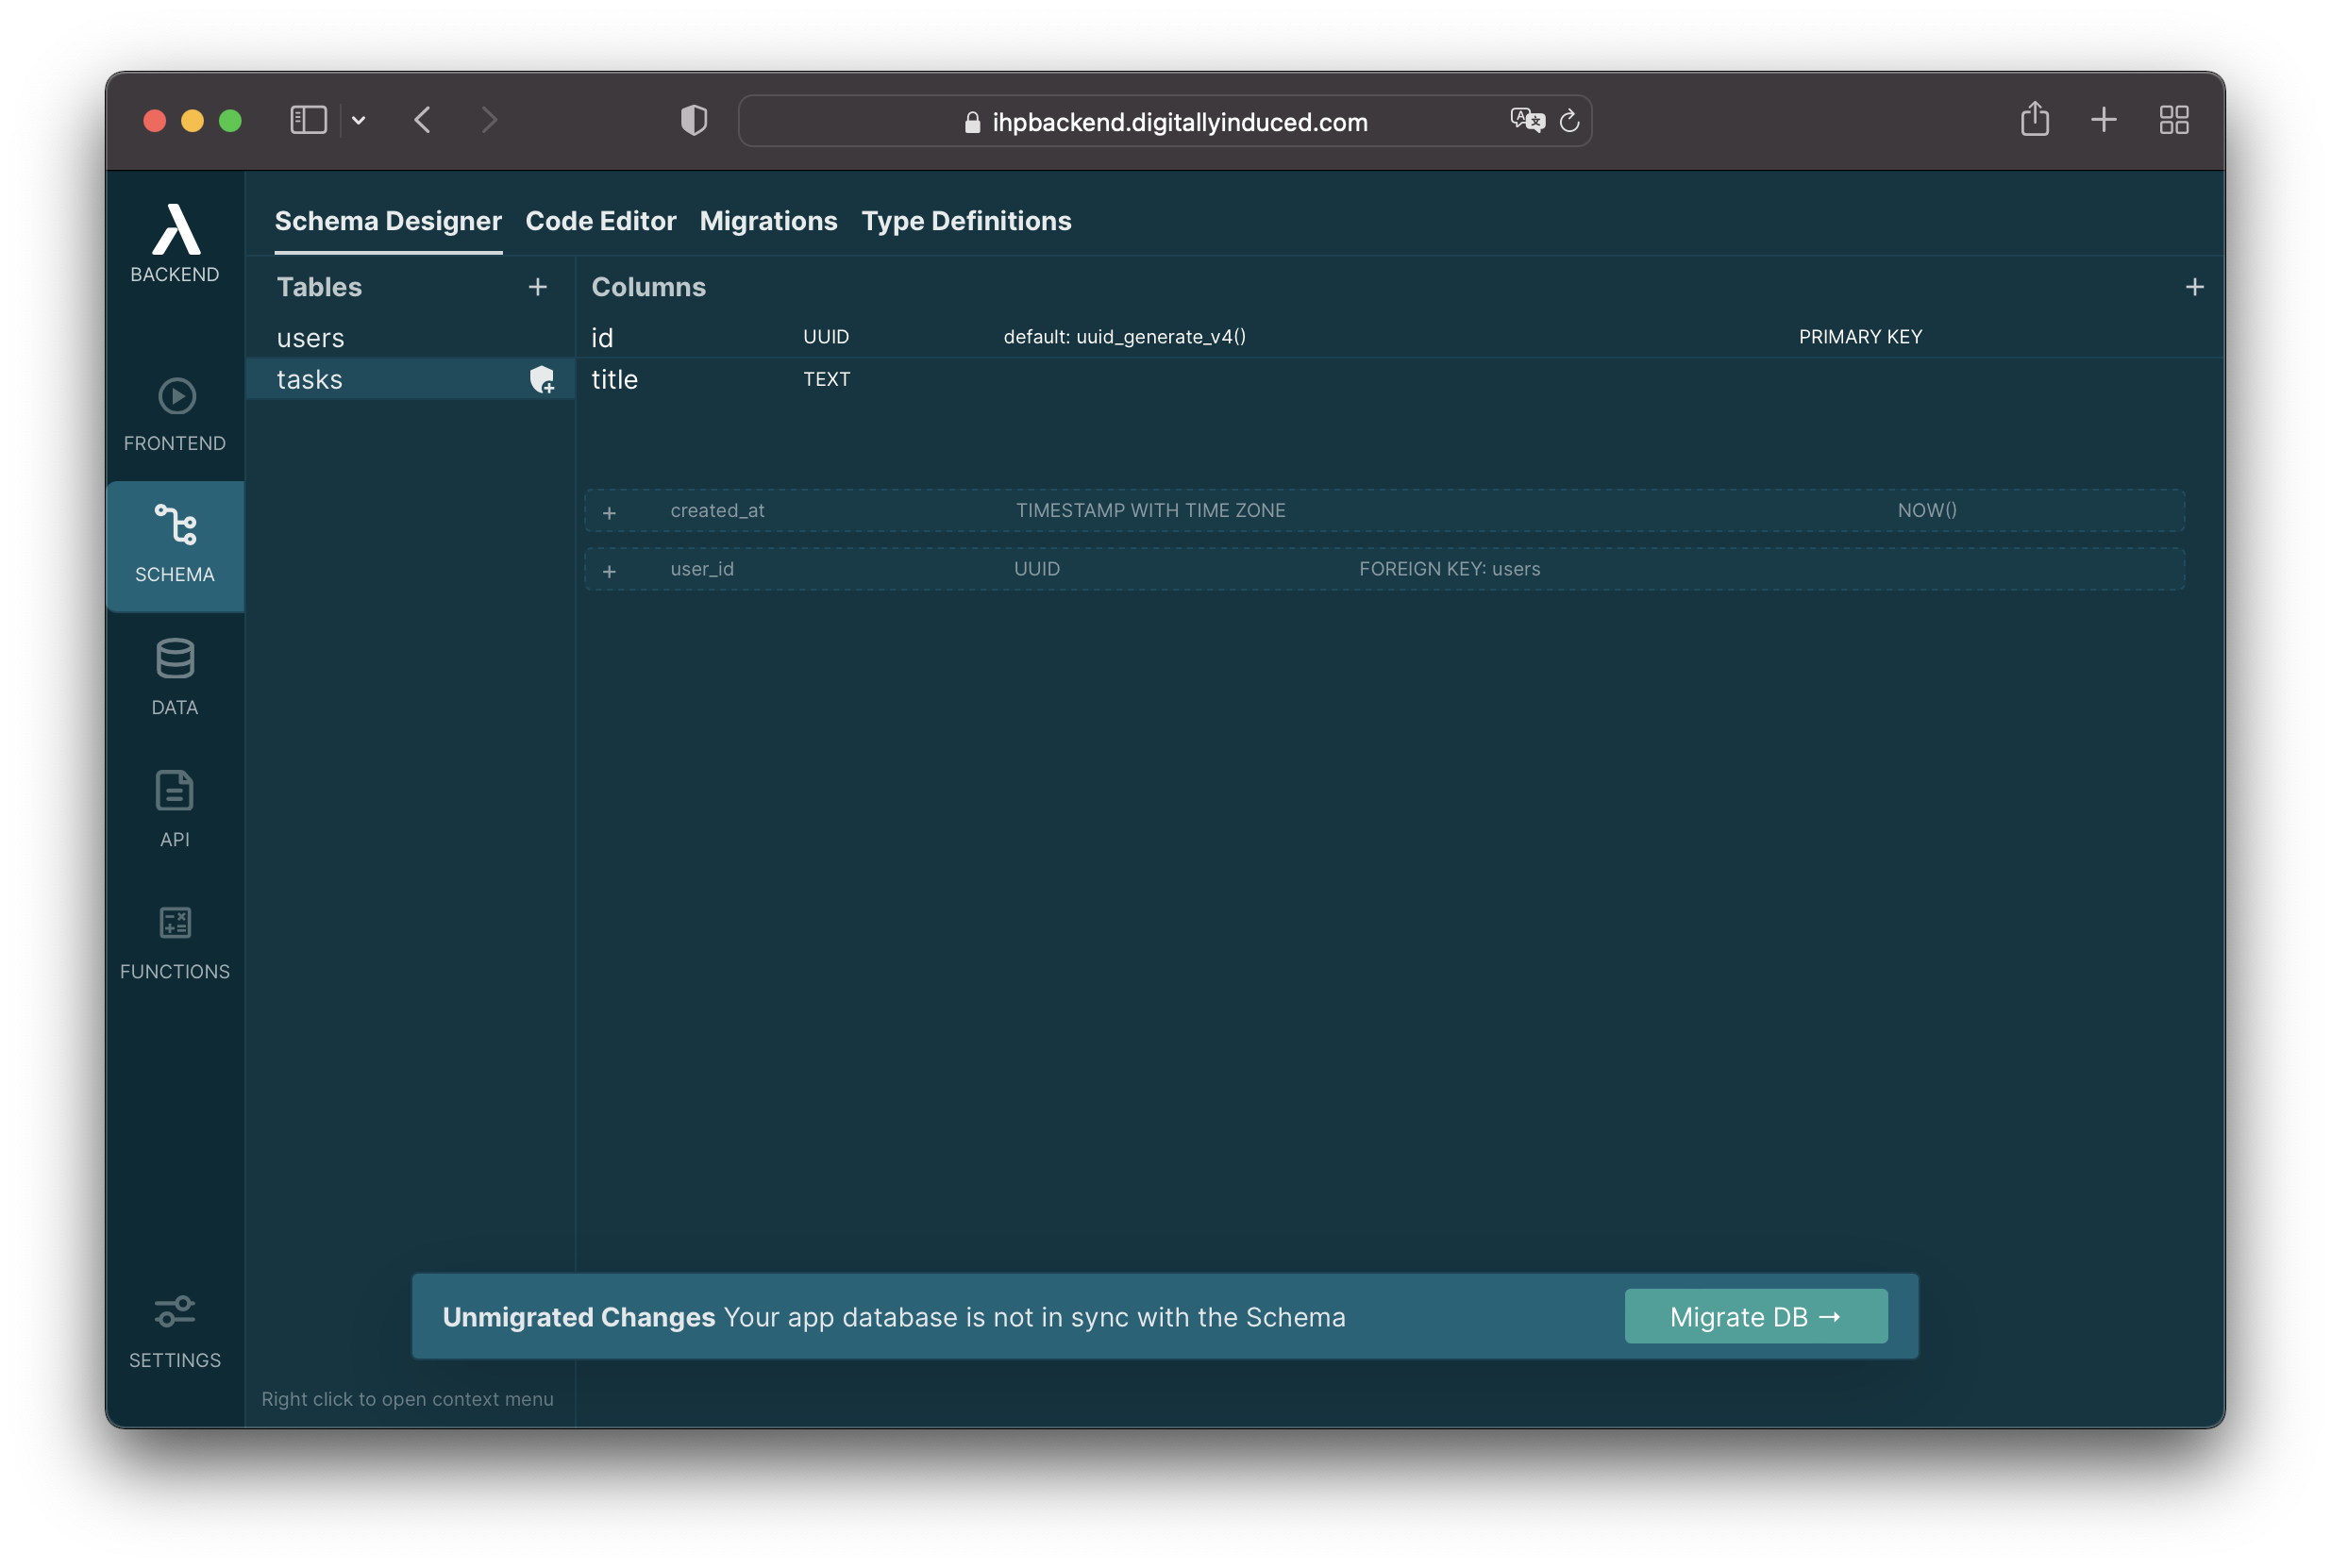
Click on the suggested
created_atcolumn to add it to thetaskstable: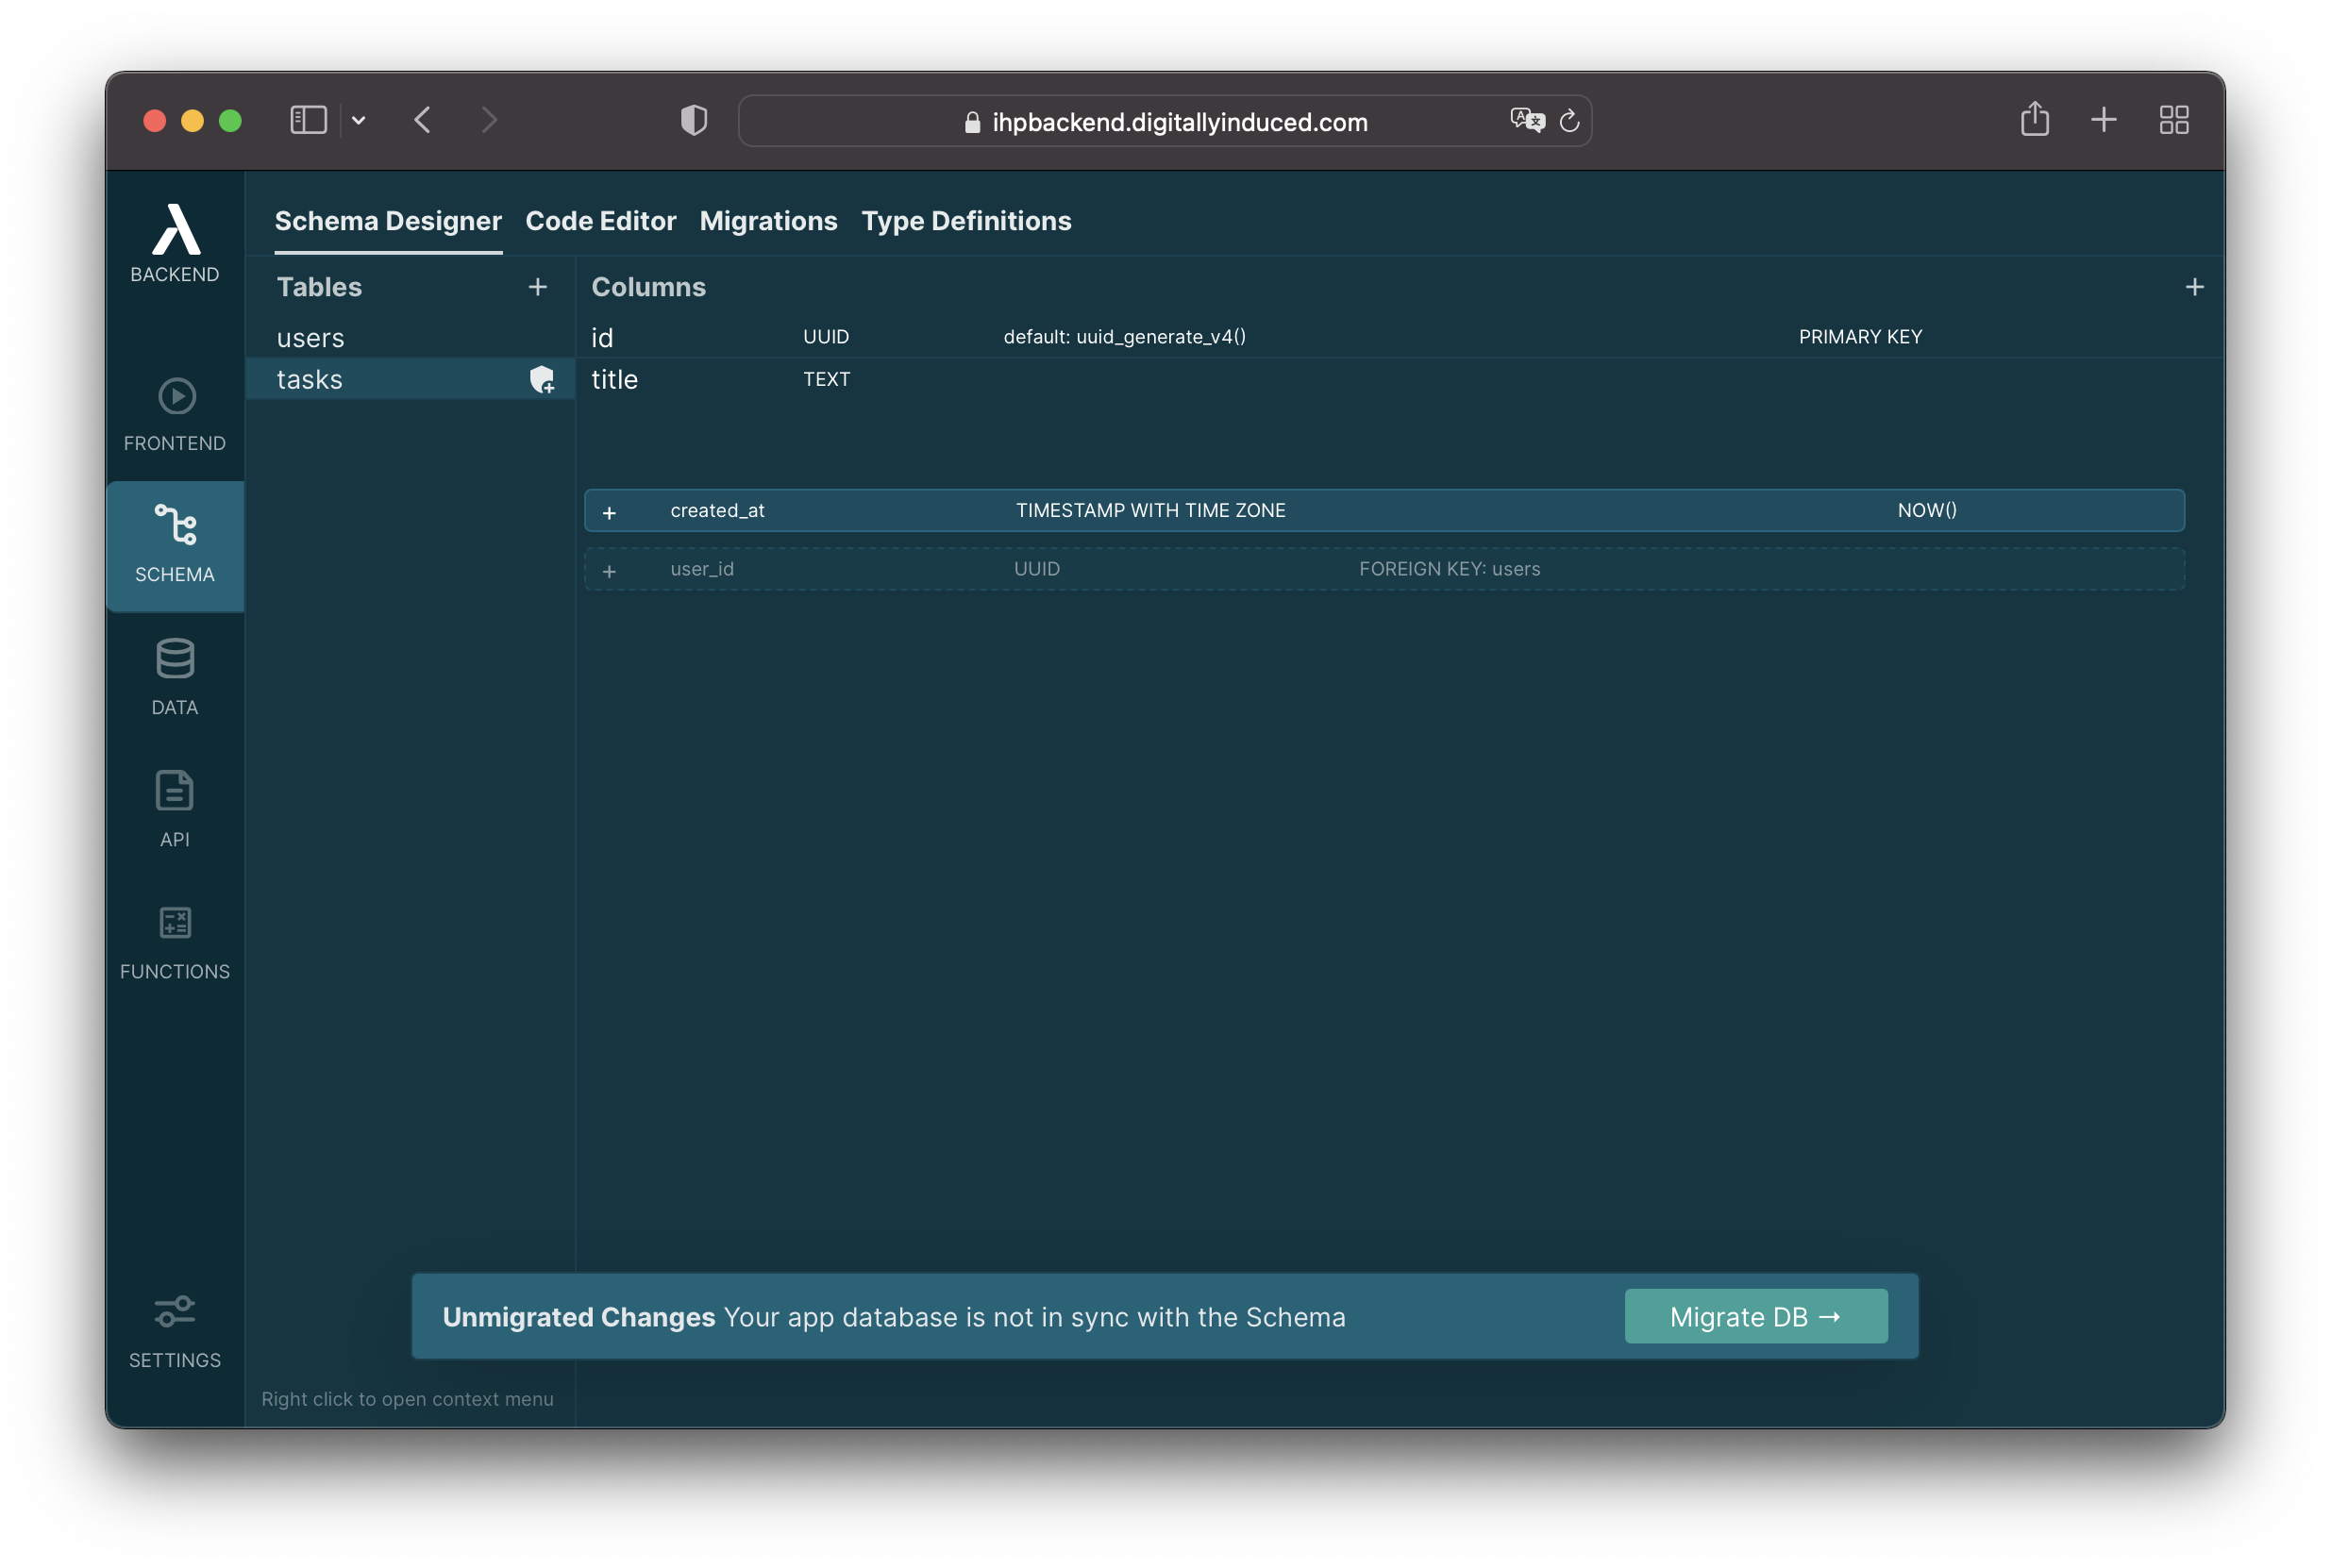
Now it will look like this:

The only column left now is the
user_id.The schema designer is also suggesting to add this for us. Click it to add the
user_idcolumn: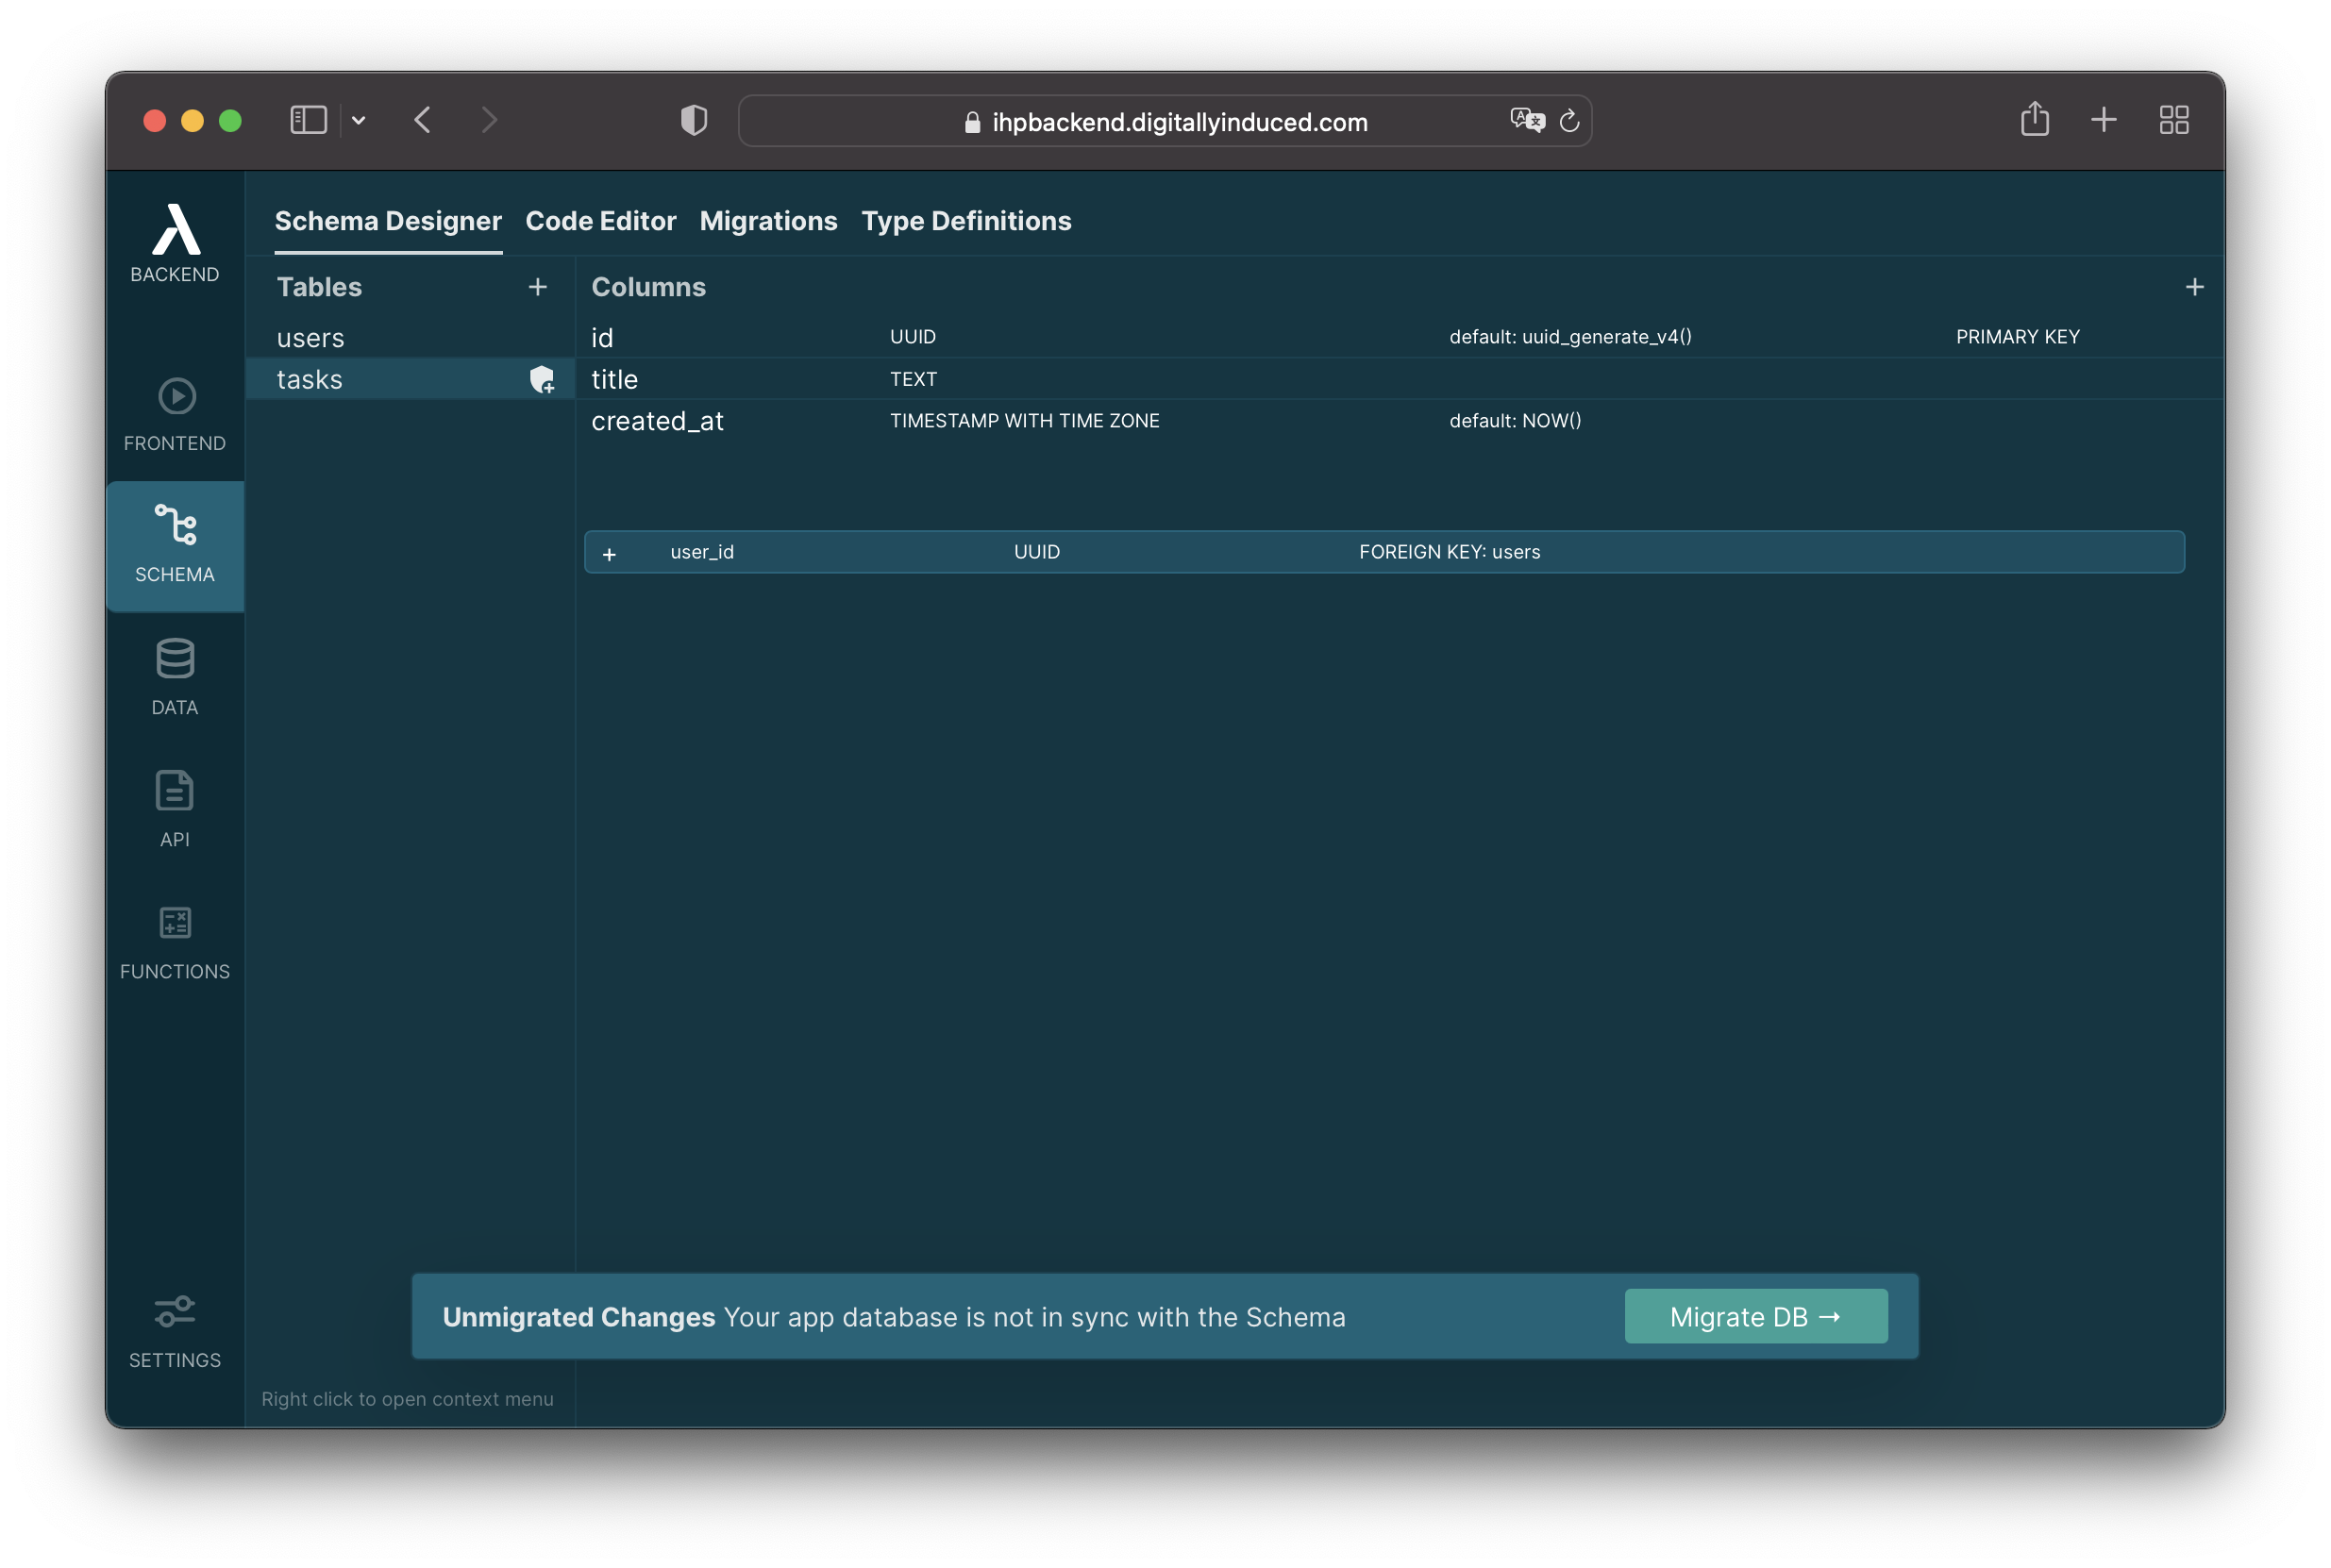
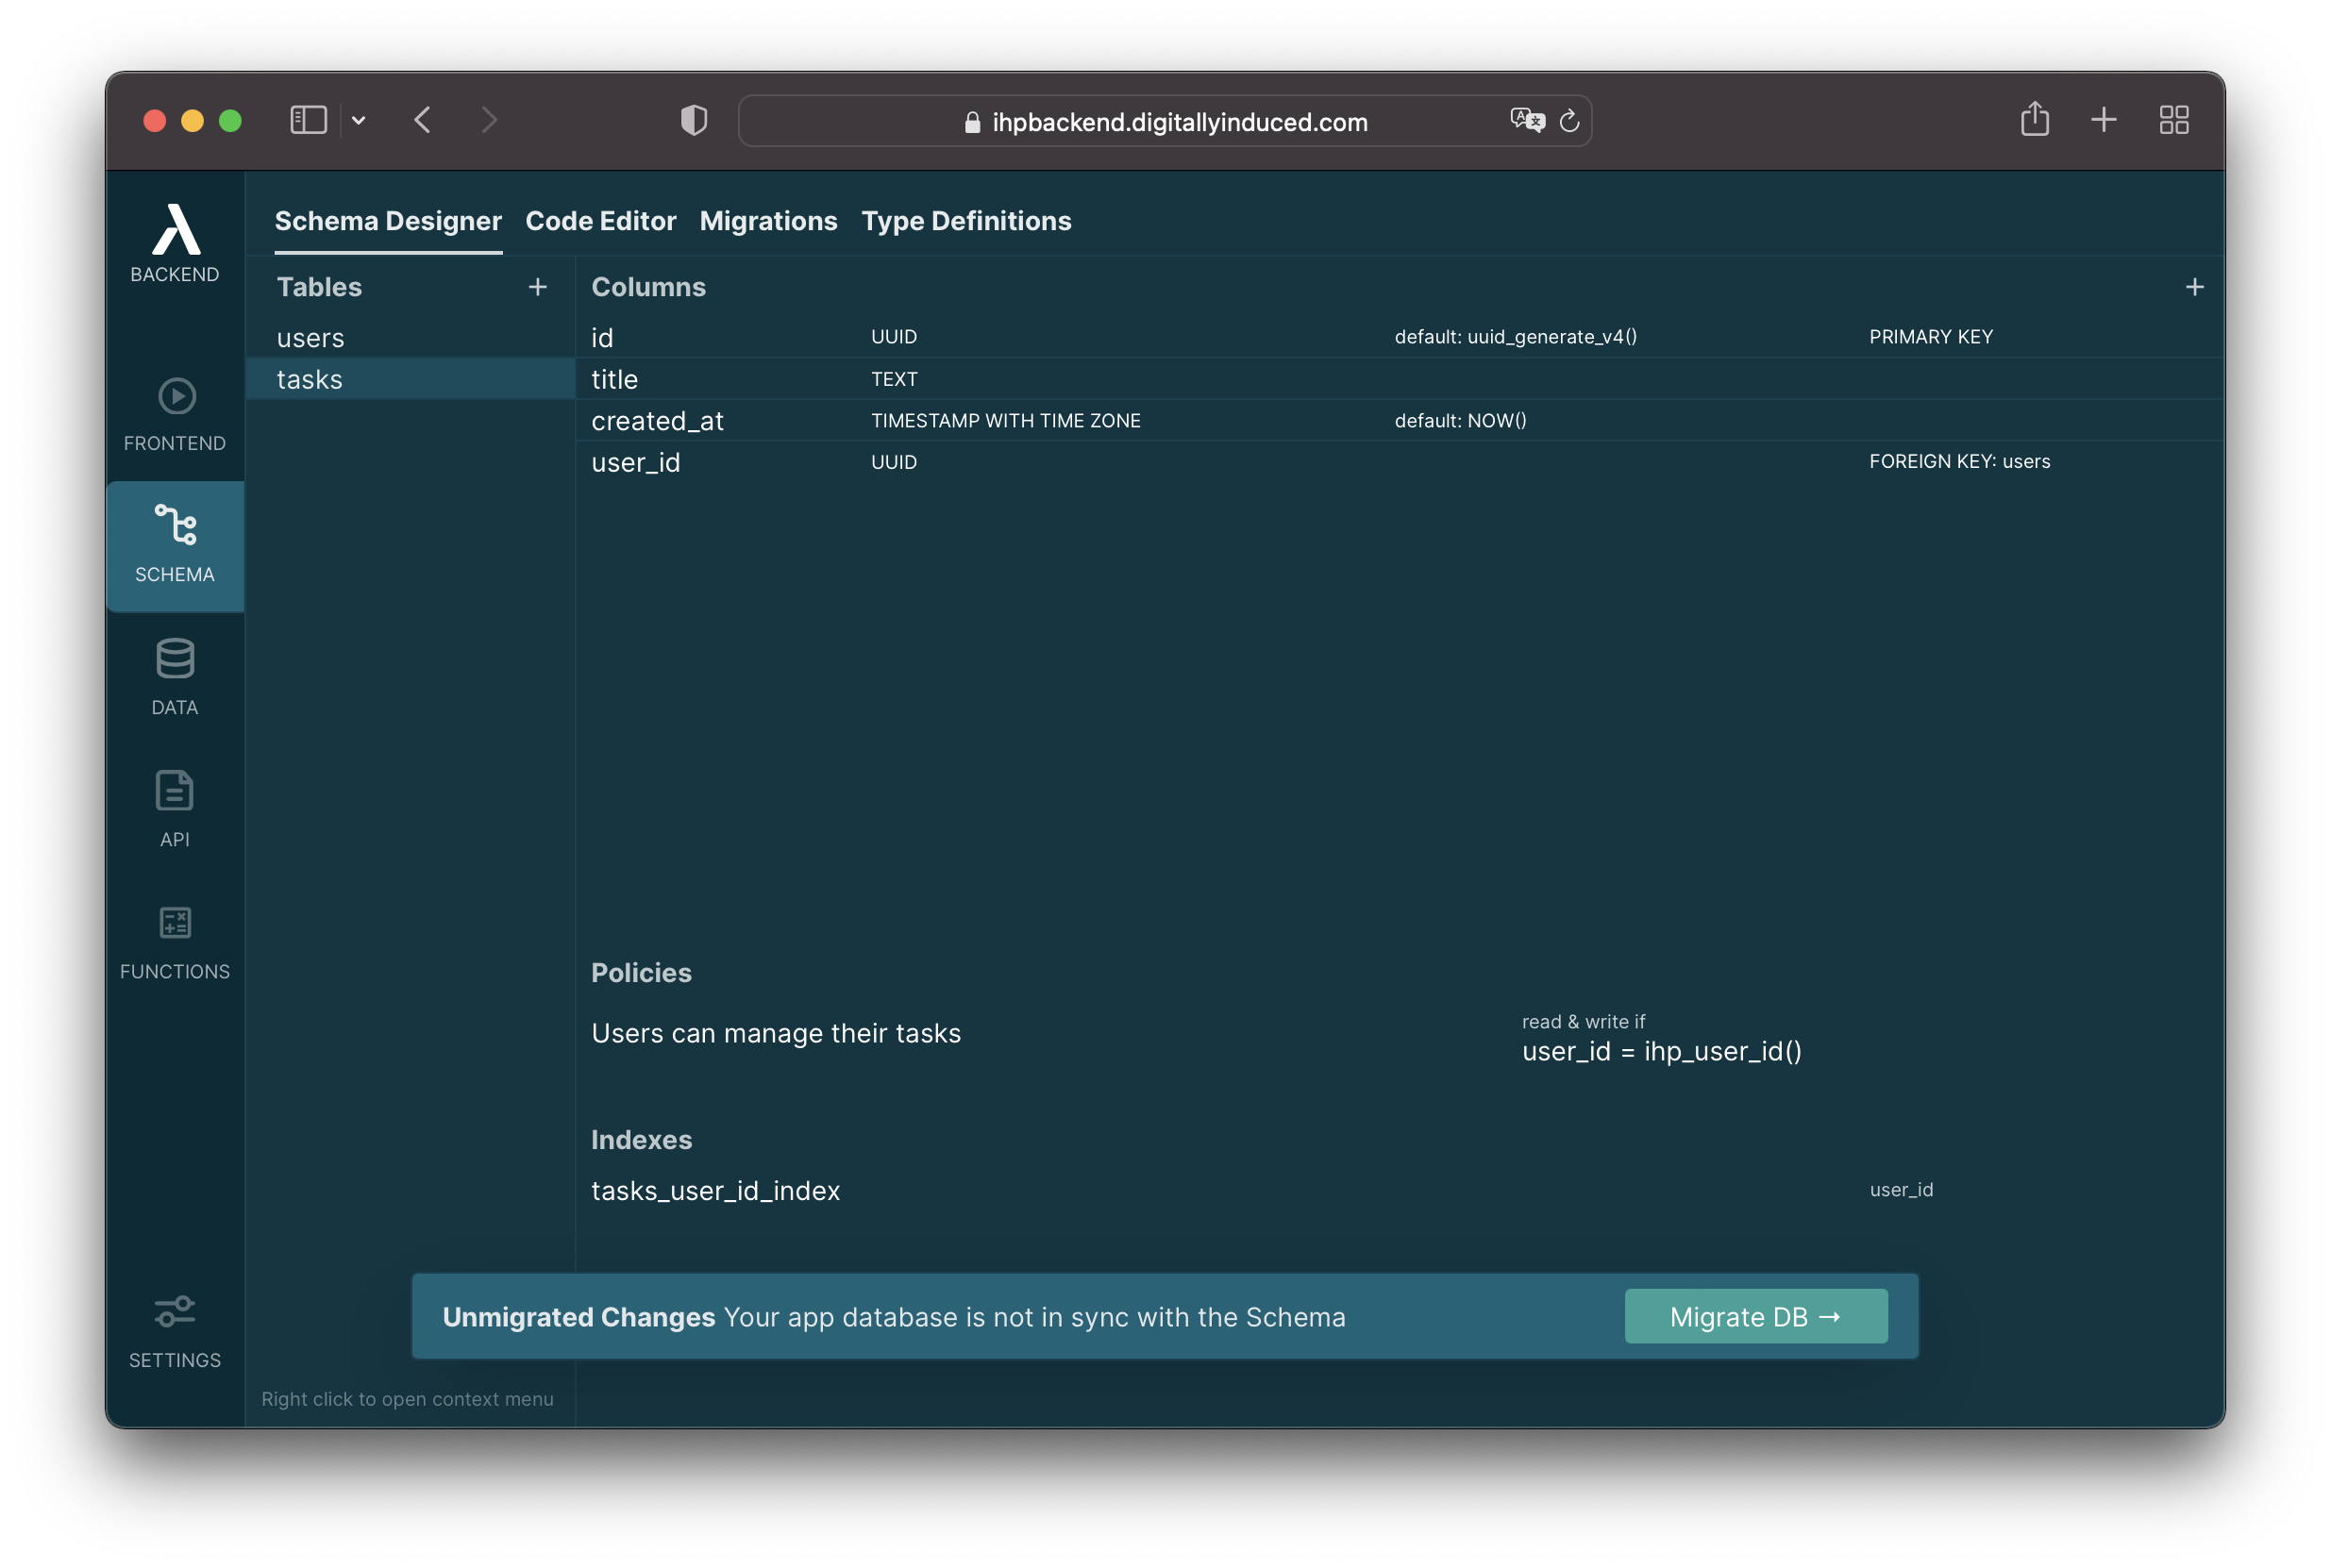
After the
user_idcolumn has been added, you'll also see a new index and a policy appear. Thin Backend often uses convention over configuration to provide good defaults for your app:- The index on the
user_idcolumn is added because it's common to run database queries likeGive me all tasks for a specific user
. - The policy is defined to only grant a user access to their own tasks:
- The
user_idfield has to be the same as the current user's id, otherwise access is prohibited. - A user can only add tasks if the
user_idis set to their own id.
- The
- The index on the
After that, your schema should look like this:
Running Migrations
Next, we need to make sure that our database schema with our tasks table is imported into the Thin Backend PostgreSQL database. For that we'll create and run a database migration.
Click the
Migrate DBbutton at the bottom of the page
Thin Backend already prepared a few SQL statements to migrate our DB. Typically we don't need to make any changes here.
Once your app is running in production, you might want to review and modify the auto generated SQL statements to make sure that everything goes as planned.
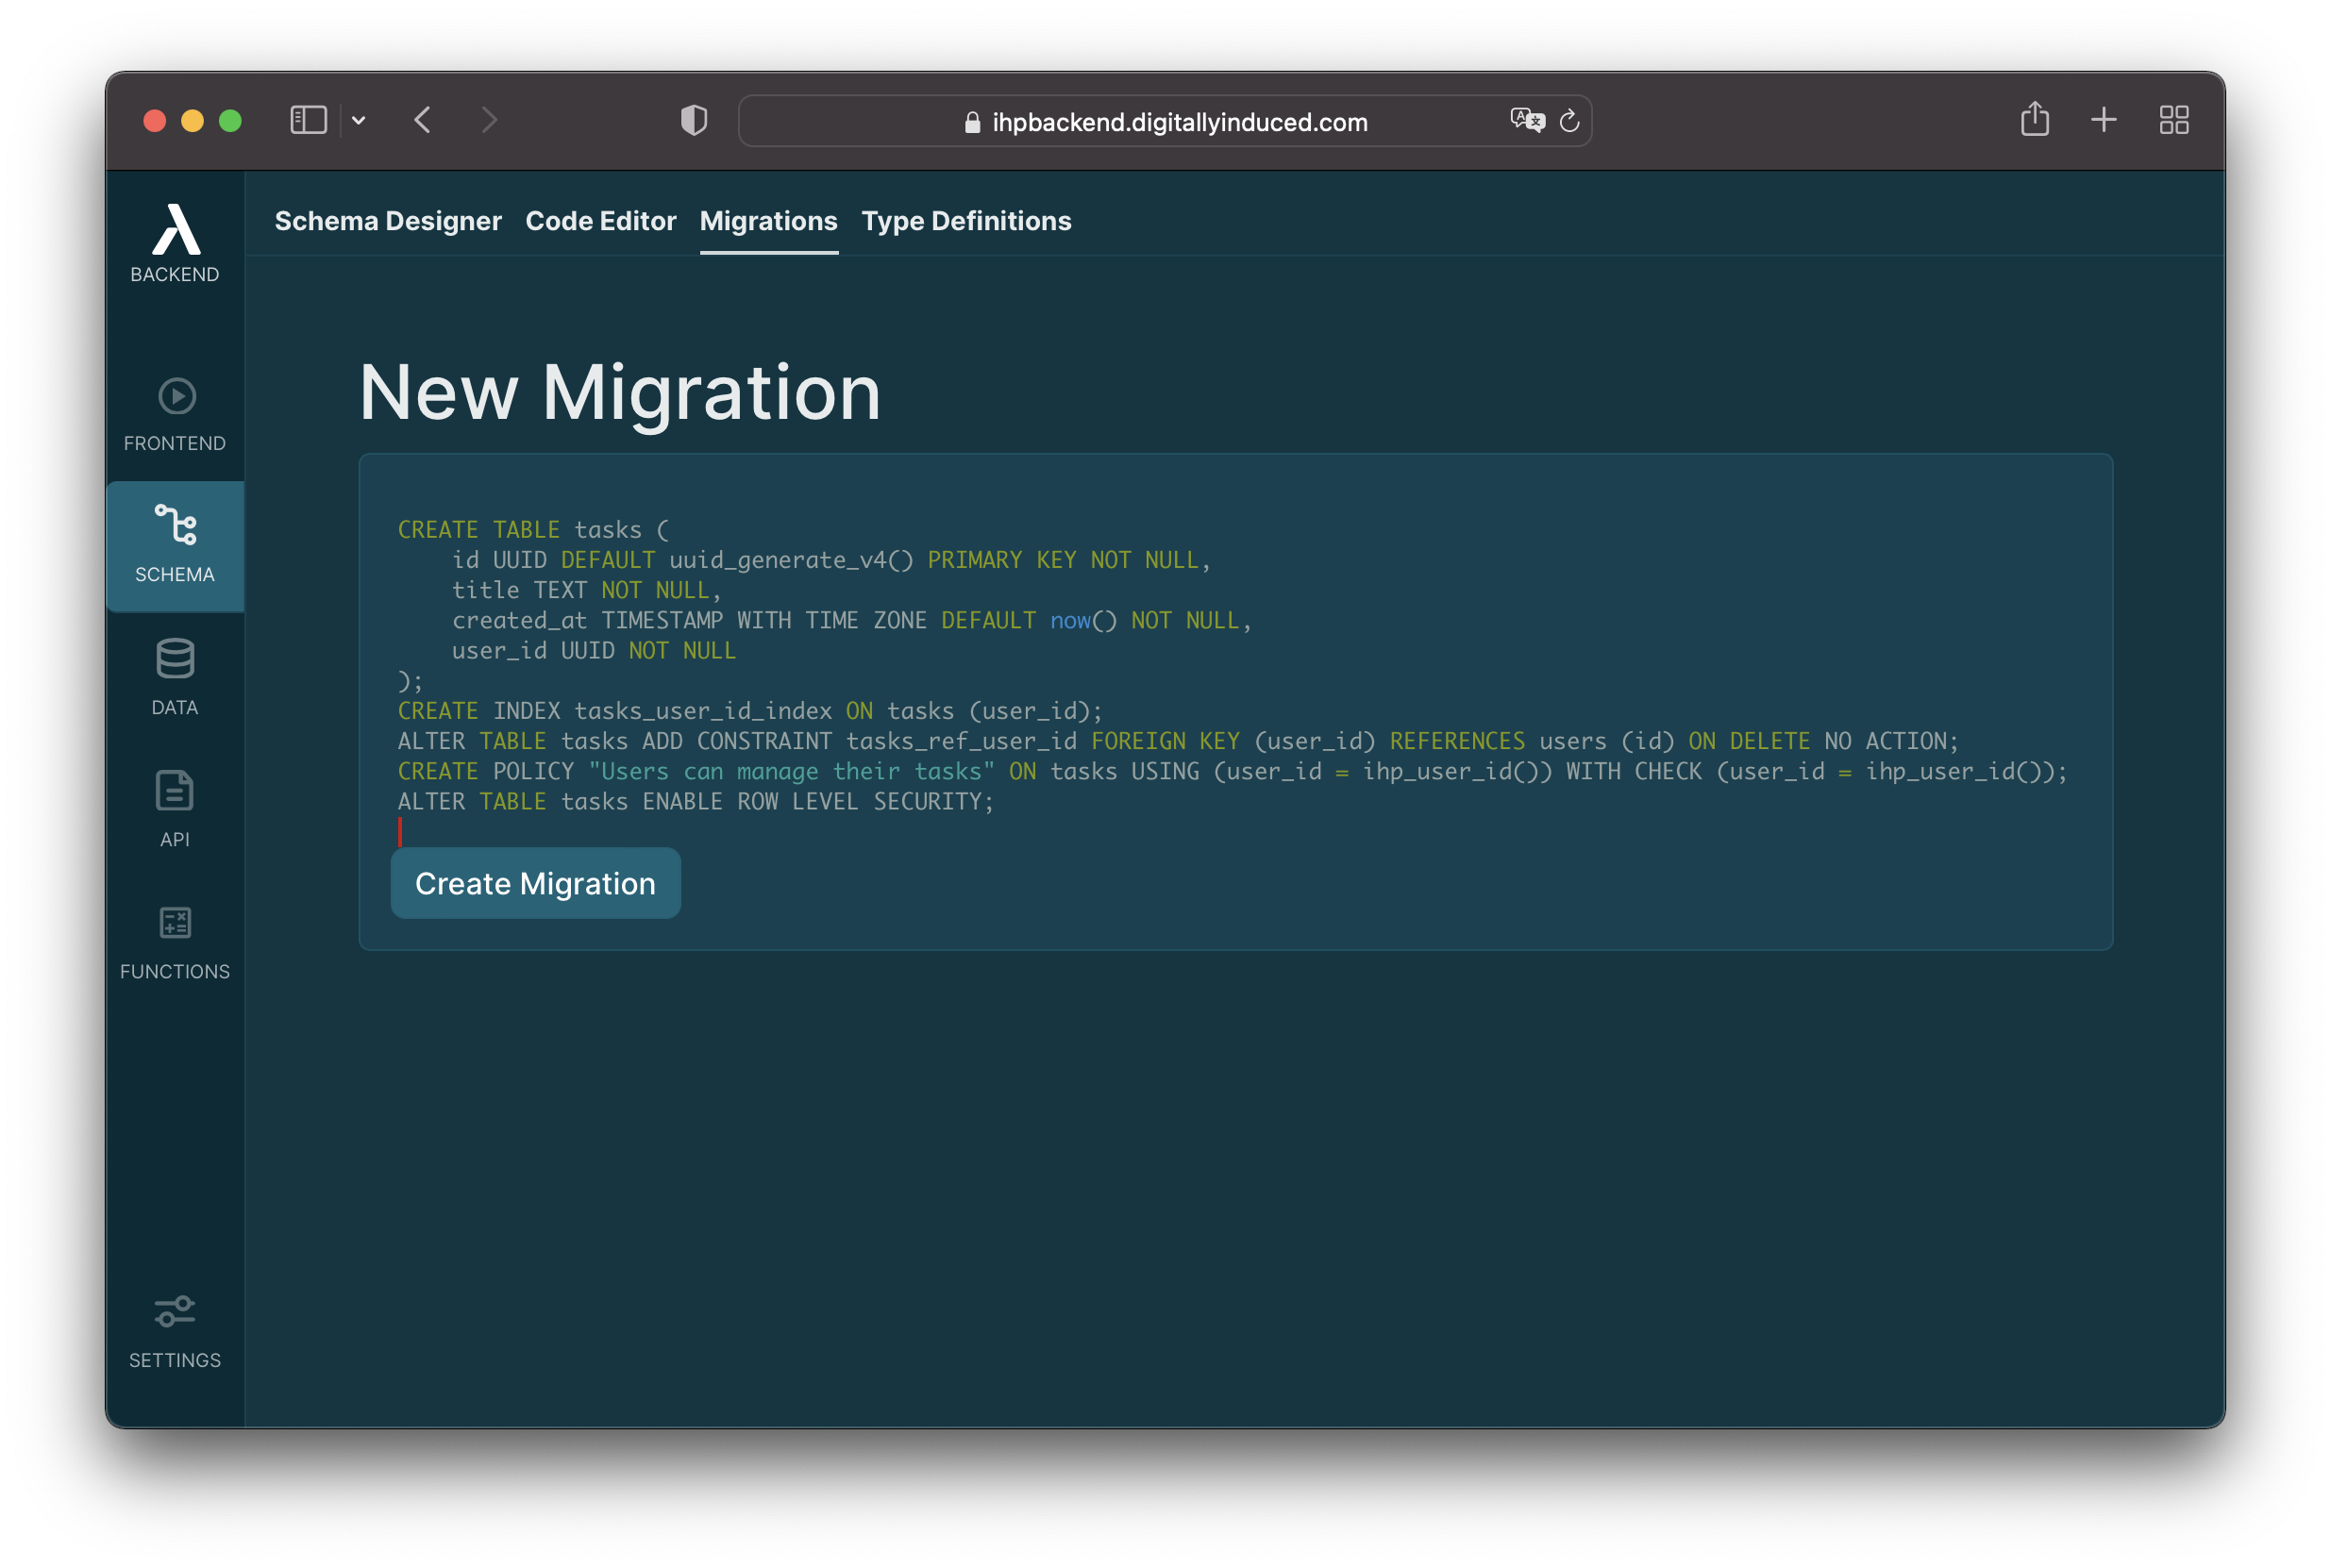
Click
Create Migrationafter you've quickly reviewed the SQL.The migration has been created:
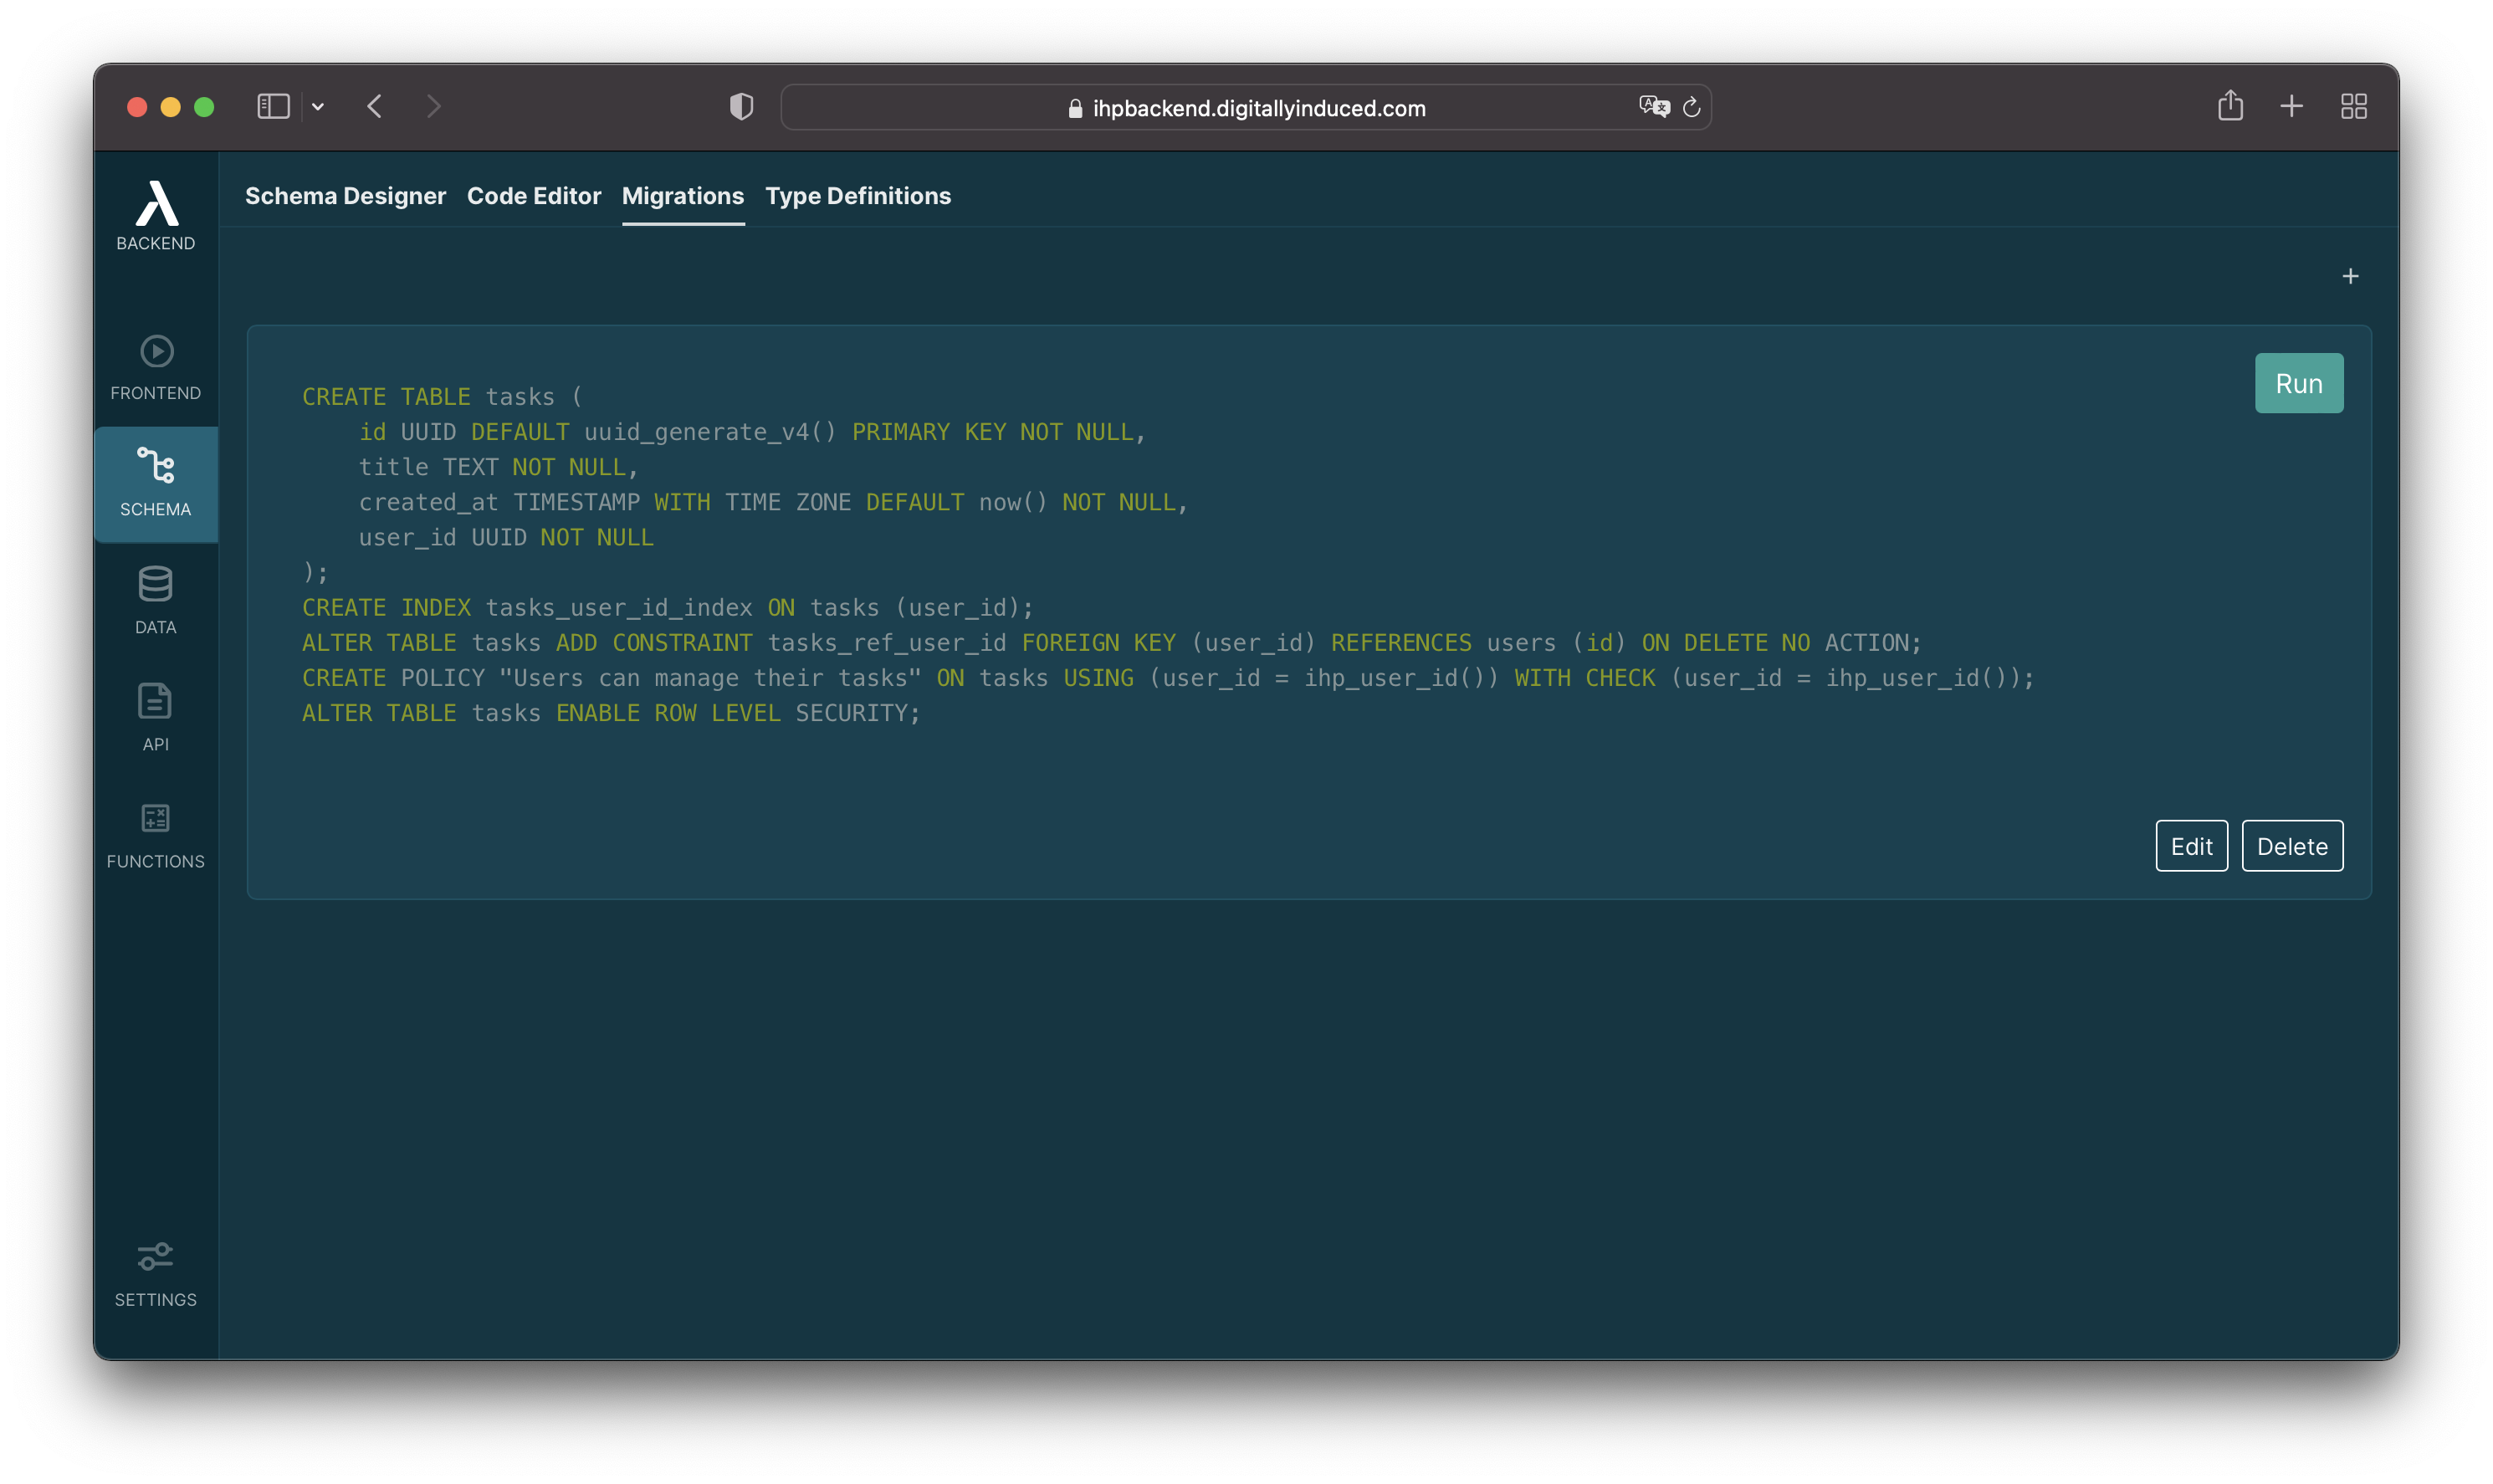
Click
Runto apply the migration to the app database: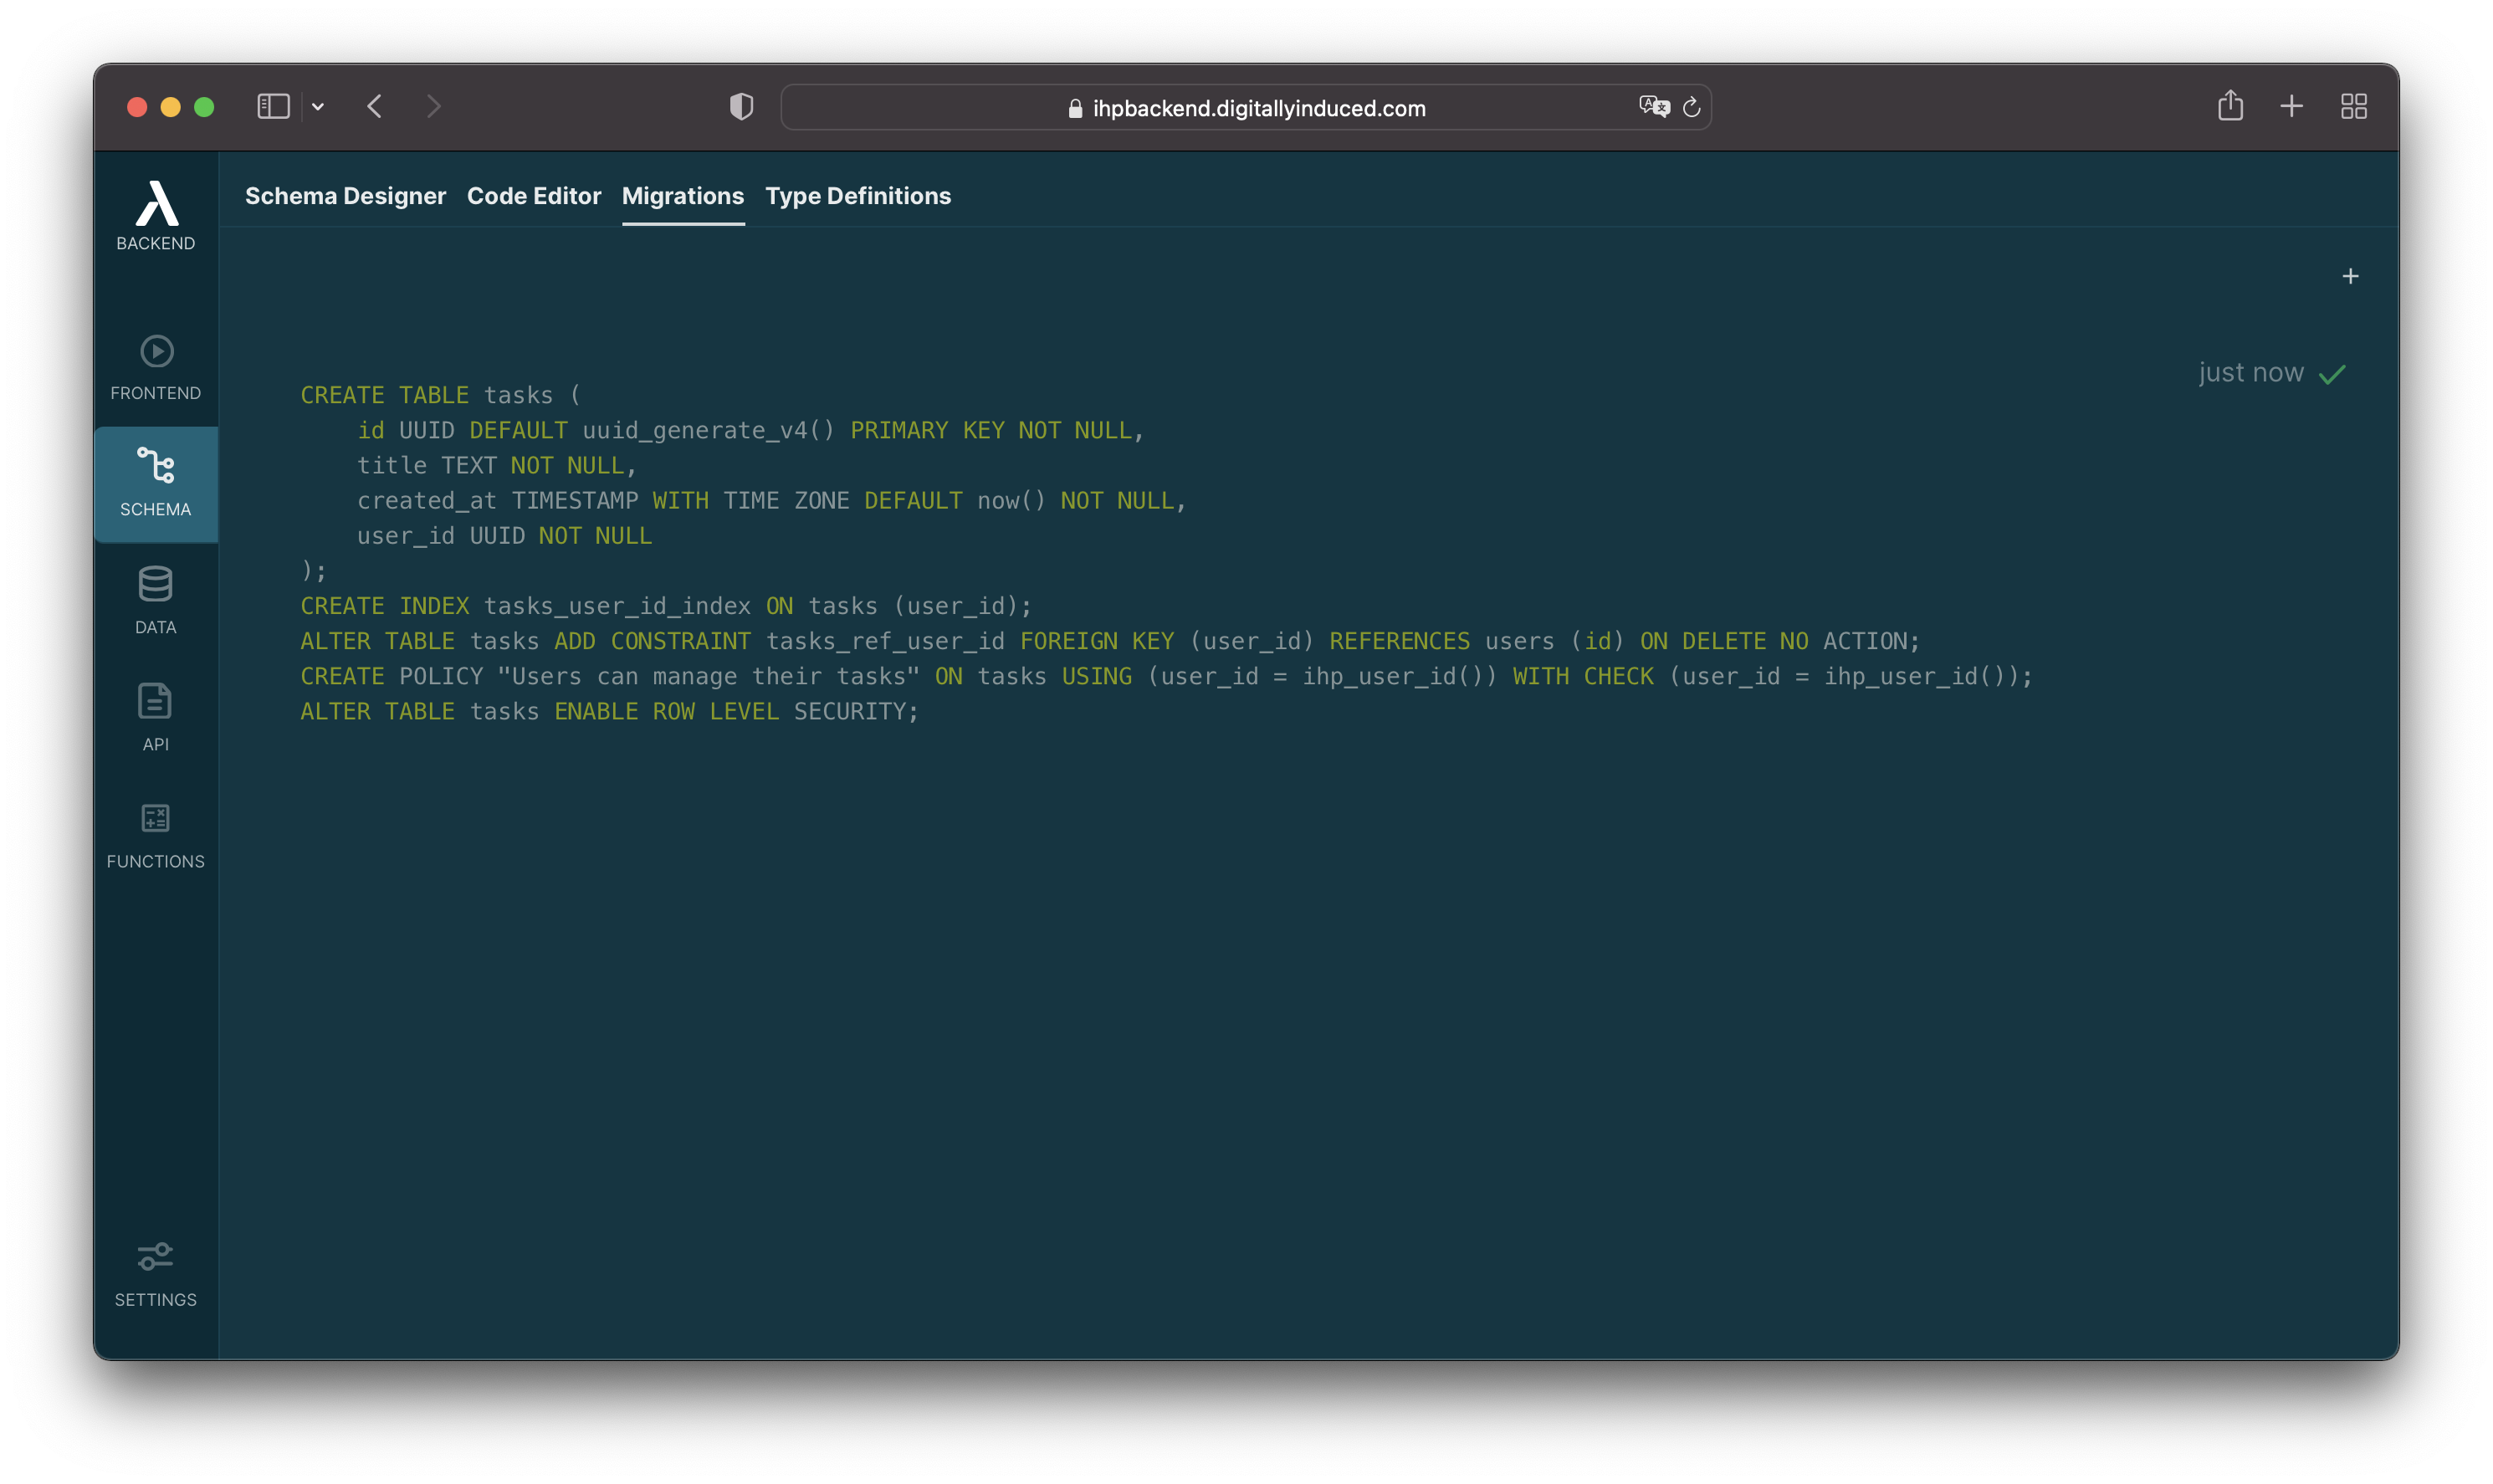
The tasks table has been created now. Let’s quickly connect to our database and see that everything is correct:
- Click on the
DATAbutton in the left navigation. - In the
DATAeditor, click on thetaskstable. You should see an empty table:
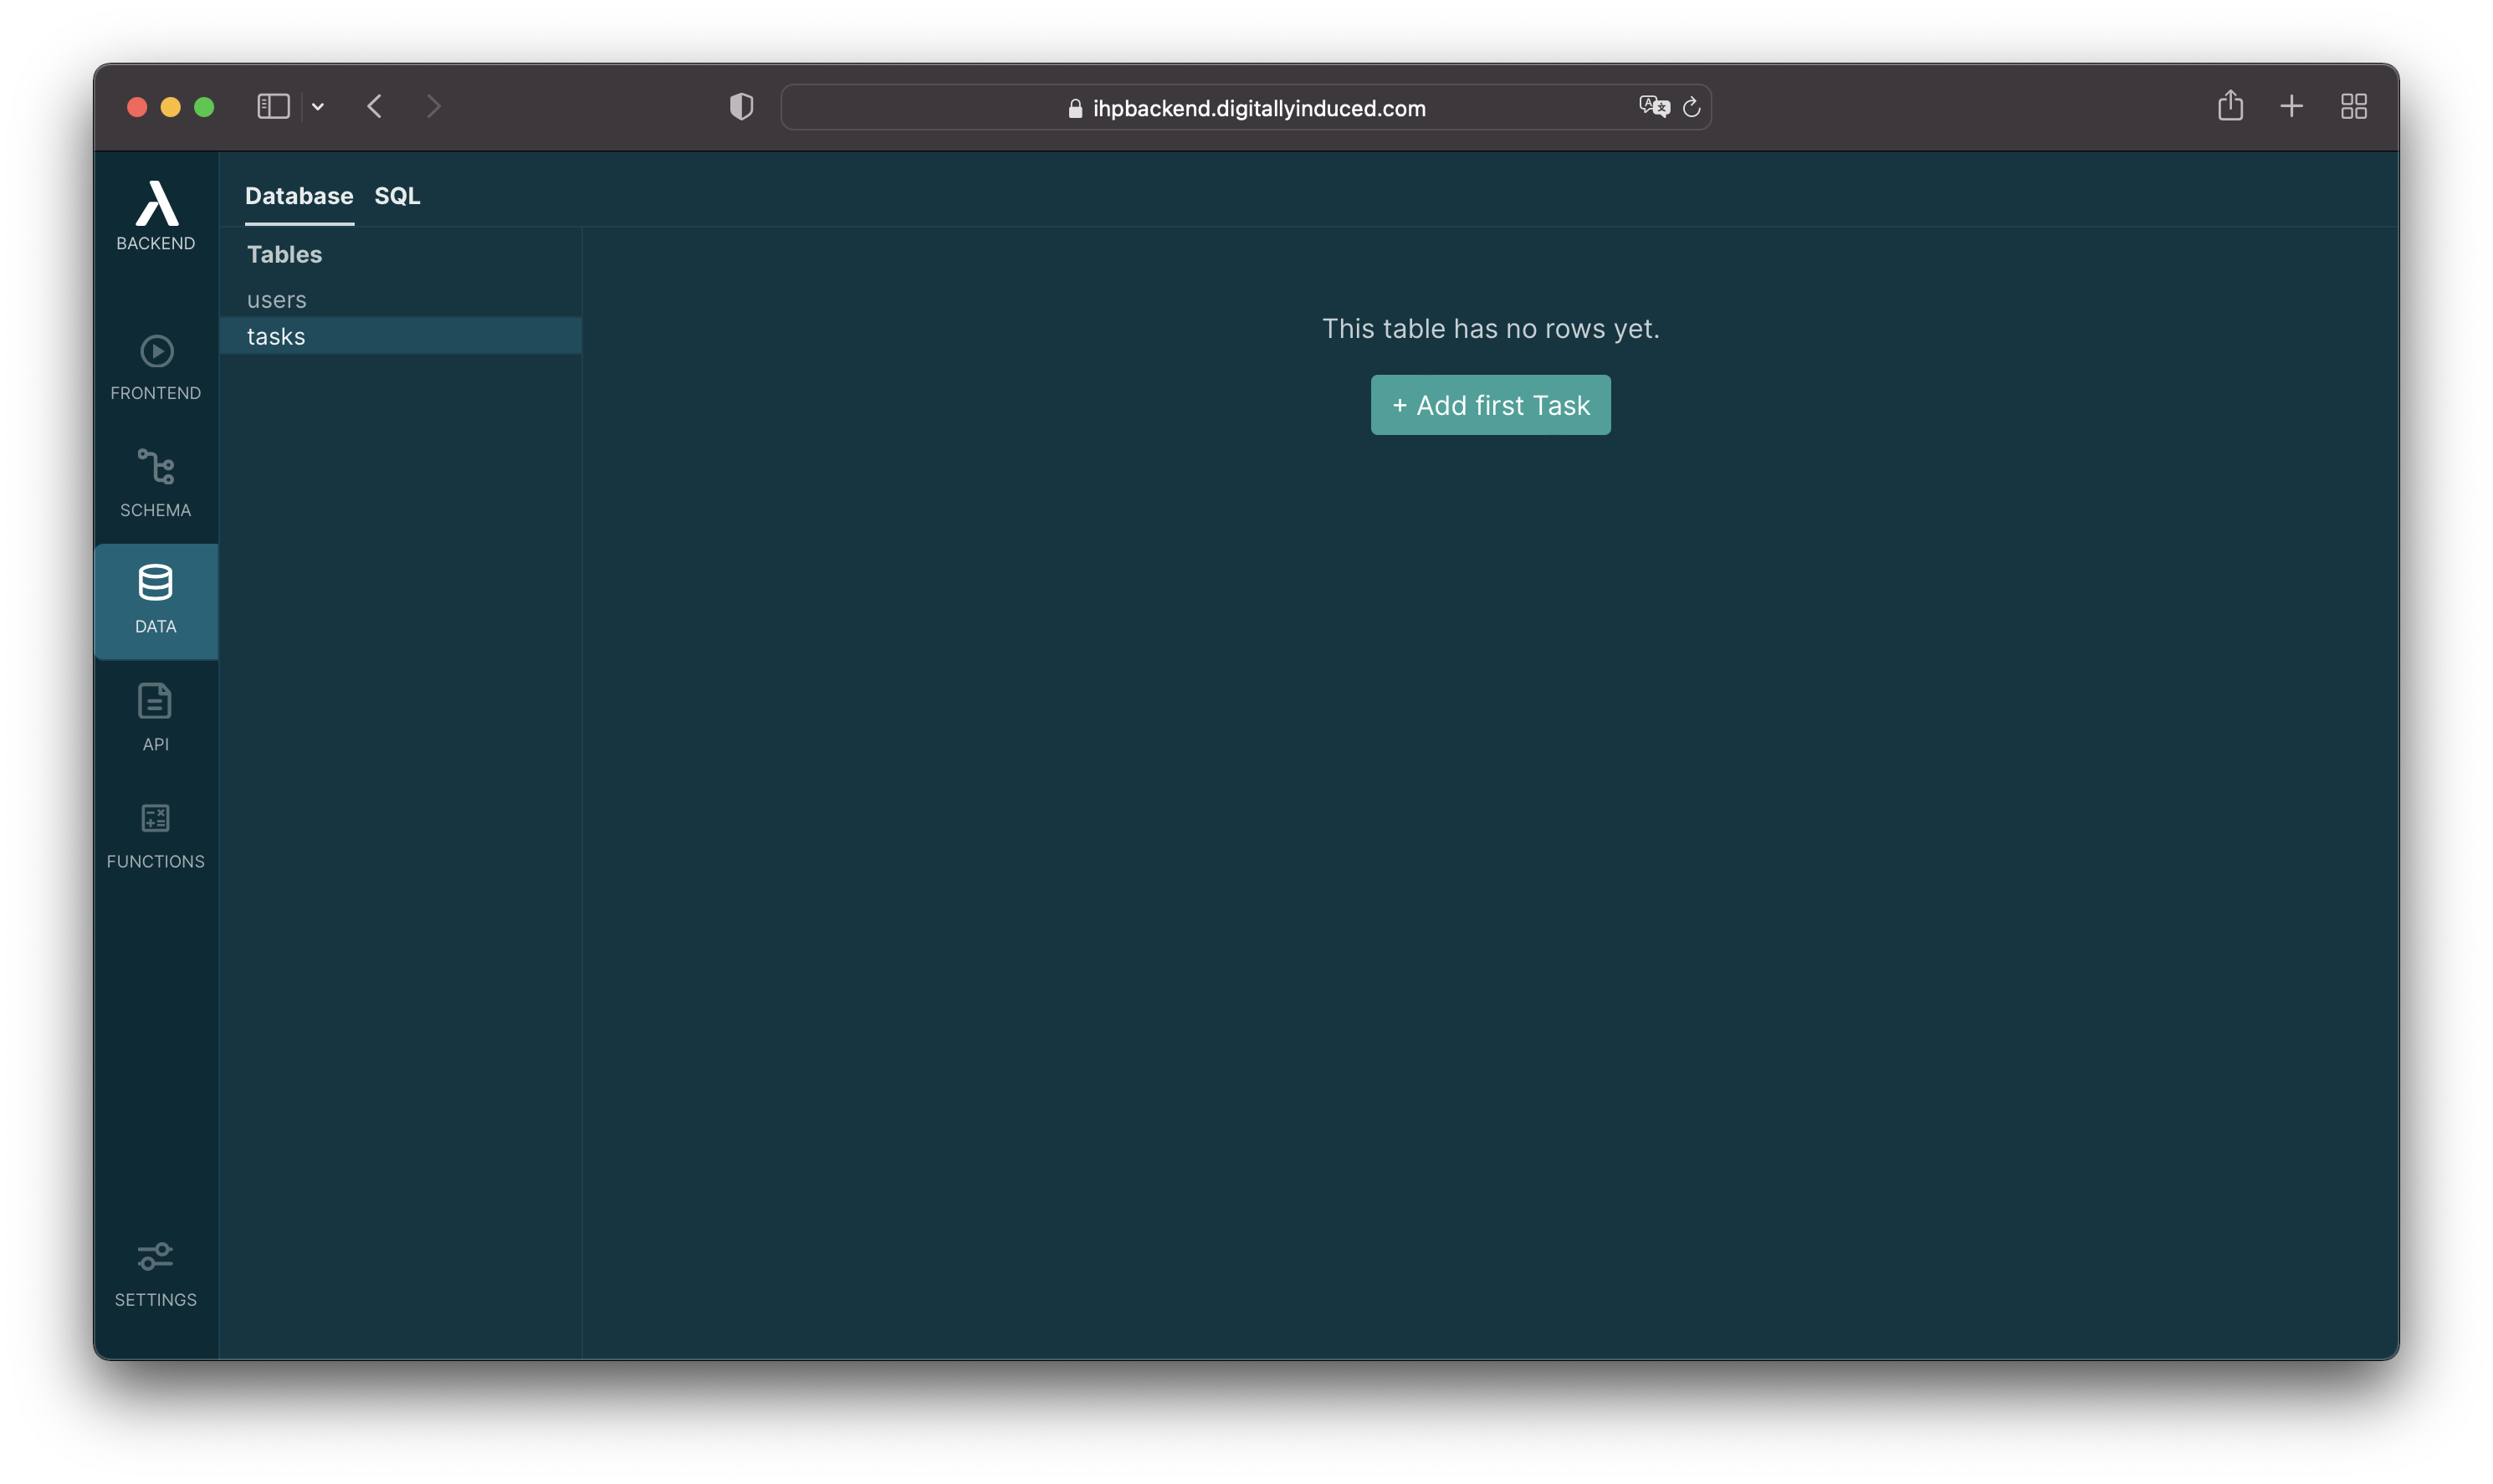
If there was some issue with the migration, the
taskswould not be in the table list at the left.
Now our database is ready to be consumed by our react app.
6. Coding the App
Setting up TypeScript
If you've already opened the project's app.tsx in VSCode, you'll likely have seen an error like this:

The red marked errors happen because we haven't installed the TypeScript type definitions for the project yet. Thin Backend automatically generates TypeScript type definitions based on the database schema.
To install them:
- Open Thin Backend
- Click
SCHEMA→Type Definitions Run the displayed
npm installcommand in your local project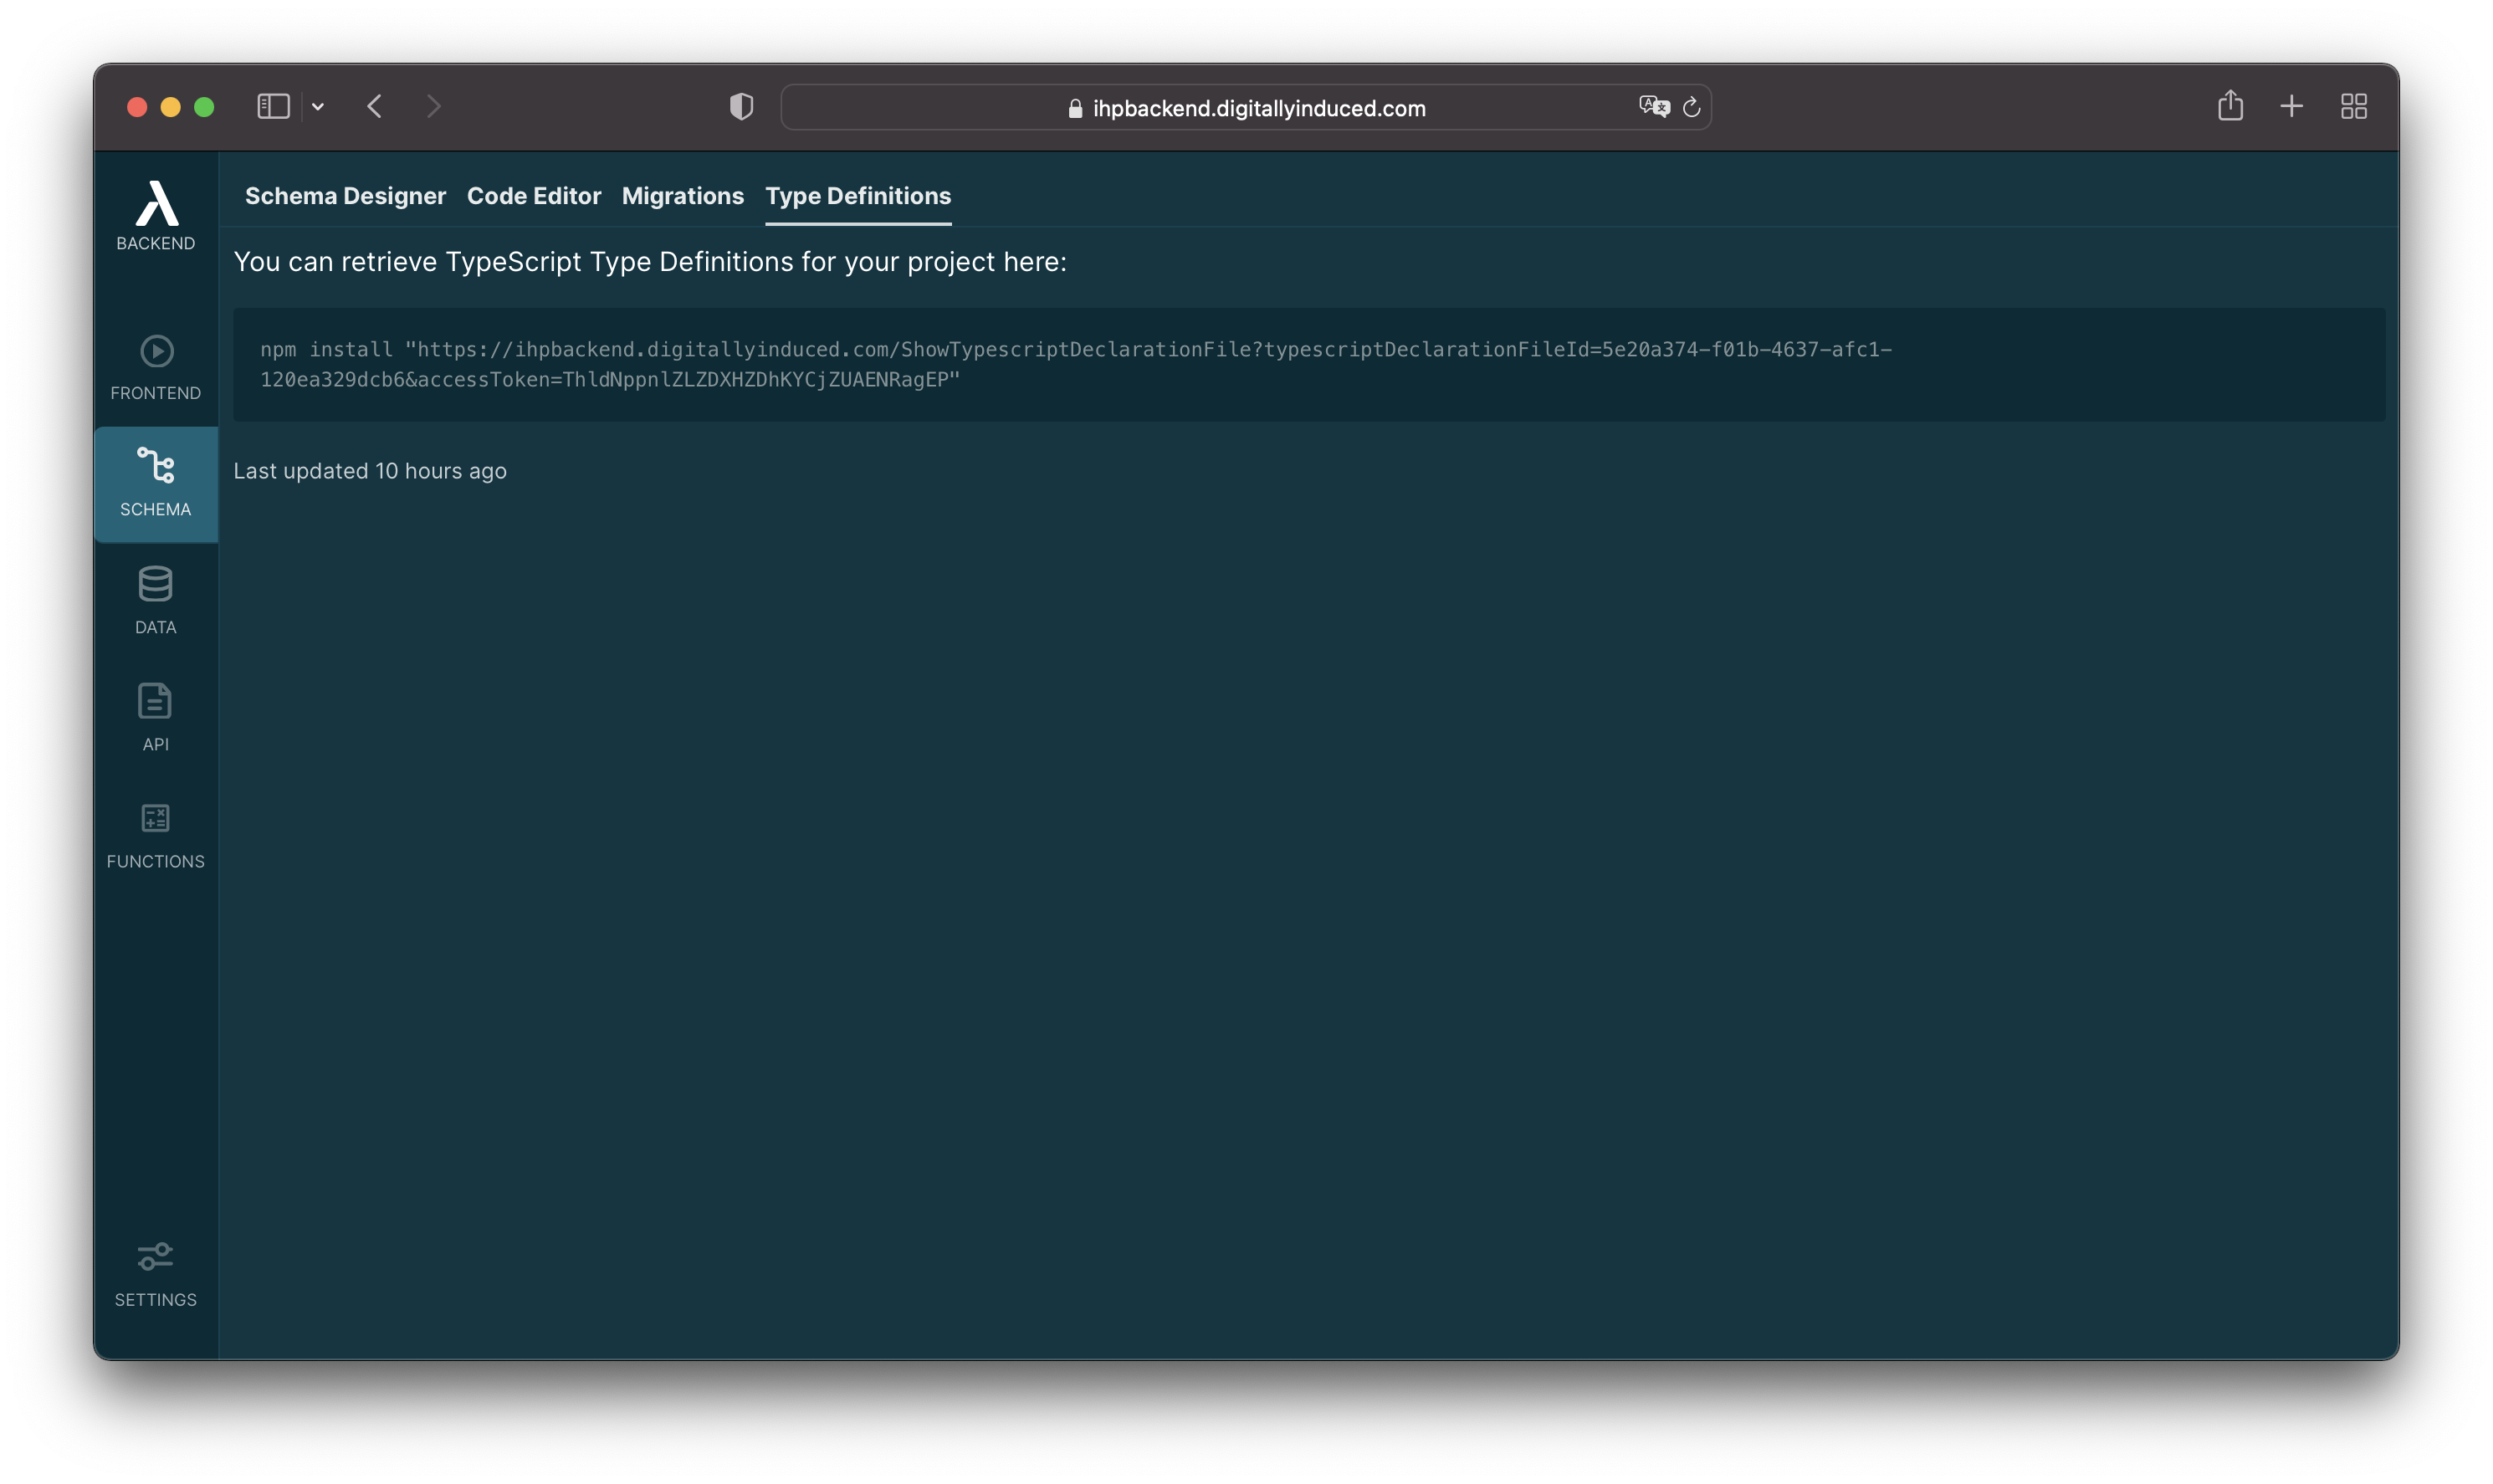
After running that command, your editor should not report any errors anymore.
Listings Tasks
In our todo app, we want to list tasks, allow the user to add new tasks, edit them and later delete them when completed.
Let's start by adding a component for showing all of the current users tasks.
- Open
app.tsxin your code editor Add a component
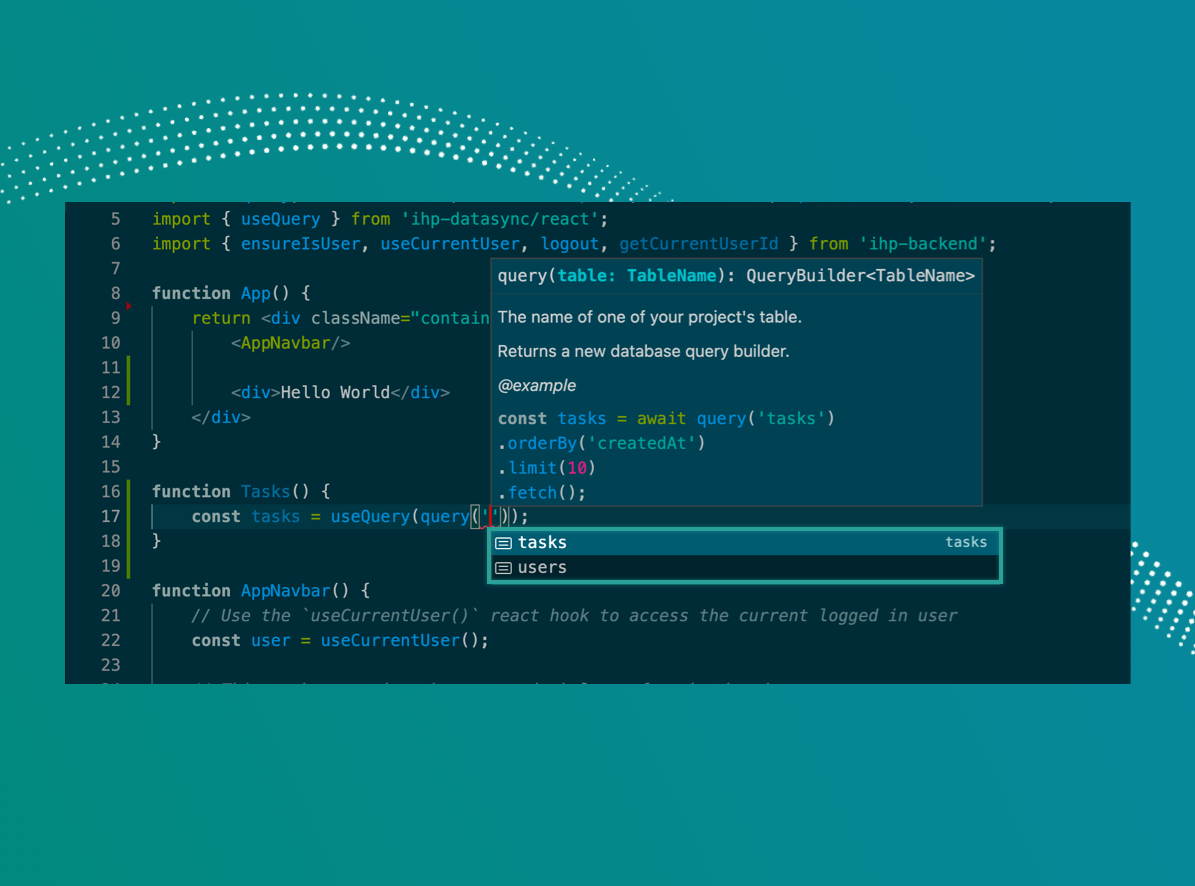
Taskslike this:function Tasks() { const tasks = useQuery(query('tasks').orderBy('createdAt')); if (tasks === null) { return <div>Loading ...</div> } return <div> {tasks.map(task => <Task task={task} key={task.id} />)} </div> }You can see that we're using a custom
useQuery(..)react hook to get the results of thequery('tasks').orderBy('createdAt')query.If you type out the above code, you'll get nice autocompletions by VSCode based on your project's schema:
Write a
Taskcomponent like this:interface TaskProps { // You might might need to an manually add an import // if not using VSCode: `import { Task } from 'thin-backend';` task: Task; } function Task({ task }: TaskProps) { return <div>{task.title}</div> }Finally we need to mount the
<Tasks />from inside ourAppcomponent:function App() { return <div className="container"> <AppNavbar/> <Tasks/> </div> }
Right now the app should still be empty as we don't have any tasks yet. Let's add an Add Task button:
Creating Tasks
Inside
app.tsxadd a componentAddTaskButtonlike this:function AddTaskButton() { function handleClick() { createRecord('tasks', { title: window.prompt('Title:') || '', userId: getCurrentUserId() }); } return <button className="btn btn-primary" onClick={handleClick}>Add Task</button> }We're calling Thin Backend's
createRecord('tasks', someTask)function to create a new task inside thetaskstable.Finally we need to mount the new
<AddTaskButton />in ourAppcomponent:function App() { return <div className="container"> <AppNavbar/> <Tasks/> <AddTaskButton /> </div> }
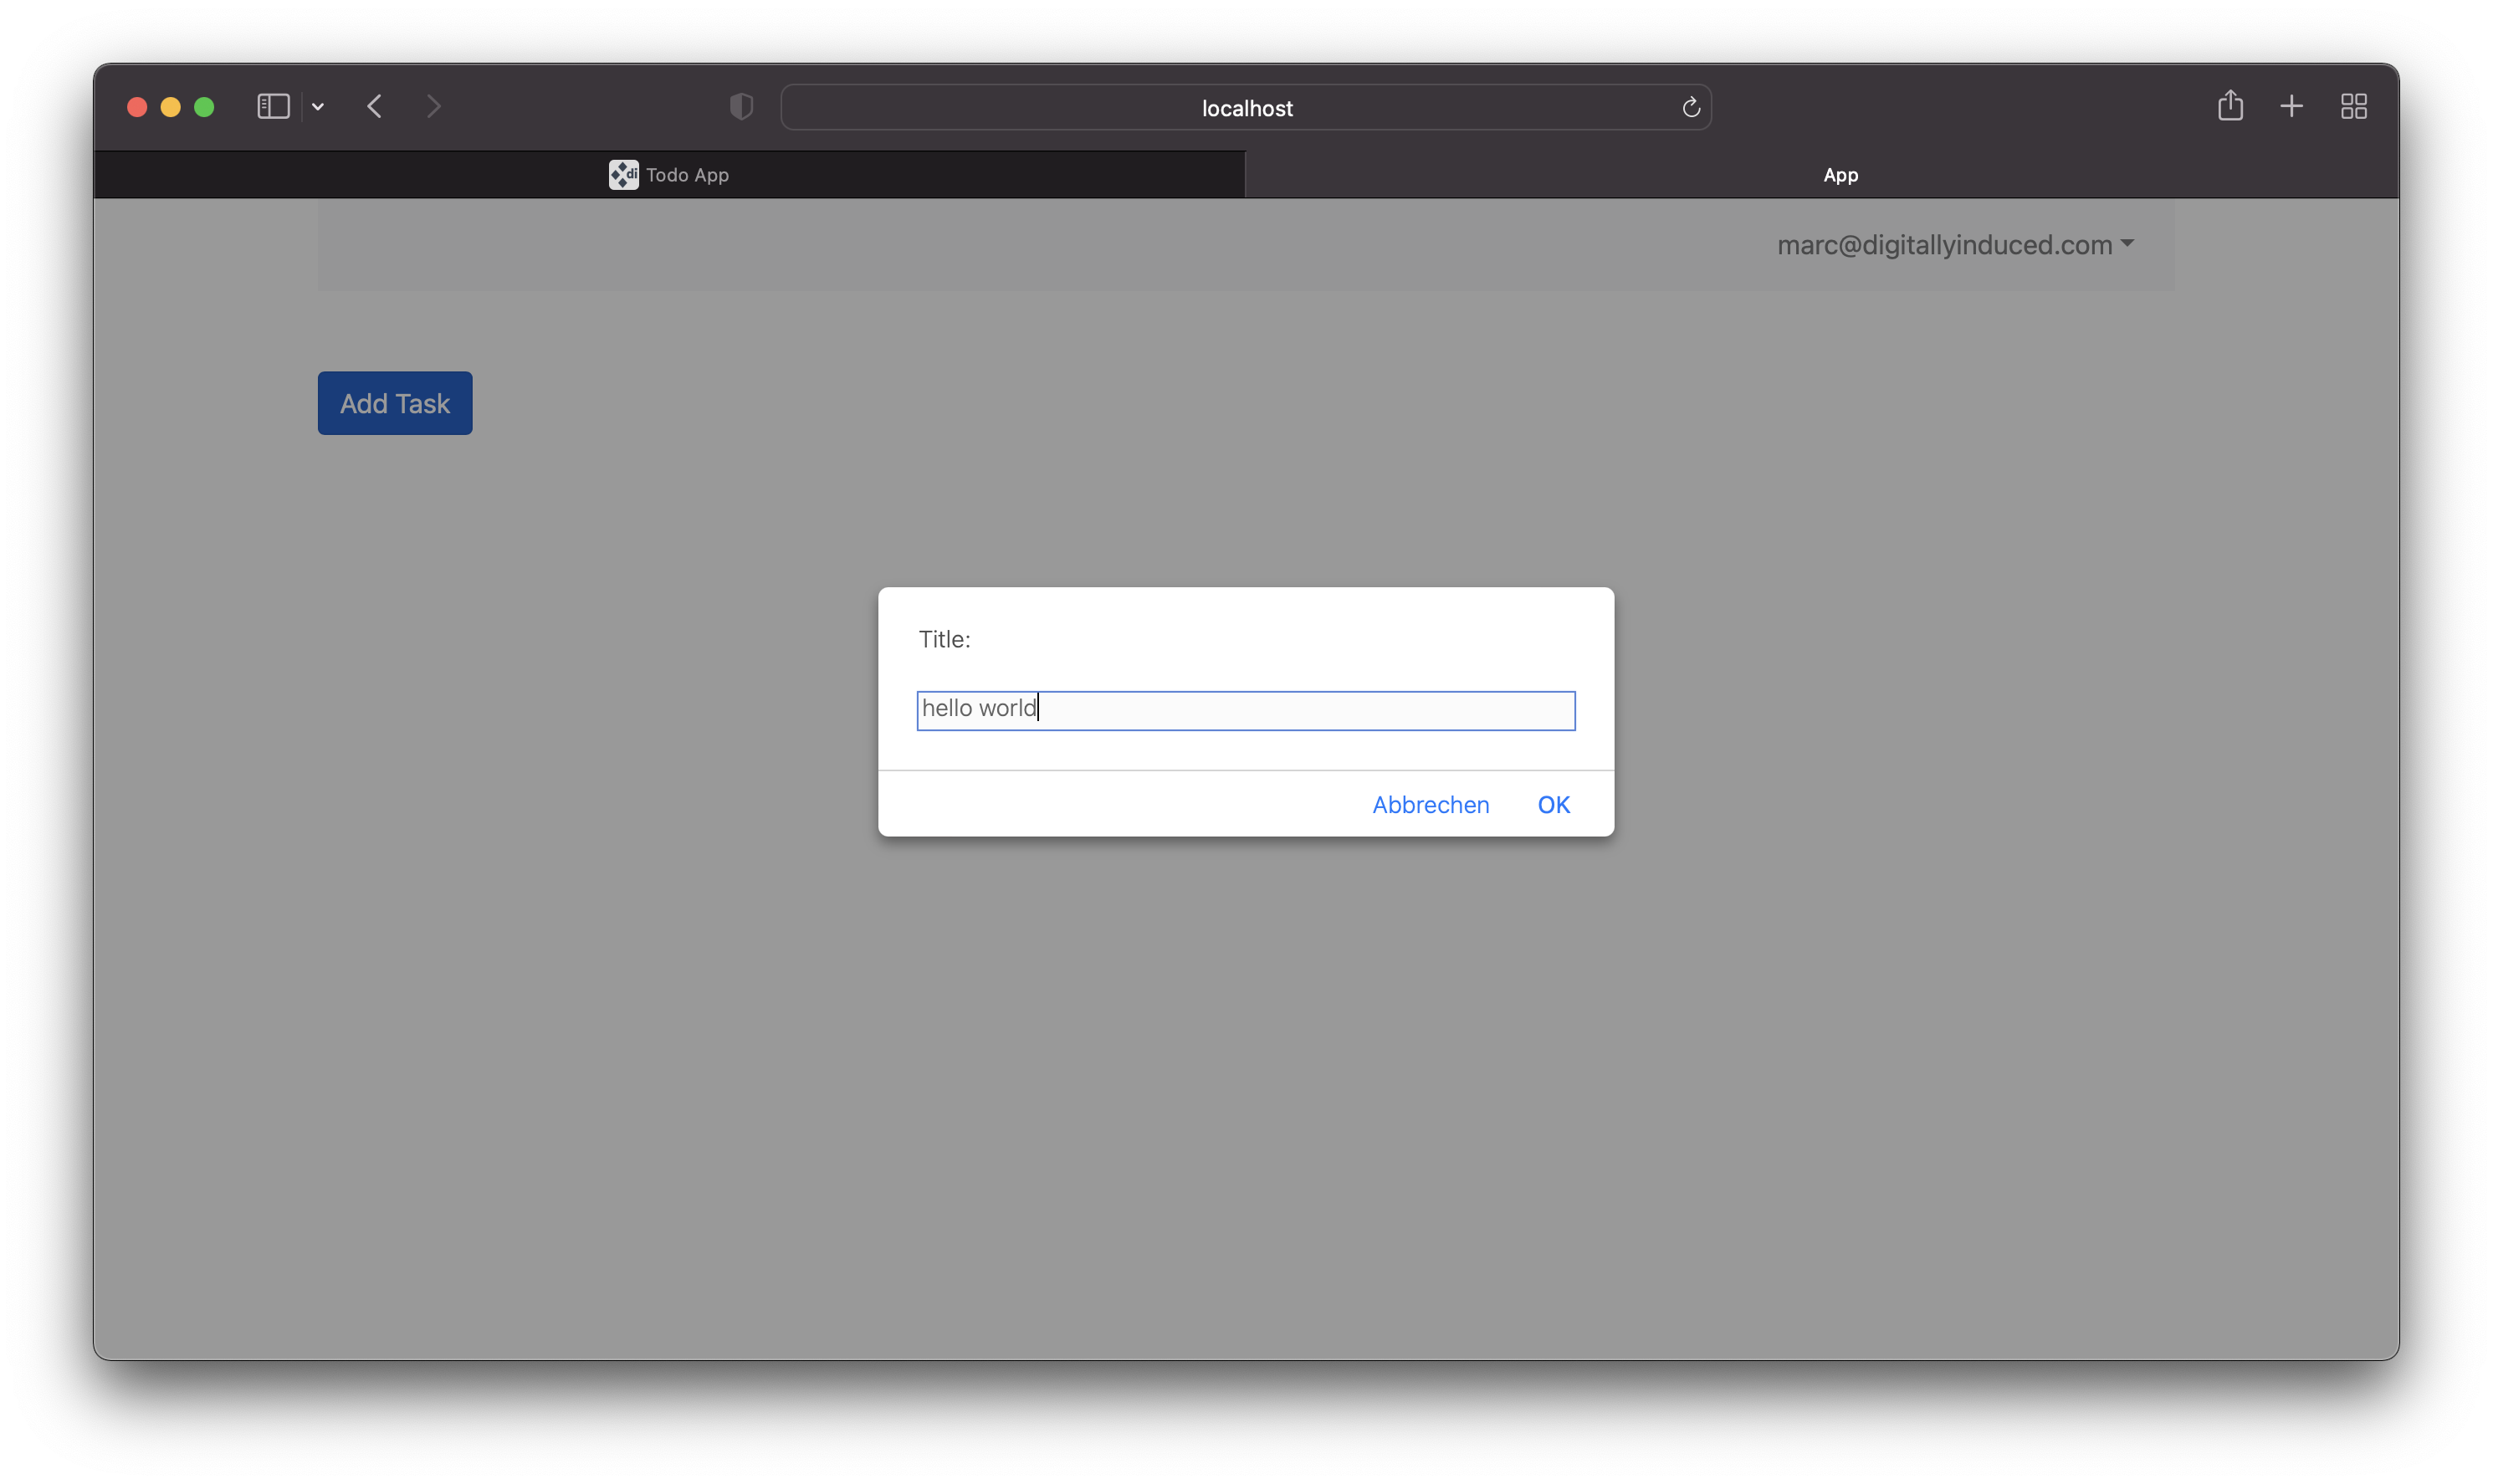
Now open the browser and click the Add Task button:
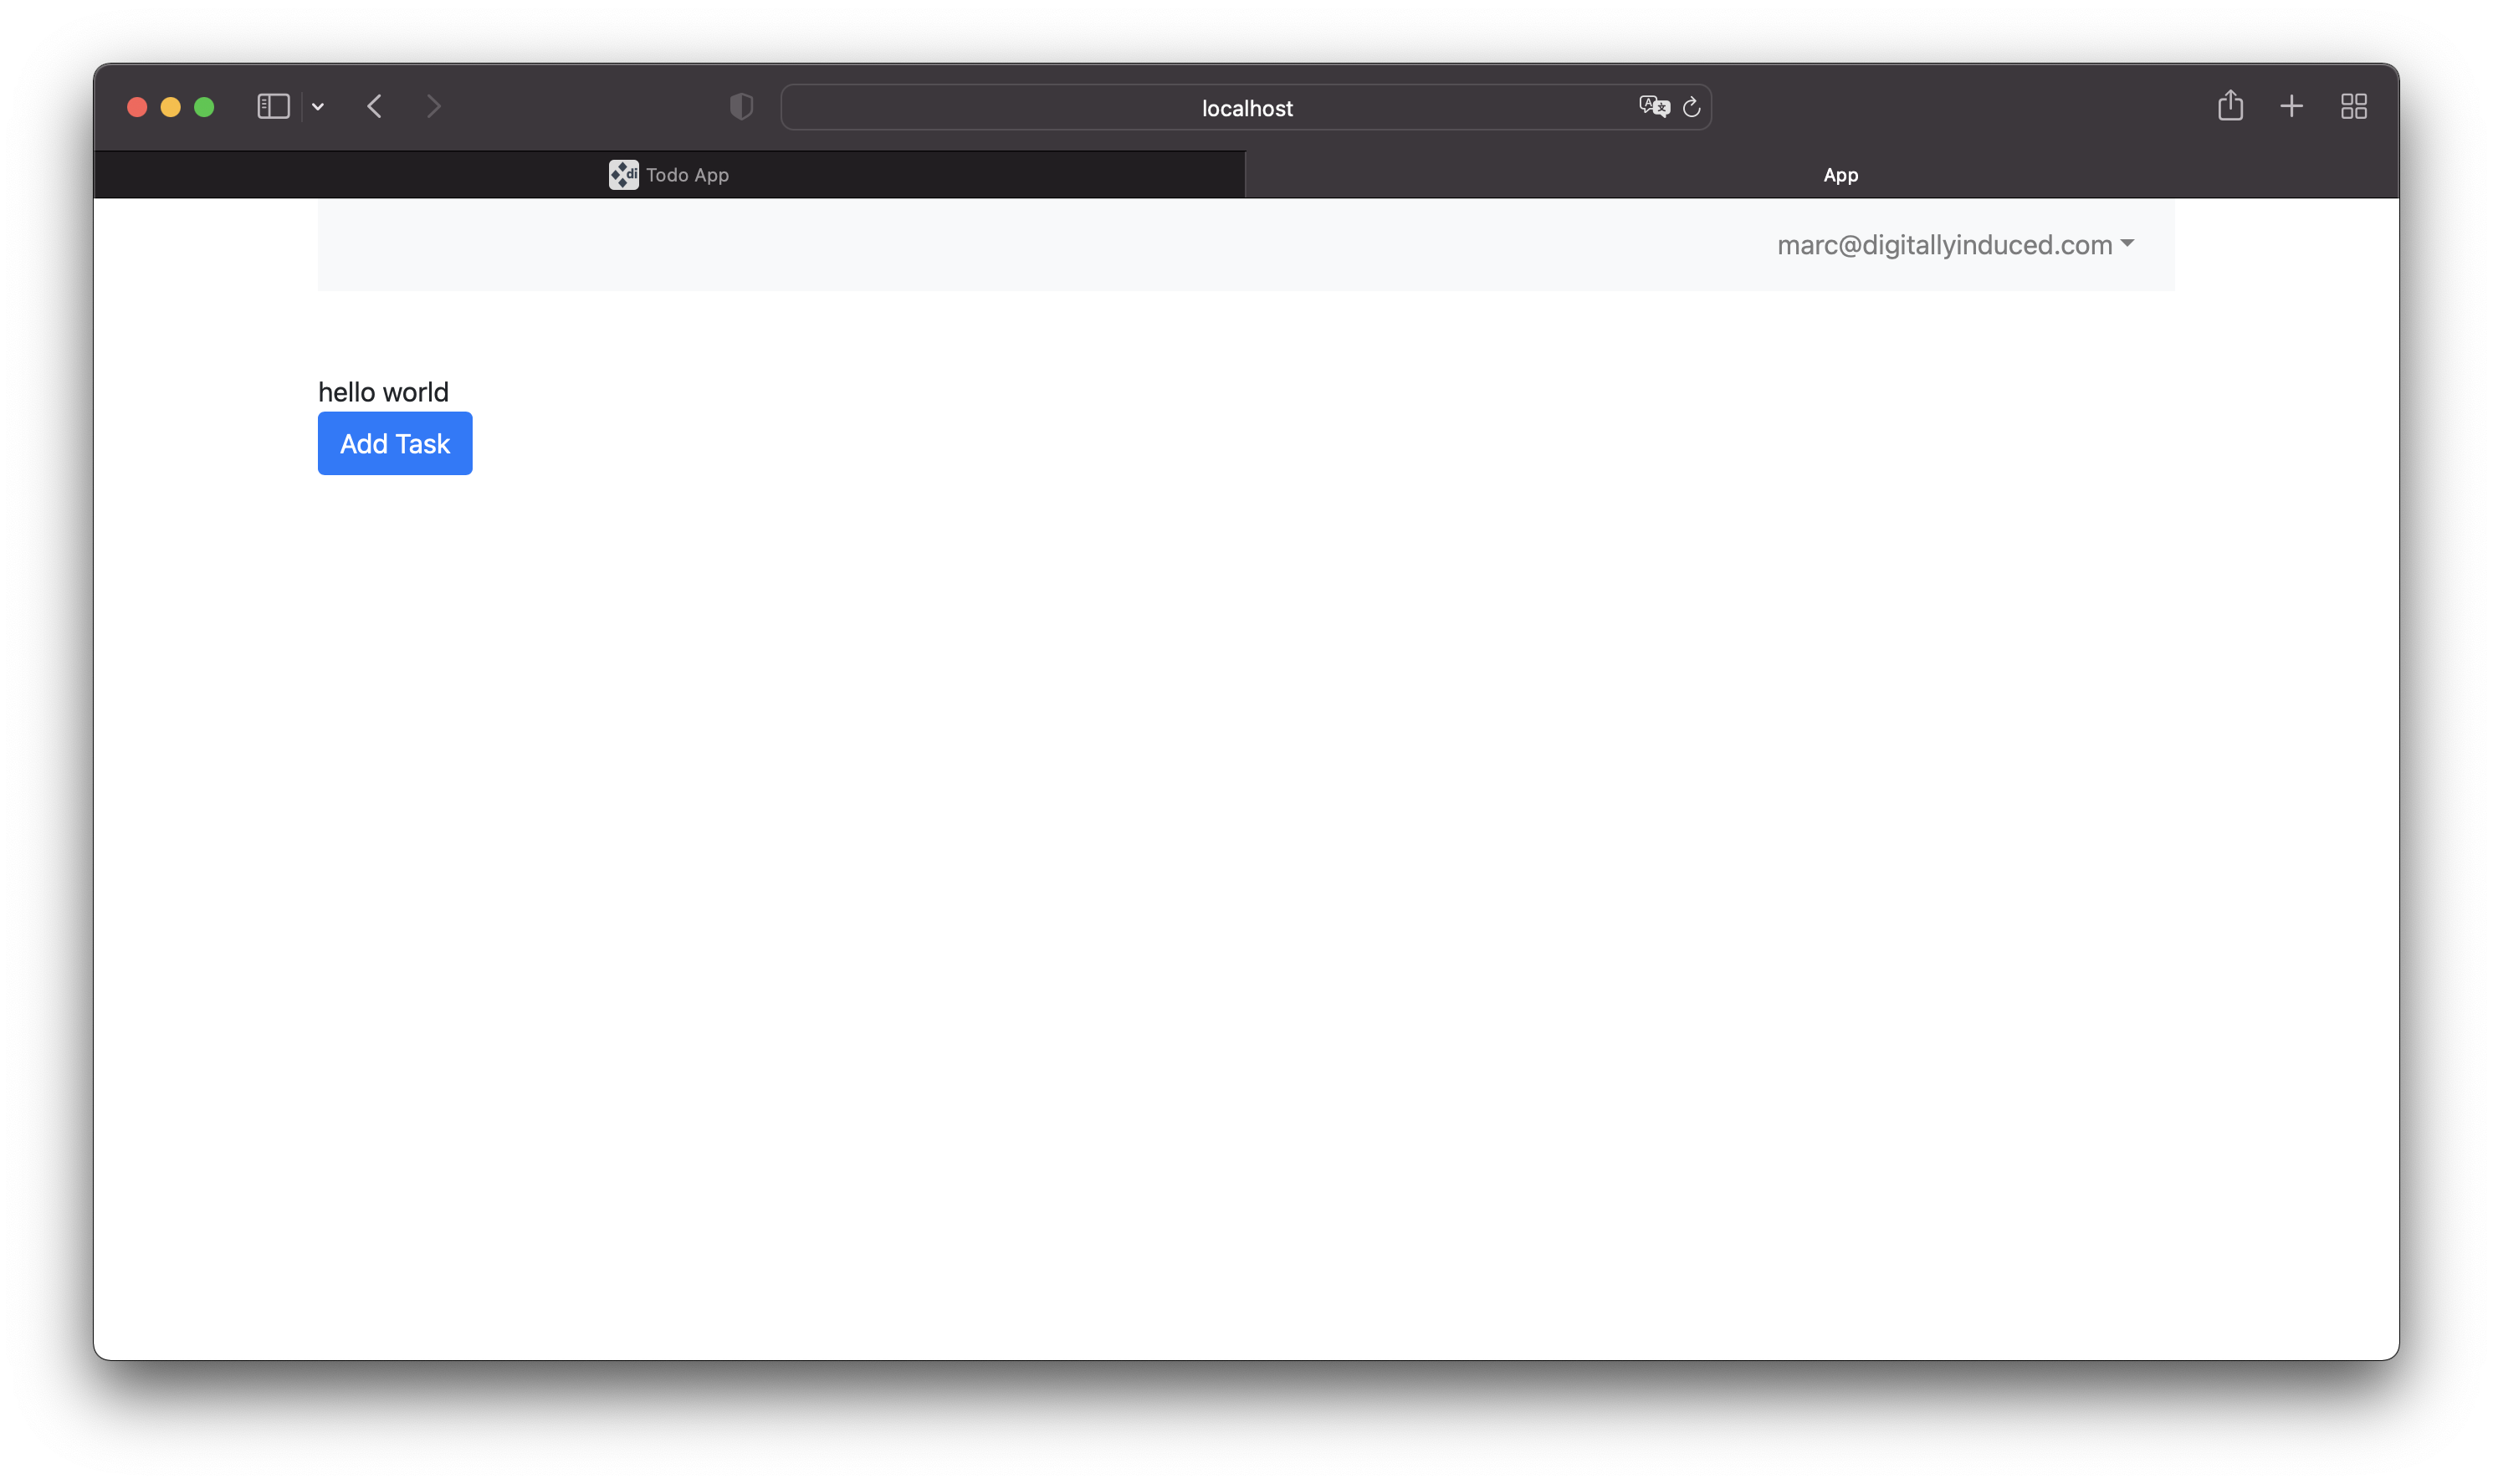
After you entered a title, the new task should instantly appear in the tasks list:
You might wonder: How is the
The Tasks component notified about new tasks?const tasks = useQuery(..) call we used to retrieve tasks sets up a subscription on the database and is automatically notified whenever the query result has changed.
Editing Tasks
Next we're going to make tasks editable. On double click on a task, we'll show a prompt to enter a new title:
Change the
Taskcomponent to look like this:function Task({ task }: TaskProps) { function edit() { updateRecord('tasks', task.id, { title: window.prompt('New title', task.title) || task.title }); } return <div onDoubleClick={edit}>{task.title}</div> }This will call Thin Backend's
updateRecord('someTable', someId, somePatch)function and update the title field to the newly entered value.
Double click on a task to and try to change the task's title.
Deleting Tasks
To complete our todo app, we'll add delete buttons to tasks, so that completed tasks can be removed again.
Inside
app.tsxadd a componentDeleteTaskButtonlike this:function DeleteTaskButton({ task }: TaskProps) { function handleClick() { deleteRecord('tasks', task.id); } return <button onClick={handleClick} className="btn ml-5 p-0 btn-link text-danger" >×</button> }We're using Thin Backend's
deleteRecord()function here to delete the task when the delete button is clicked.Let's render the delete button right next to the task itself inside the
Taskcomponent:function Task({ task }: TaskProps) { function edit() { updateRecord('tasks', task.id, { title: window.prompt('New title', task.title) || task.title }); } return <div onDoubleClick={edit}> {task.title} {/* ADD THE LINE BELOW */} <DeleteTaskButton task={task}/> </div> }
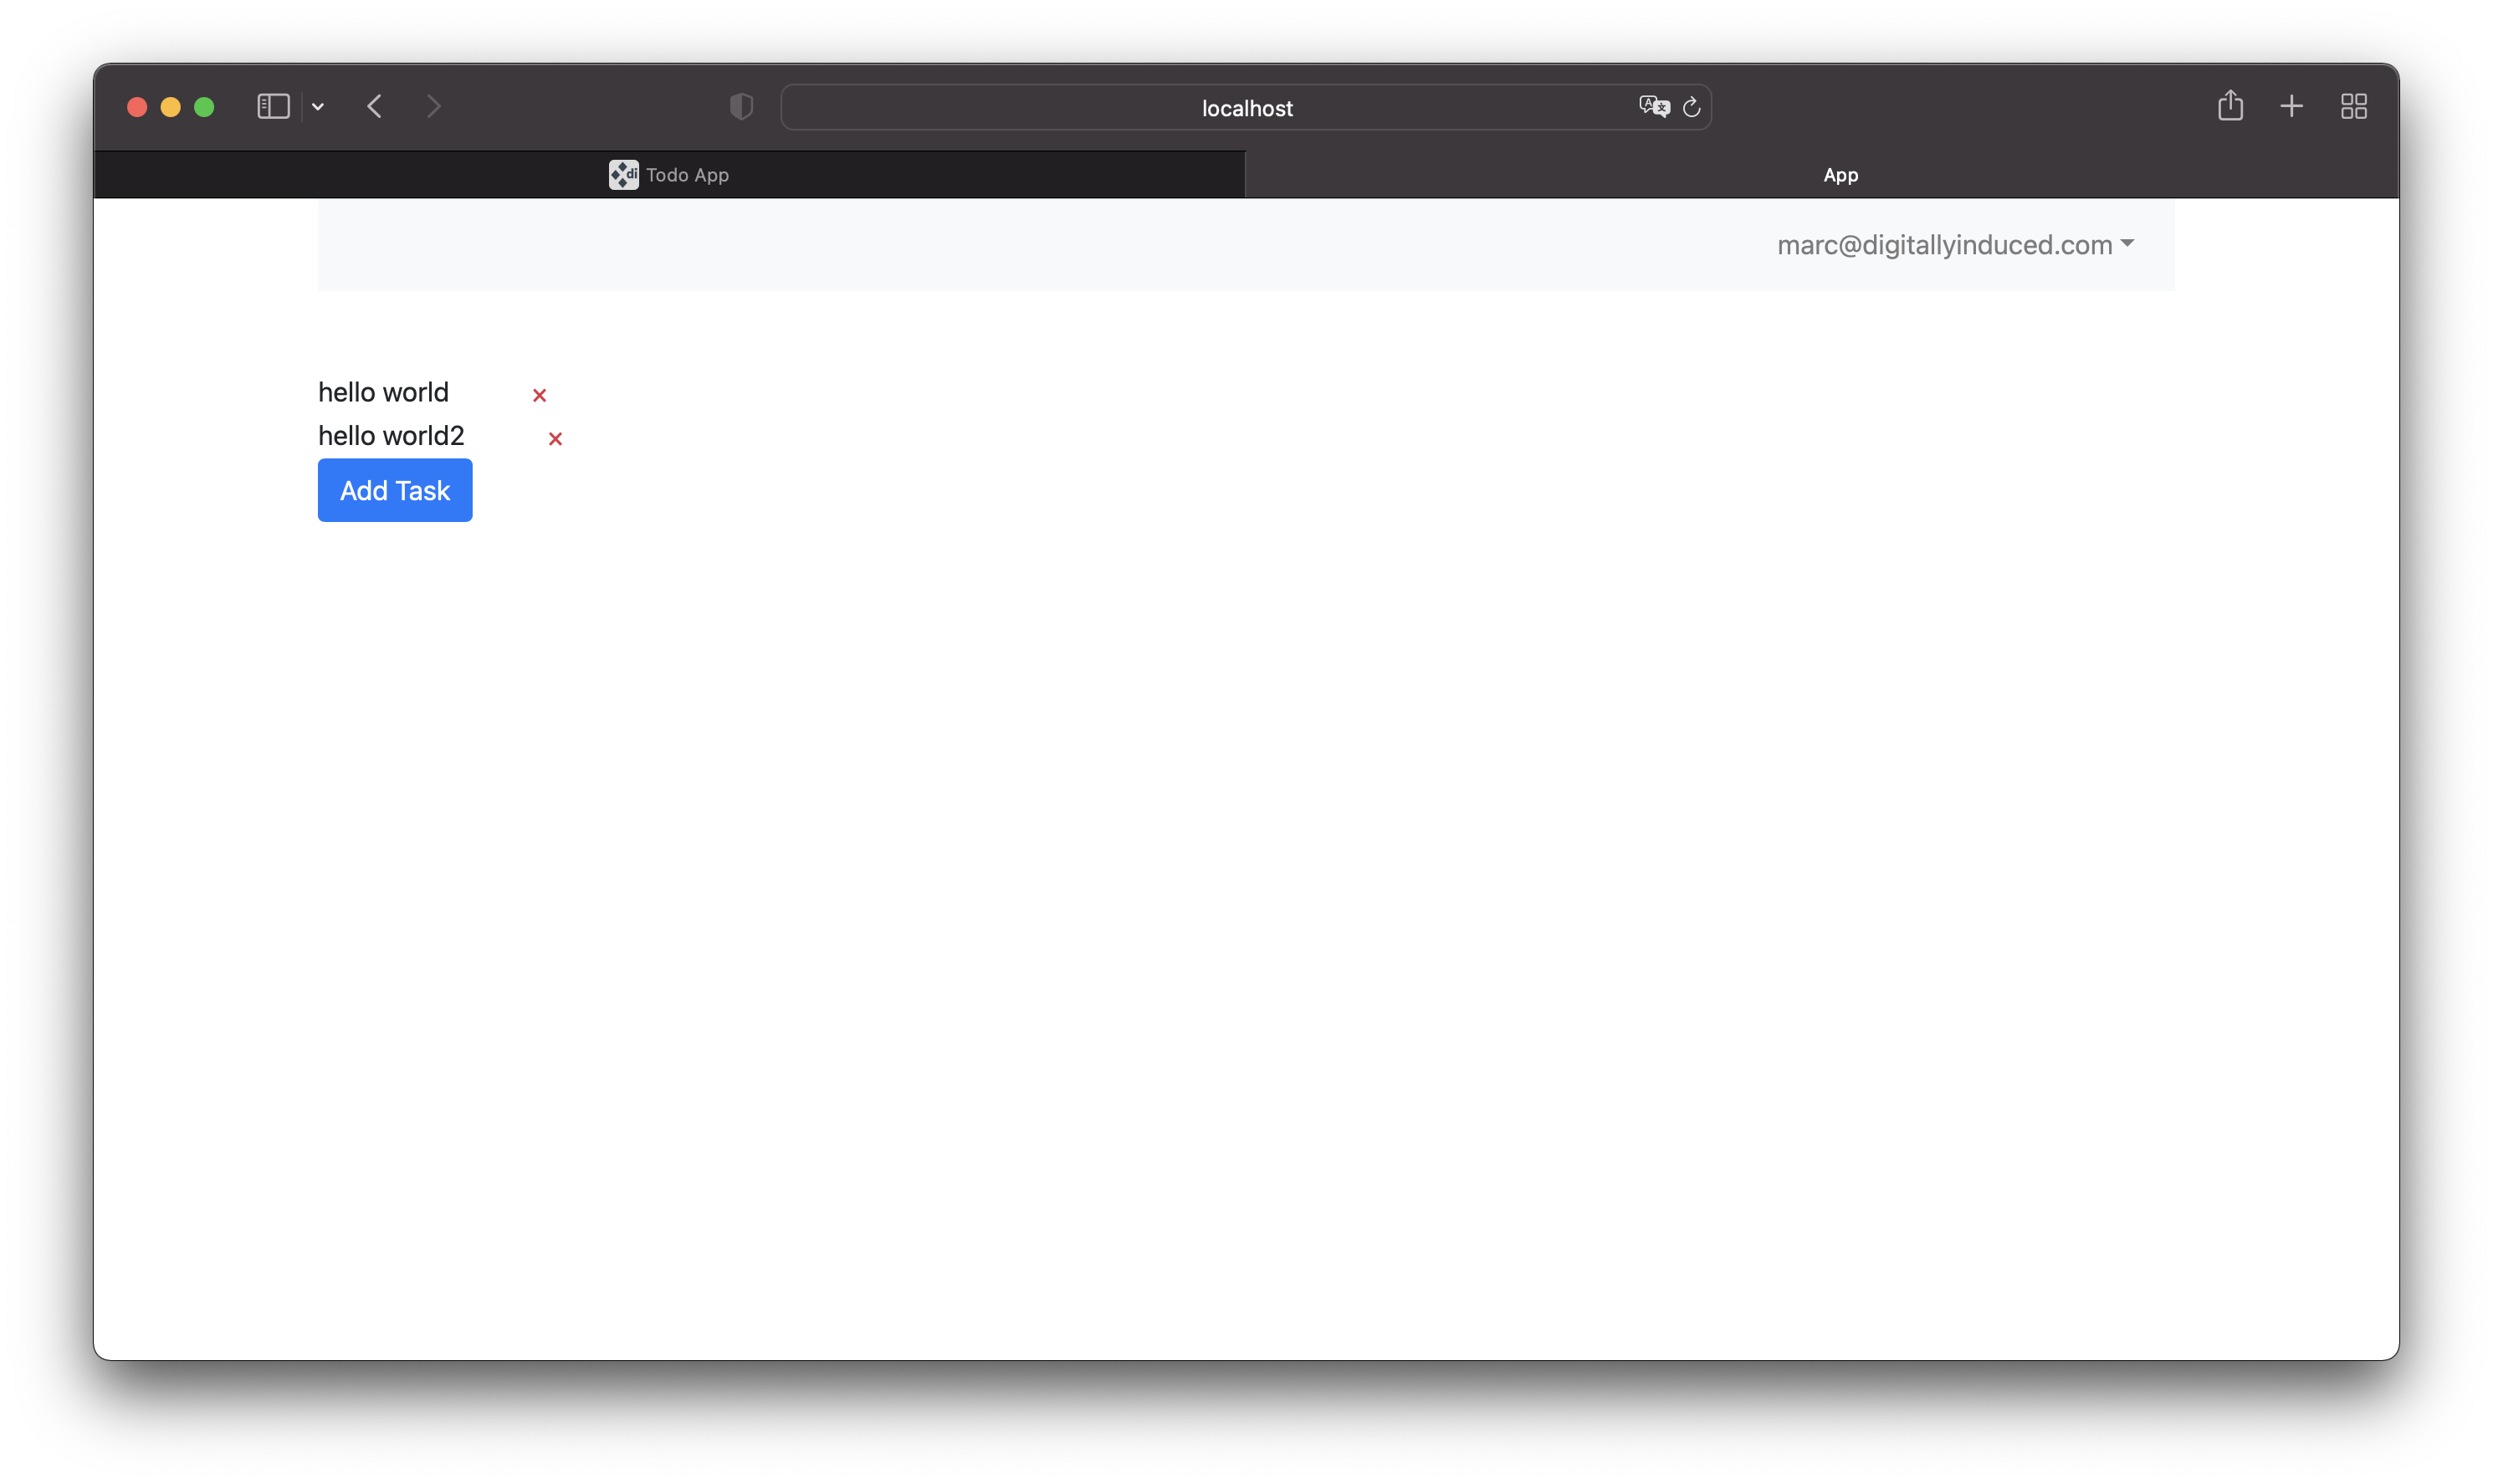
The result should look like this now:
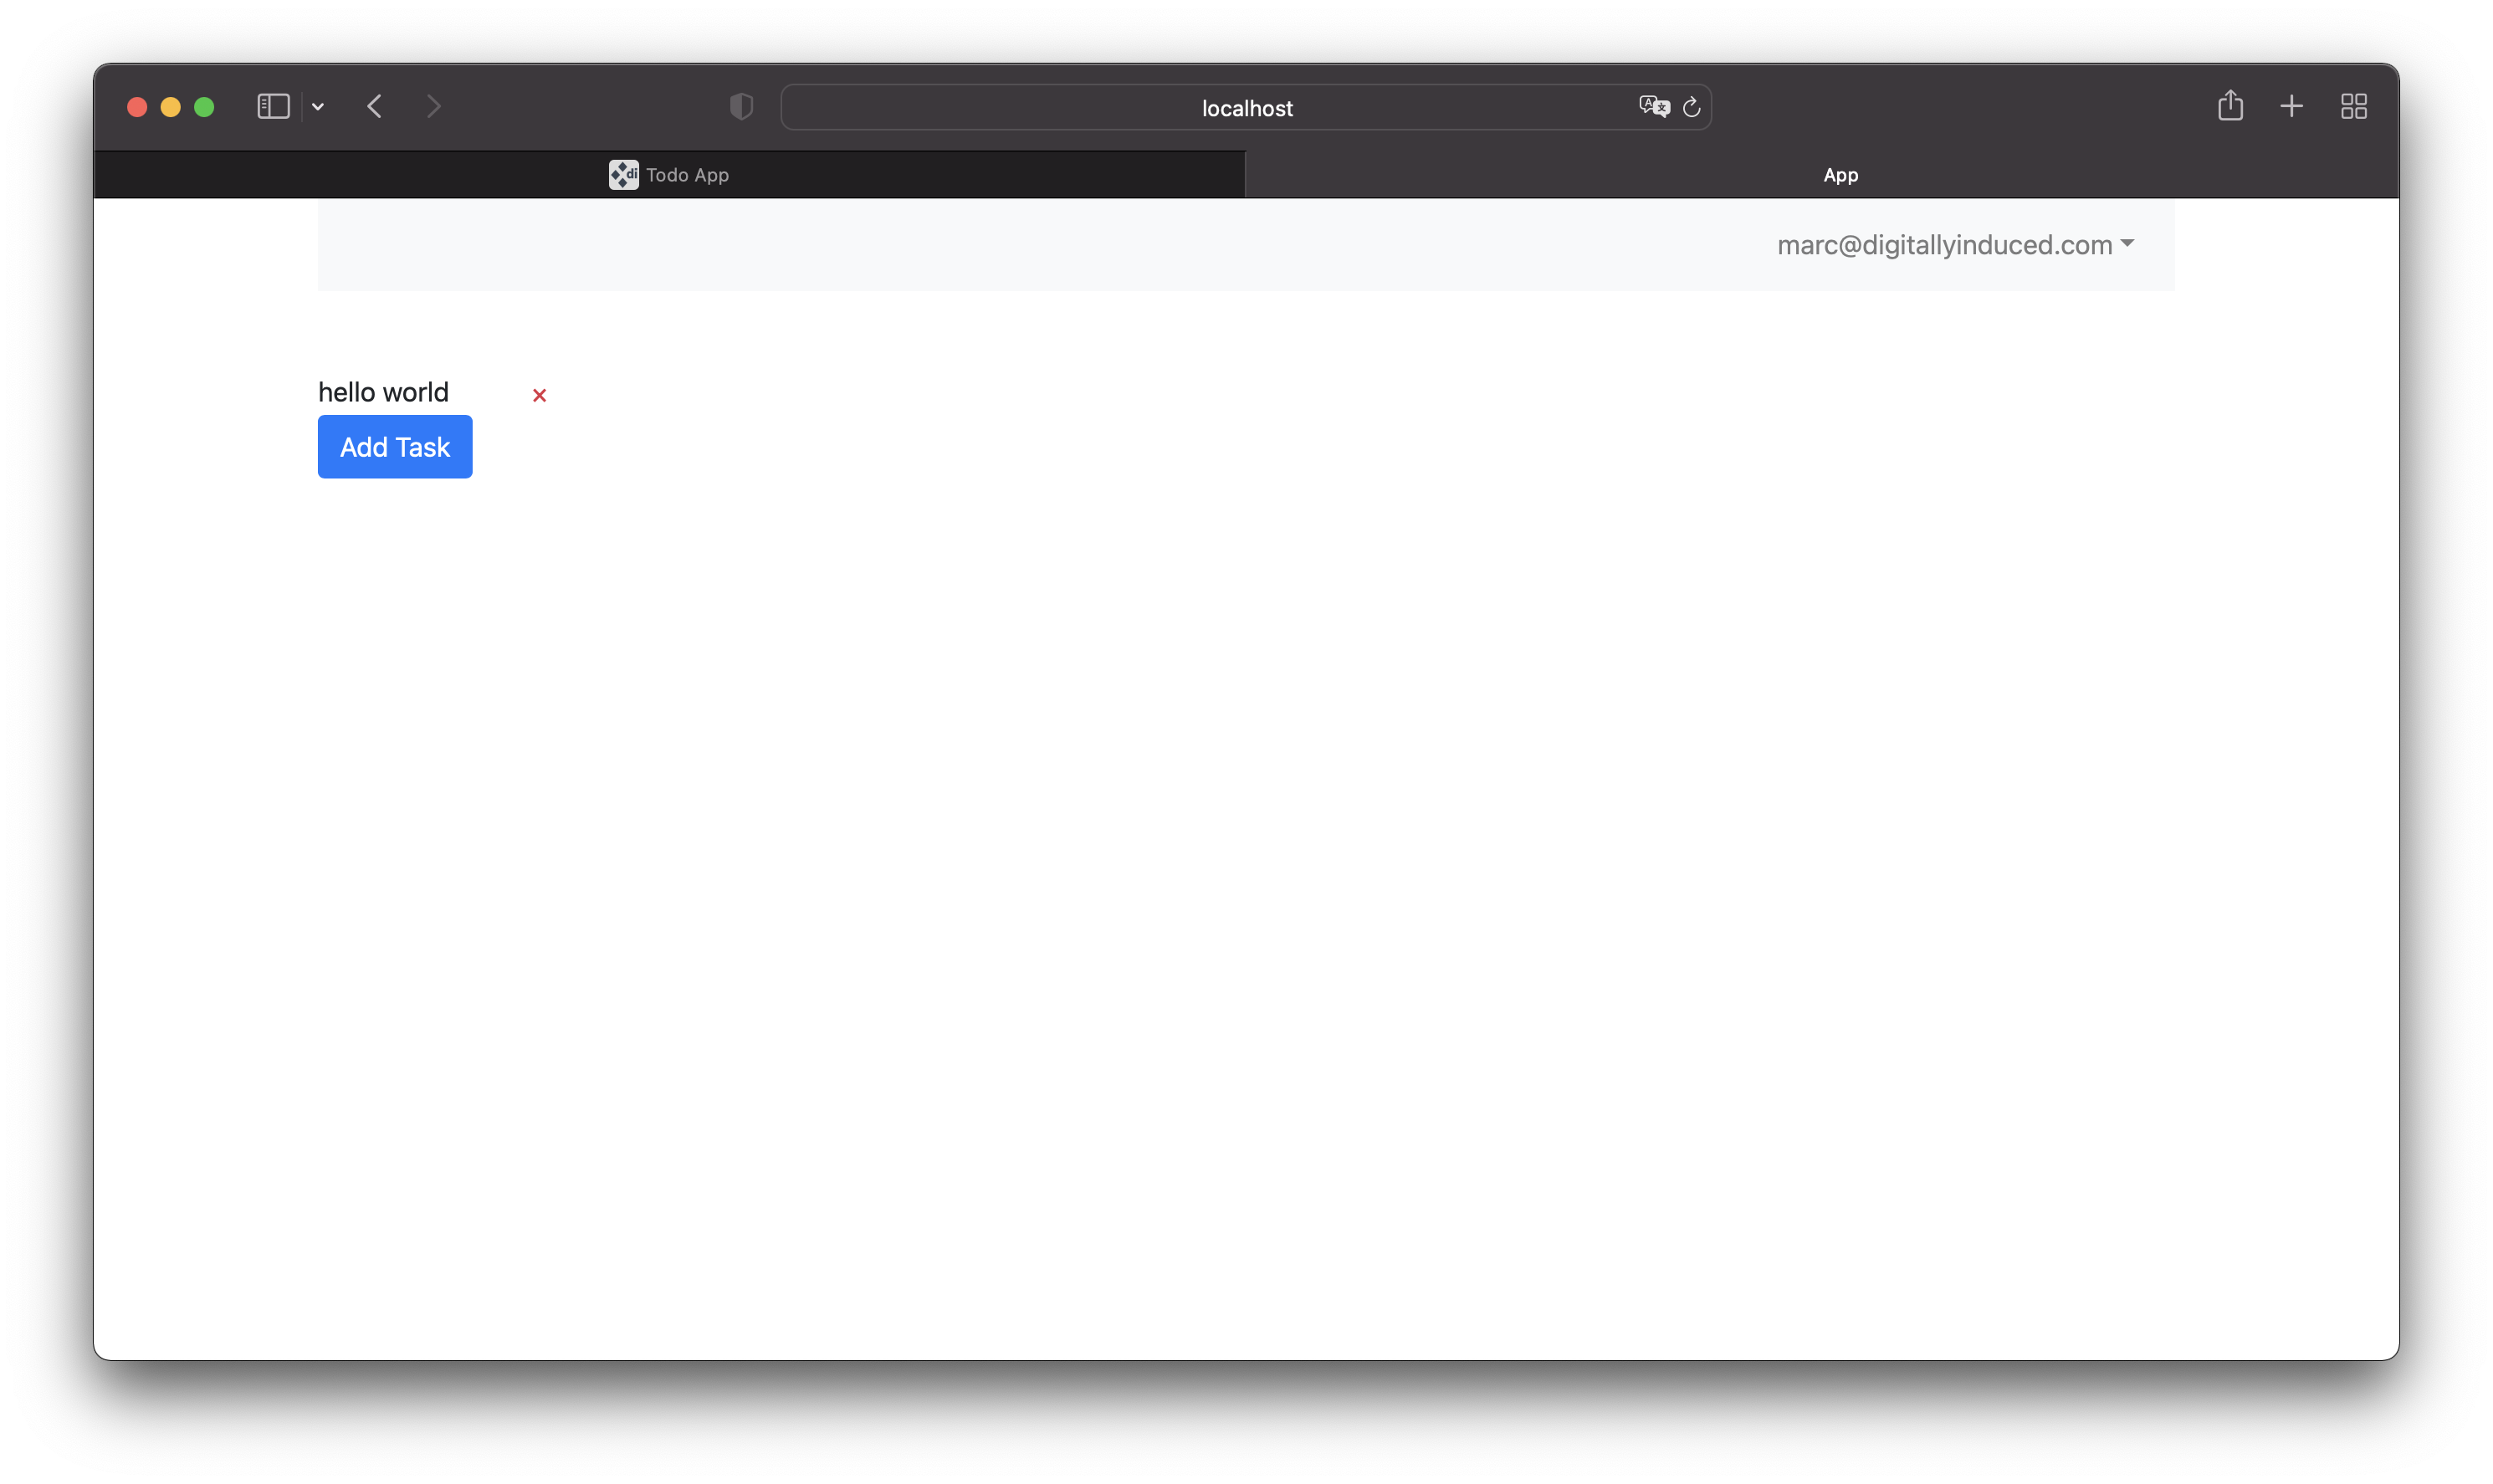
Click the delete button and tasks will instantly disappear:
8. Summary
You've now implemented the basics of todo management. Congrats!
Along the way you've learned the basic operations of Thin Backend:
Fetching data with
useQueryand the query builder:const tasks = useQuery(query('tasks').orderBy('createdAt'))Inserting into a database table:
createRecord('some_table', someRecord)Patching a database record:
updateRecord('some_table', someRecordId somePatchObject)Deleting a database record:
deleteRecord('some_table', someRecordId)
You now understand enough of Thin Backend to be dangerous. The best way to continue your journey is to start building things. Take a look at the other Guides to learn more about all the functionality provided by Thin Backend.
Check out the Database Guide for a full list of all database operations you can do with Thin.
Community
If you need any help or input, feel free to ask in the Thin Community Forum.